The Redirects module is an important tool to use when URLs are changed or updated. URLs can change for many reasons. For example, product URLs are generally composed of the product name, which can have benefits for SEO. However, if the product name changes, so might the URL, which means that the old URL needs to be redirected to the new one.
To add redirects to your web store, go to System > Redirects.
Enable the redirects feature by switching the option on and clicking update.
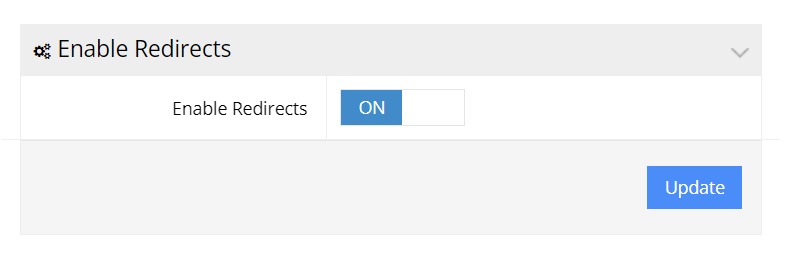
Enable Redirects option
Note: all of the supplied paths must not include a domain. If your full URL is www.site.com/category/product you would use the /category/product portion.
Add one redirect with the Add Redirects section
In the From field, enter a path that used to exist, but is not longer working.
In the To field, enter the URL that you would to direct to.
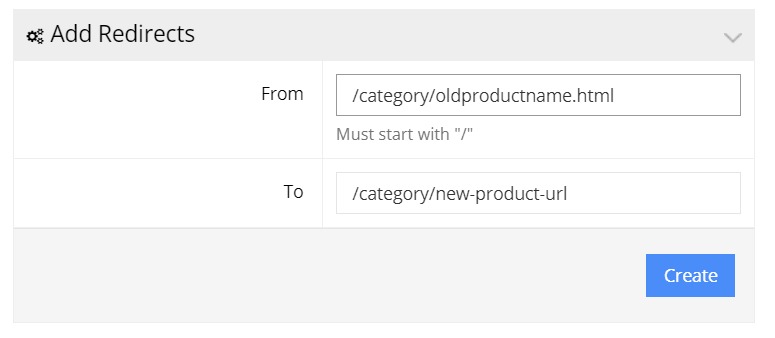
Add Redirects section
Example:
Add many redirects at a time
To start, go to System > Redirects
Export a spreadsheet by clicking the Export 301 Redirects button.
This file gives you the format to supply the URLs, as well as any existing redirects. Open this file in Excel.
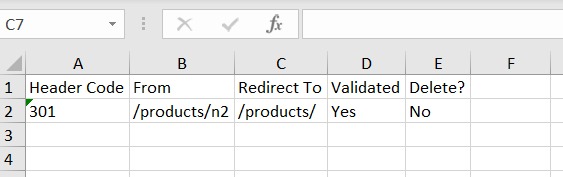
Column A Header Code has two valid options:
- 301
- 302
301 indicates a permanent redirect, whereas 302 indicates a temporary redirect. If you’re not sure, use 301.
Column B From is a path that used to exist, but is not longer working. You must not supply a domain (www.site.com) — only the path (/category.html)
Column C Redirect To is the target URL. This is where you want the user to be directed to. This URL must be available to the public; It cannot be a hidden product, category, or page only available when a user logs in.
Excel spreadsheet with redirects
Columns D & E are not used for adding a new redirect. Leave them blank.
To apply your changes to the site save the Excel file and upload it to the site by using the Imports Redirects section.
To upload click the Select File button, and find your saved Excel file. Finish by clicking the Import button.
Check your Redirects
To check that your redirect will work, you can click the Check Validated Redirects button.
This will check every URL you have setup. If the redirect works properly, then the Validated column on the Redirects page (or the spreadsheet) will show Yes.
If you do not see Yes, this means your To path is not valid. Try logging out, and check if the URL works.