In this guide, we’ll show you how to convert a B2B user to a B2C user.
Download the Excel Sheet
Go to Customers > Manage Customers, and search for the customer you wish to convert. Once located, click Tools > Export.
An Excel sheet with this customer’s data will begin to download.
Modify the Excel Sheet
Once the Excel sheet is downloaded, open it and make the following modifications:
- Customer Code (Column A) – You should change this to your default B2C customer. To locate your default system/B2C customer, go to System > Features > B2C (Public) > Pricing & Stock Settings > System Default Customer.
- User Group (Column F) – Change this to your B2C group. This is most likely Public Users (Registered Users/B2C).
- Warehouses (Columns G, AA, AB, and AC) – Delete any warehouse settings. Your default settings for B2C will apply under System > Features > B2C (Public) > Pricing & Stock Settings.
- B2b User? (true/false) (Column AG) – This should be false.
Once finished, save your Excel sheet. Your settings might look something like this:

Upload the Excel Sheet
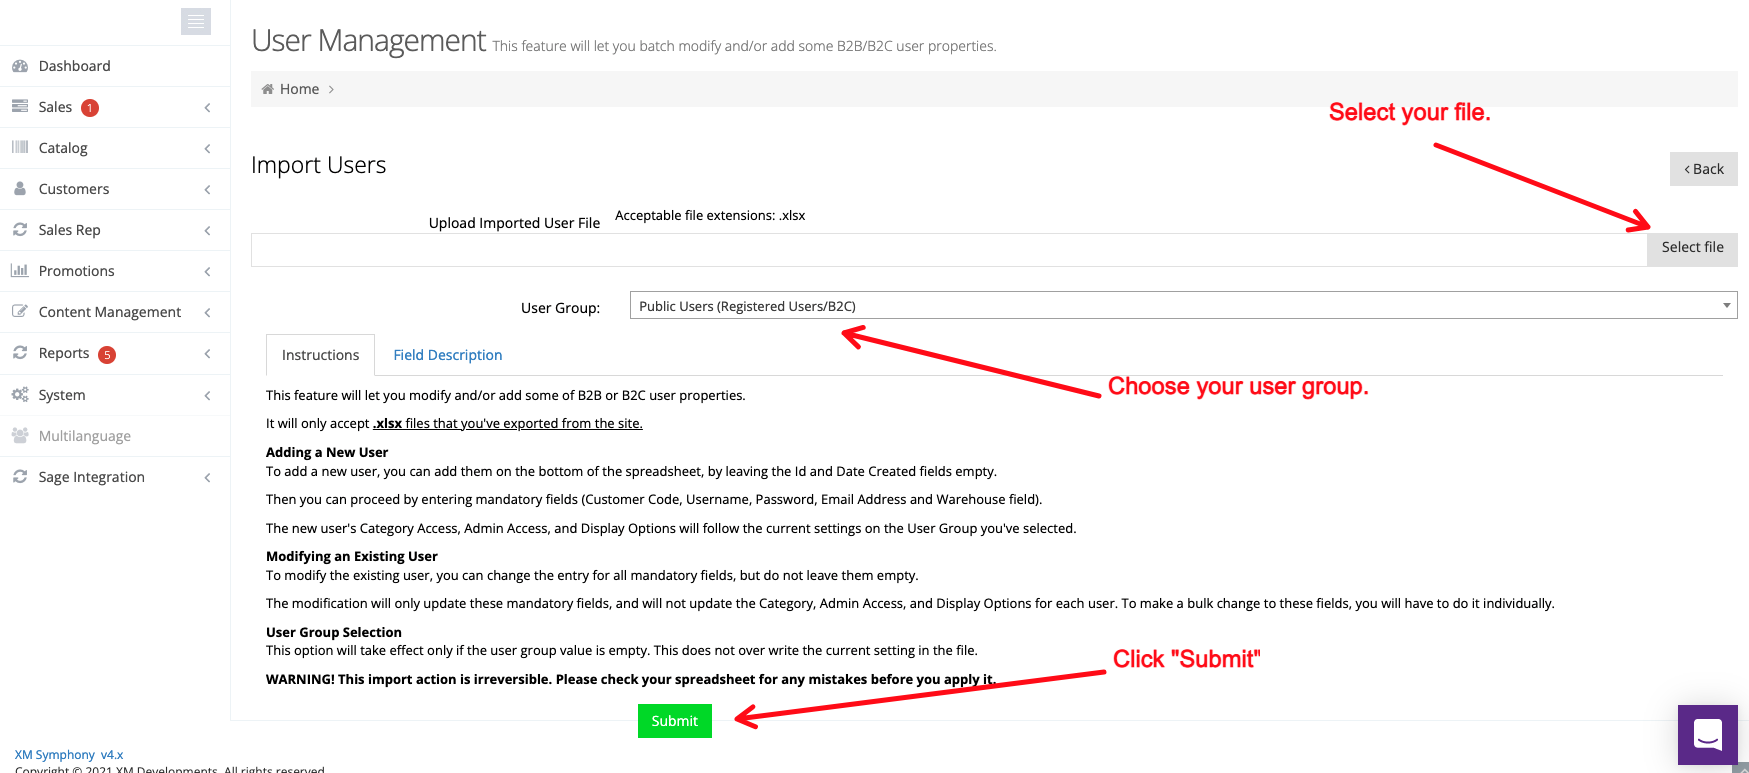
Return to Customers > Manage Customers, and click Tools > Import.

- First, select the Excel file that you saved above.
- Next, choose the correct B2C user group.
- Finally, click Submit.
Verify the Conversion
To verify that the web store user has been converted to B2C successfully, return to Customers > Manage Customers, and search for the web store user in question. The user should look something like this:

If it does, you should be set!

