Multilanguage allows you to translate your web store into several languages. If your company is global and needs to communicate with audiences that speak multiple languages, this is a must-use module.
Video Overview
[videopress 3bVIhhcp permalink=”false”]
Getting Started
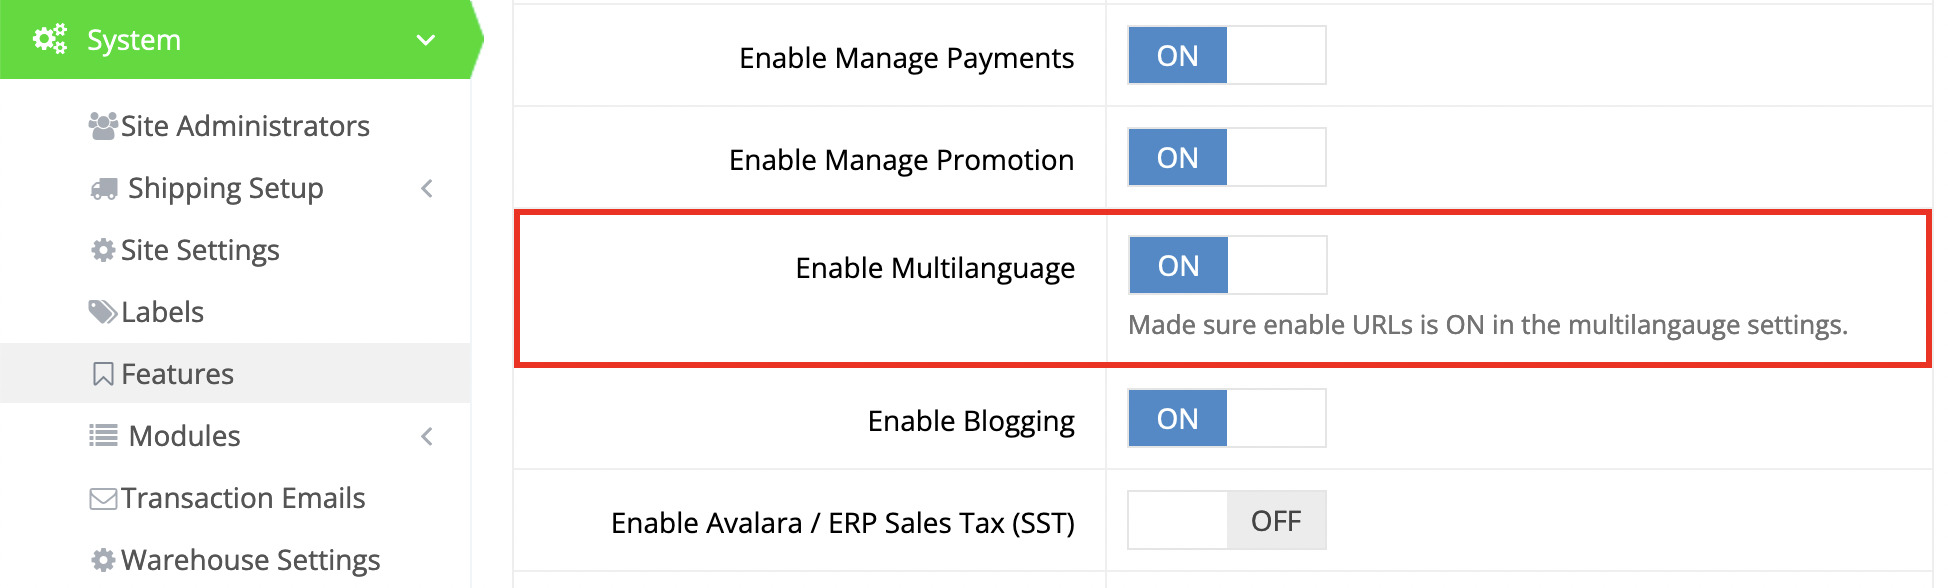
If you have not used Multilanguage on your web store, it is likely that it is not yet enabled. To enable it, go to System > Features and toggle on Enable Multilanguage.
Configure Multilanguage
Once enabled, in the main menu click Multilanguage > Settings.

There are several settings that need to be configured:
- Default Language – As the name suggests, this is the default language of your store.
- Enable URLs – This needs to be enabled so that the language switcher works. Additionally, it allows your content to be displayed in the language of preference, depending on the URL used.
- Type – The Select Box will be a standard select dropdown menu, whereas the Dropdown will be a slightly more stylized version, with country flags representing the languages, for example.
- Show on IPs (separated by ‘|’ – In the event that you wish to show the language dropdown on specific IP addresses, you can specify them here. If there is more than one, be sure to separate them by a vertical bar.
- Languages – Finally, and most importantly, be sure to activate the languages that you wish to use on your store.
Reindex
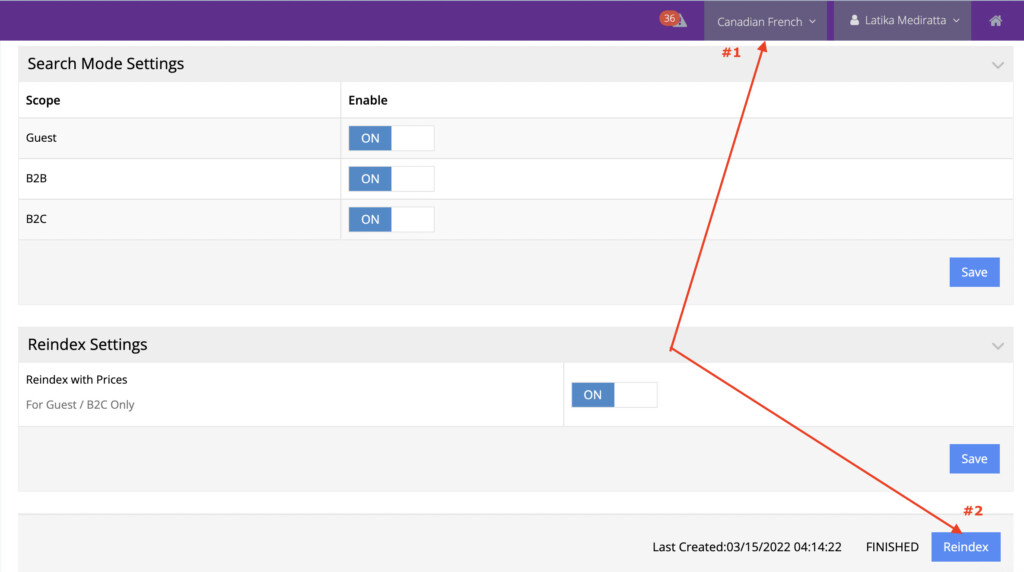
After configuring the settings, reindex your site for all the activated languages.
- Go to Catalog > Product Settings > Elasticsearch.
- Select language from the language switcher.
- Click Reindex
Repeat the above steps for all the languages.
Translating Content
To learn how to translate specific content, please watch the video, starting at the 4:56 mark.
[videopress 3bVIhhcp at=”296″ permalink=”false”]
Things to Note
- Category names can be changed, but you can’t hide or delete categories in one language while still having them show in another.
- If you delete content in the new language site, (French in this example), those sections will still show on the default language page (English in this example).
- Some areas of the site can only be changed by exporting a file under Multilanguage > Import/Export, making changes, and importing. The newsletter module is an example of an area that can only have its language changed through this process.
- It may be necessary to enable the Switch Language widget in the Header Multi Module, which is generally found in your default Header page under Content Management > Default Pages.