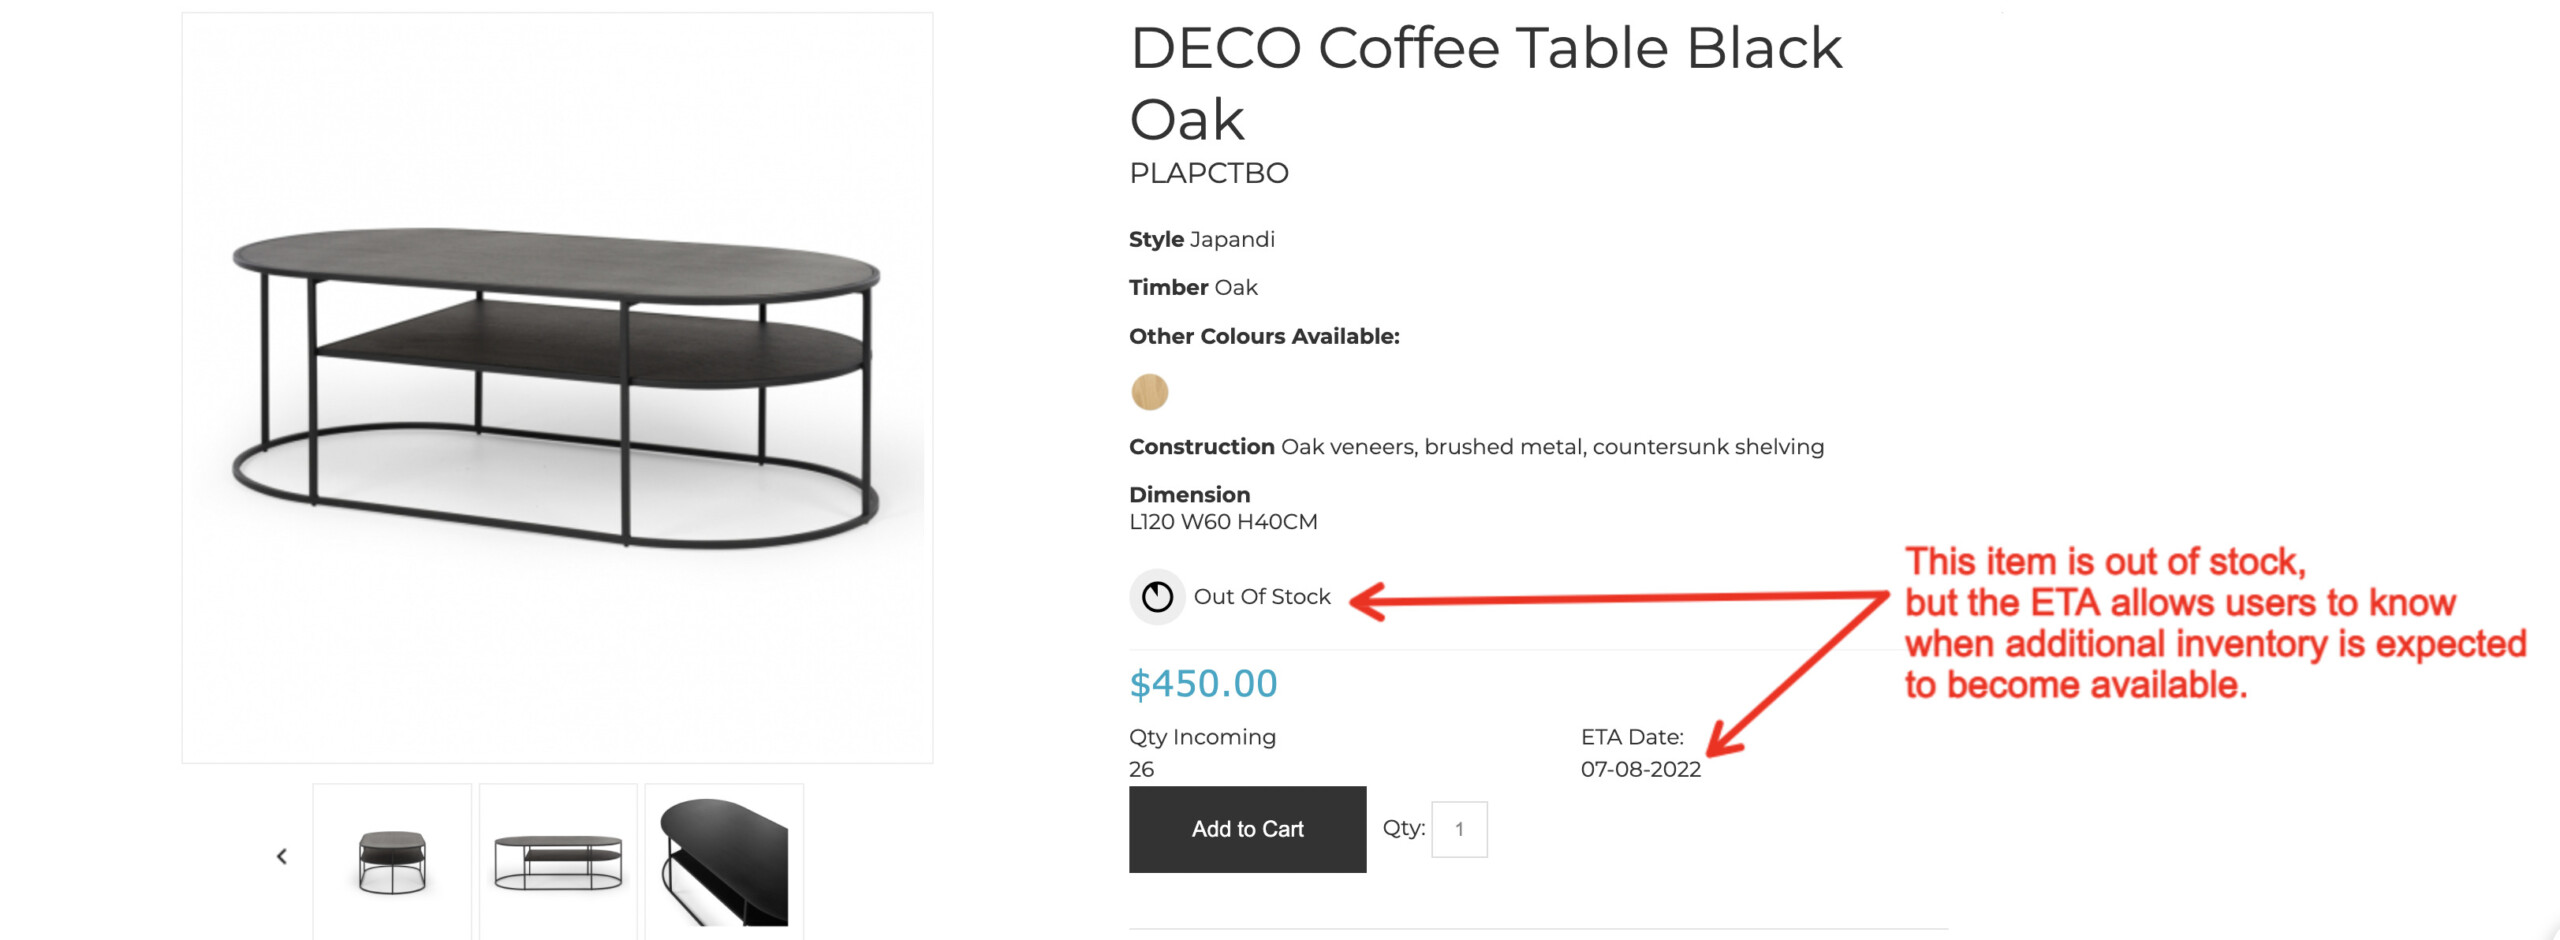
Purchase orders and the estimated time of delivery for the products on order can be displayed in the web store. This is useful for communicating when additional stock will be available for certain items, especially items on back order.
Displaying Purchase Order Information
User Group Settings
For B2B users — including Site Administrators — the user group must have permission to view purchase orders. To enable this setting for Site Administrators, go to System > Site Administrators.
Next, click the Edit Admin Group button.
After that, go to Display Options and click the arrow button to the right to show the settings.
Finally, toggle on Display Purchase Orders and Apply your changes.

Product Detail Page Settings
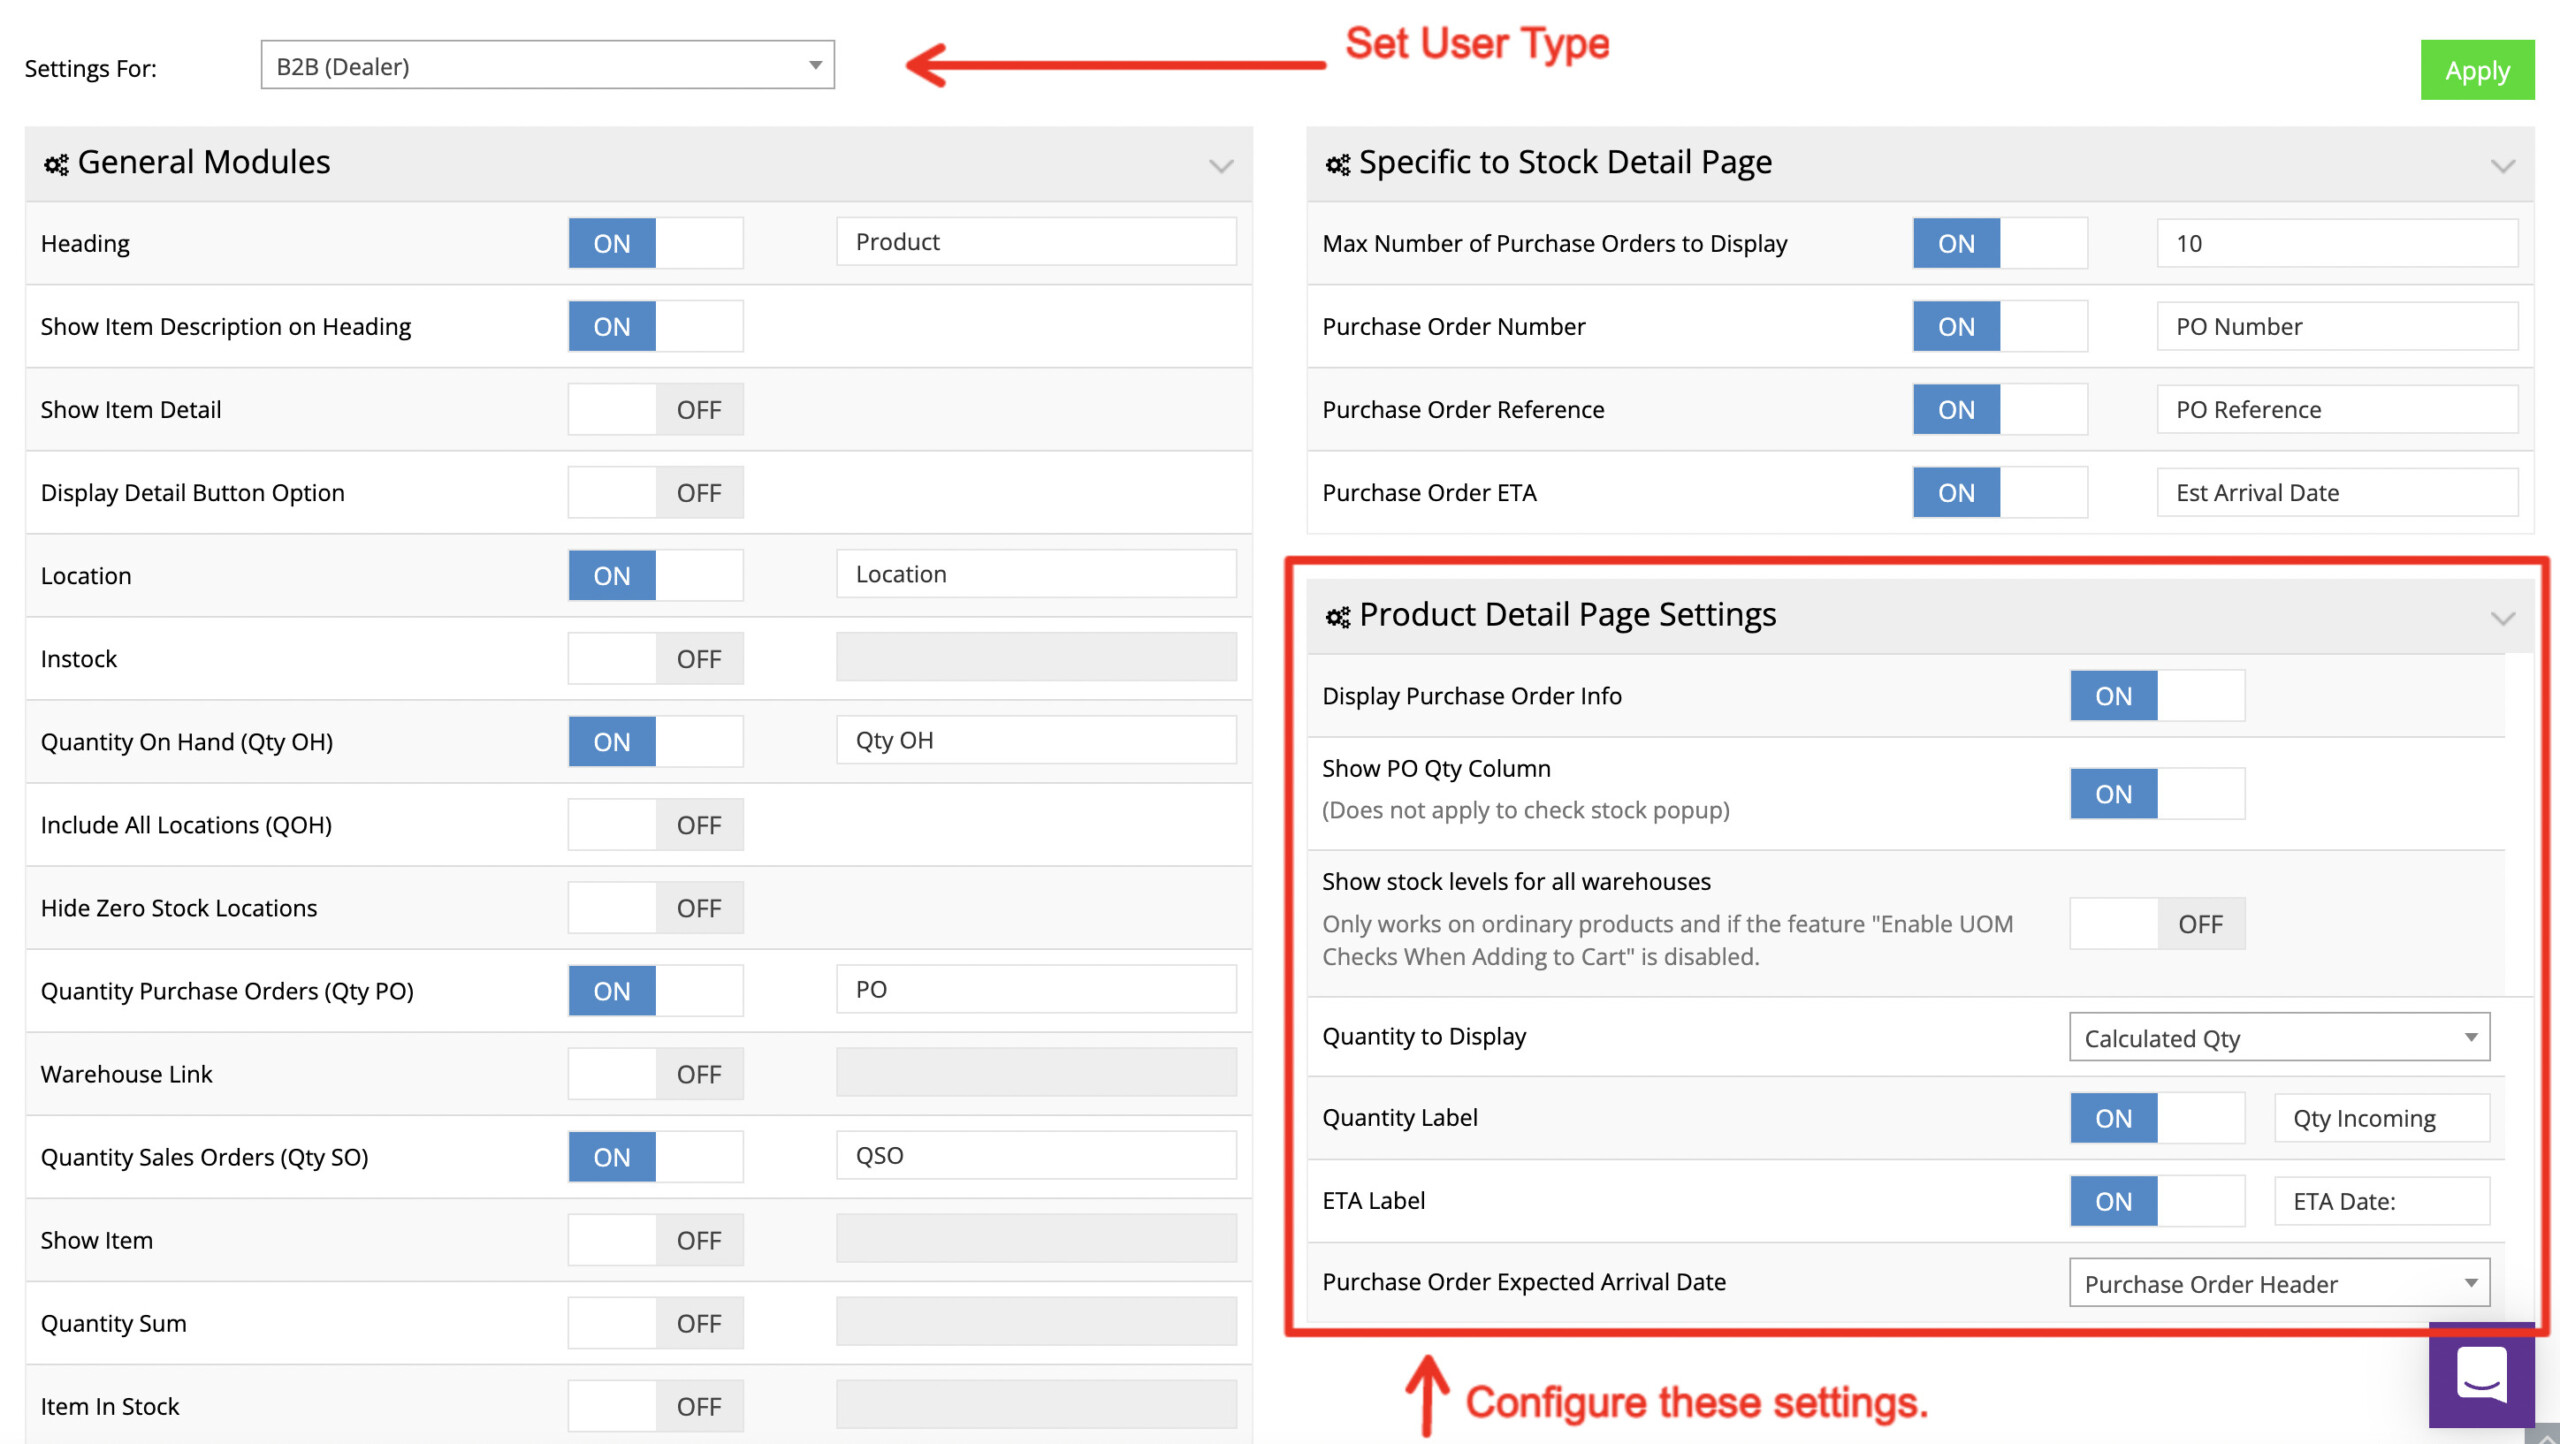
To display purchase order information on your product pages, one first needs to go to System > Modules > Stock Levels. Then, choose the user type — either B2B (Dealer) or B2C (Public) — for which you’d like to show the purchase order information.

Once you have chosen the user type, then you will need to configure the settings under Product Detail Page Settings:
- Display Purchase Order Info – This setting activates the display of the purchase order information on the product detail pages.
- Show PO Qty Column – This displays the expected quantity for each purchase order listed.
- Quantity to Display – The Calculated Qty option will subtract sales orders (on back order) from purchase orders, whereas the Ordered Qty will show just the quantity on order in the Purchase Order.
- Quantity Label – This is the label for the quantity amount. In this case, “Qty Incoming” has been set, which is reflected on the first screenshot (of the product details) in this article.
- ETA Label – This is the label for the Estimated Time of Arrival (ETA). In this case, “ETA Date:” has been set, which is reflected on the first screenshot (of the product details) in this article.
- Purchase Order Expected Arrival Date – The web store can pull the ETAs from the Purchase Order Header or the Purchase Order Details (from the PO lines). In other words, in some cases, there’s one ETA on the Purchase Order header, but there are multiple different ETAs for items within that Purchase Order.
Enable Purchase Order List on Product Grid
Once you have configured the settings in Product Detail Page Settings, you will need to enable the Stock PO List setting in your product grid.
This guidance assumes that your web store has the Product Grid and Elasticsearch for Product Details enabled. If you’re not sure if these settings are enabled, please contact us, and we’ll be happy to help!
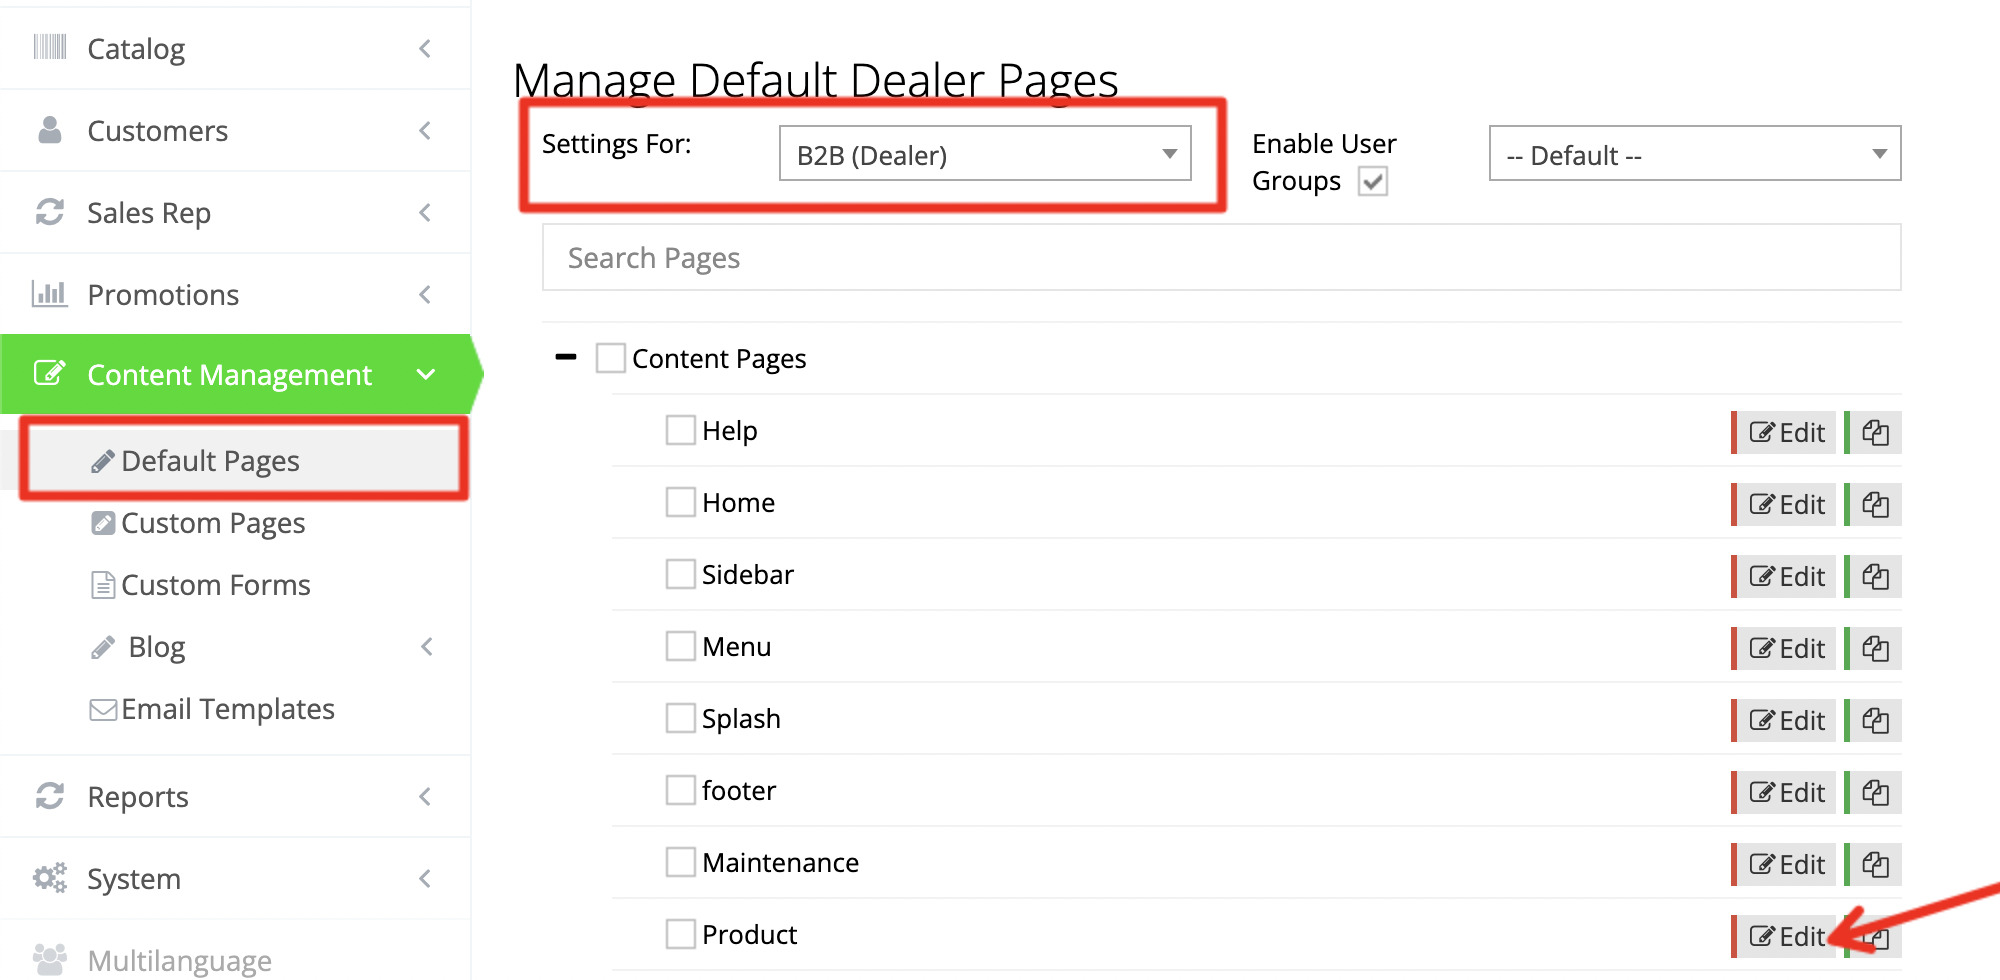
To do this, go to Content Management > Default Pages and select the settings the user type in question — either B2B (Dealer) or B2C (Public). Then, locate the Product page and click the Edit button.

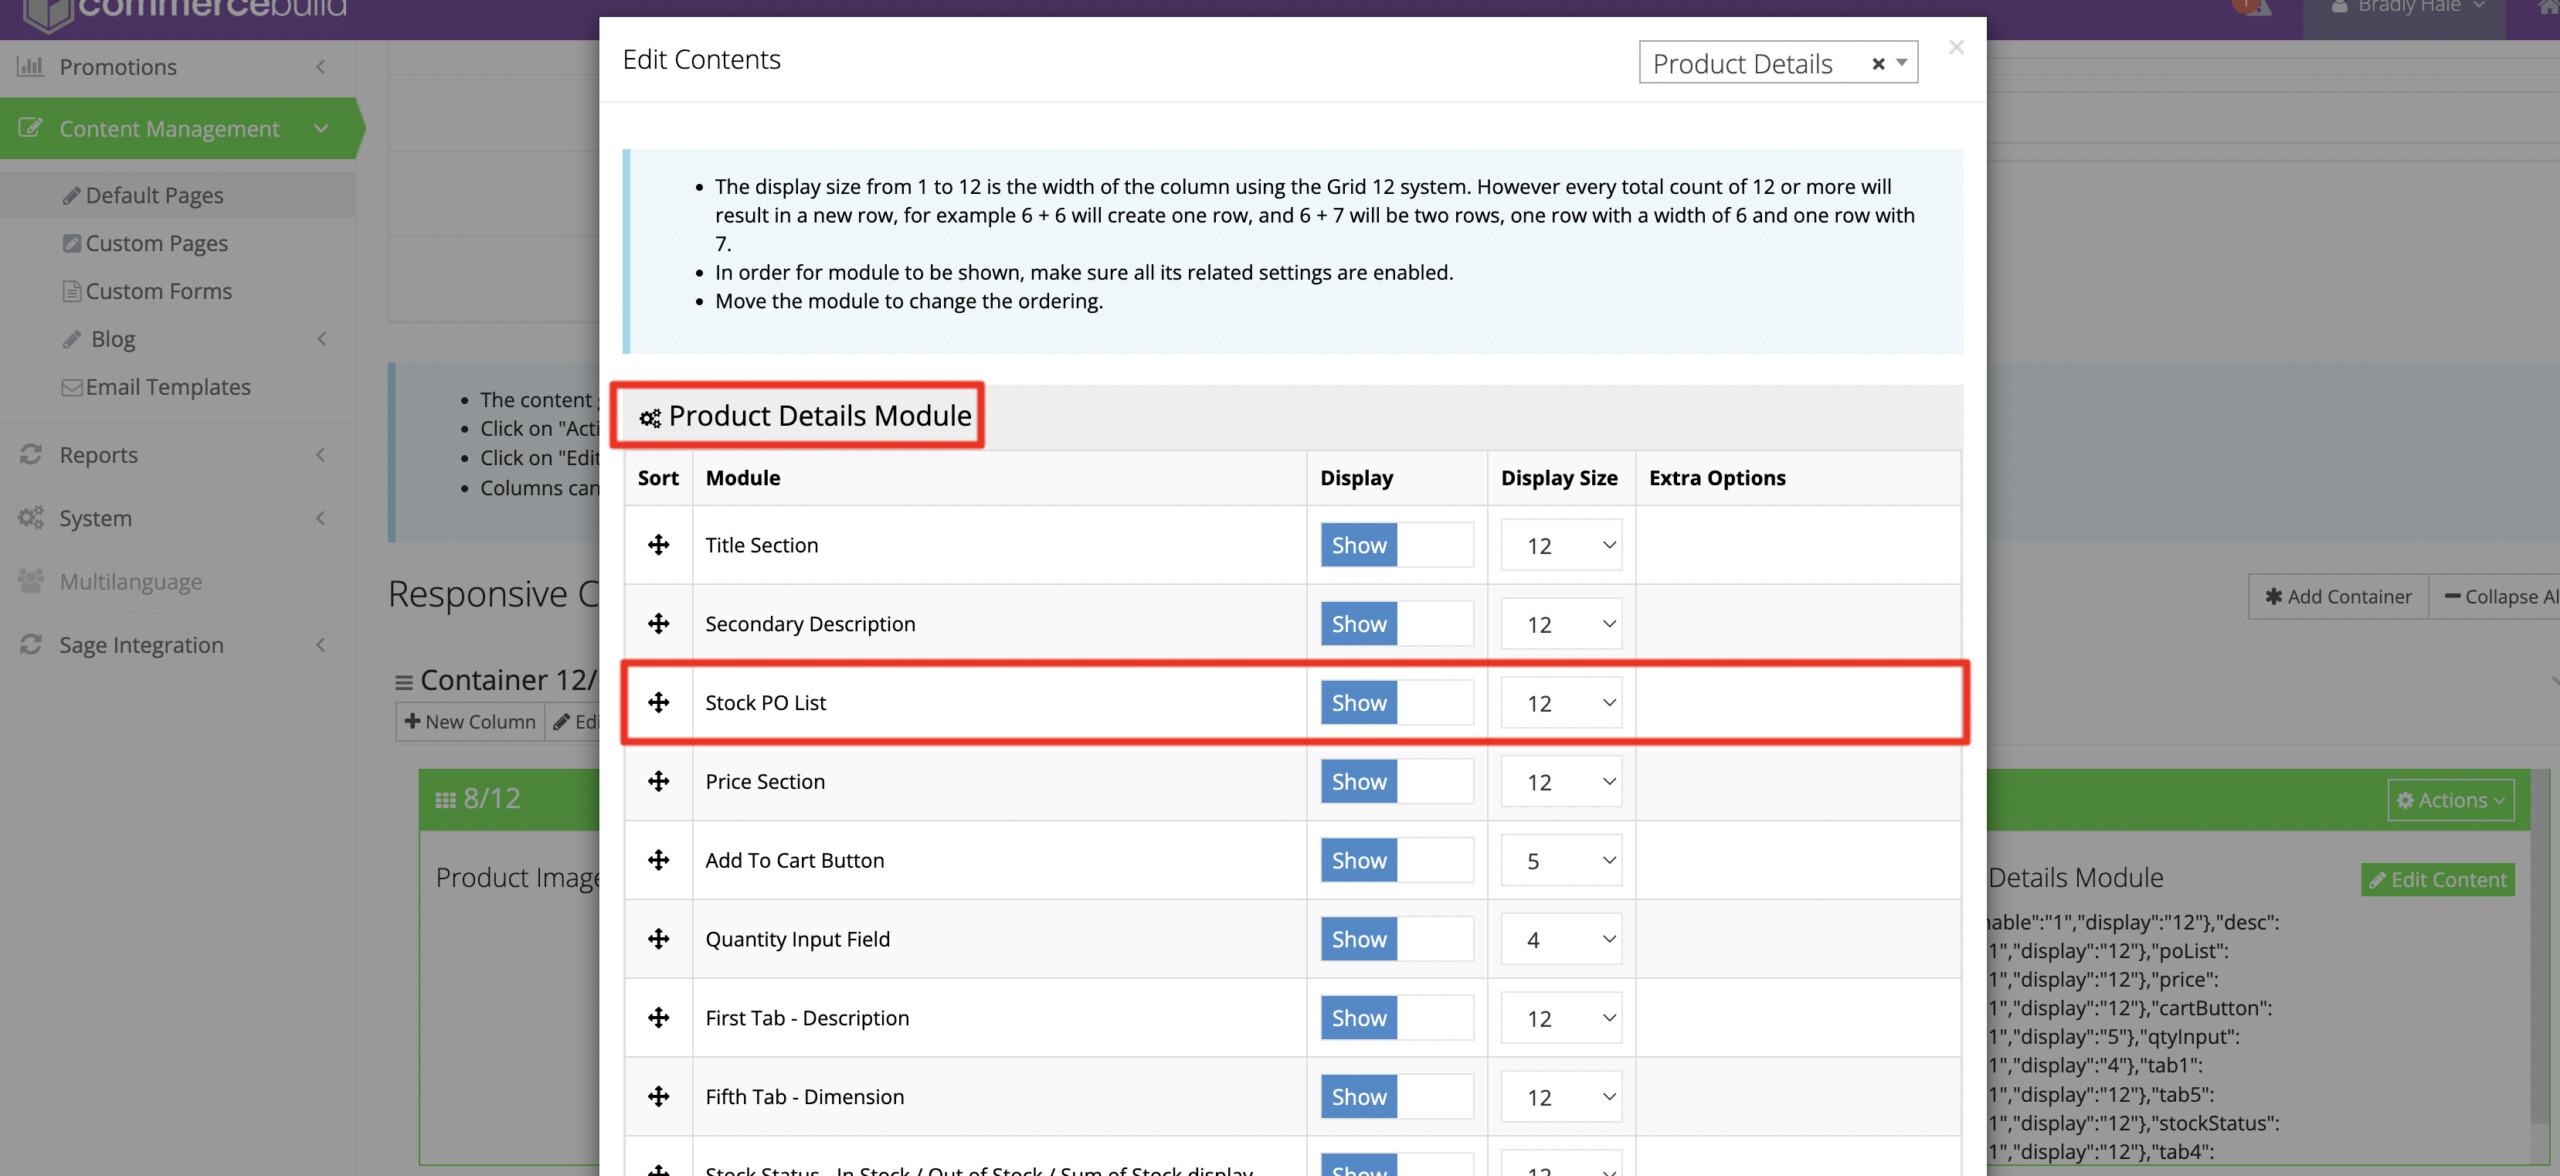
Once in the Product page, locate the Product Details Module, click Edit Content, and then toggle the Stock PO List setting to Show. You can move (under Sort) the setting upward or downward, depending on your preference for how it should be displayed in the product details.

Once Stock PO List is shown, Apply your changes, and the purchase orders should now display in your product details if they exist in your ERP.

