Product management is the maintenance of your products and product pages within your webstore. Some information will be maintained in your ERP system which is separate from the management of your products in your webstore.
ERP item data is replicated every few minutes and this data includes the item code, item description, item price, unit of measure, and stock quantity. All of which will be primarily maintained in your ERP.
The type of management we’re referring to in this section has to do with the content on your product pages, relating products to each other, and maintaining product images. This will be done within your webstore by either using the eCommerce Console tools or Excel export/imports.
Getting Started
Navigate to Catalog > Products in the admin dashboard.
You will see a list of products already present in that section. These products are brought over from the ERP when your webstore is set up. As mentioned before, by default only the product’s code, description, price, stock, and unit of measure are brought over. Rest other data needs to be added in via features available under the Product Management section.
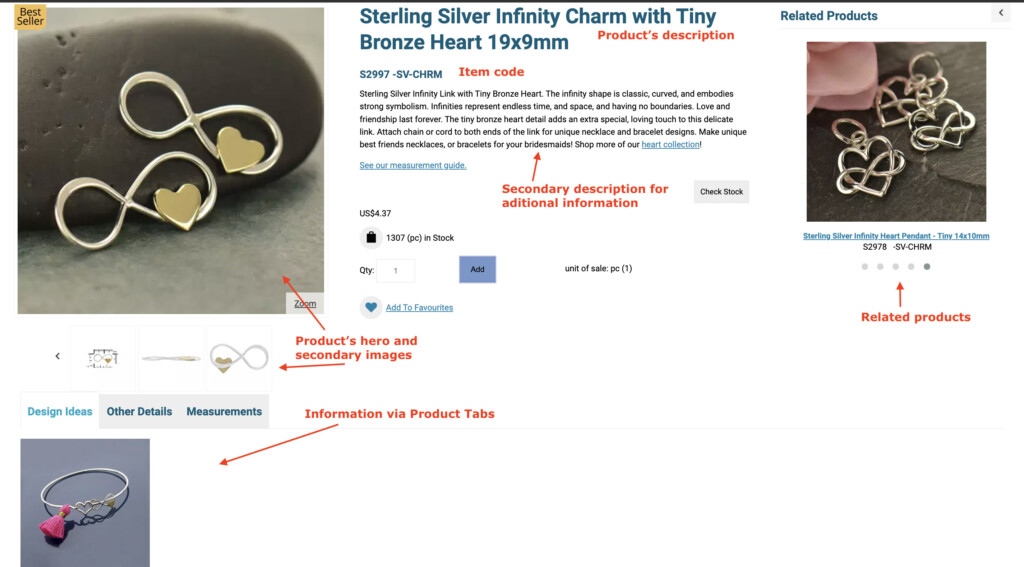
This is what a typical product page looks like:
Add content
Search for your product and click Edit to add more information which will be organized in various tabs:
General
This tab pertains to general settings related to a product setup. Some of the prominent ones are :
Secondary description – to add additional information about a product.
Barcode – this is imported from your ERP.
Tags – Product tags are useful when it comes to tagging your products so they are searchable if a tag is entered as a search criterion. See our guidance on How to add tags to products. for more information.
Low Limit – This setting helps to show a message on a product when its stock hits a certain limit.
Enable POA – “Price on Ask”, this setting is used to hide a product’s price from your users.
Ignore Quantity Availability Checks – This allows the user to add the item to the cart disregarding back-ordering and negative inventory settings.
Enforce Quantity Availability Checks – Restricts the user from purchasing an item if there is no stock available disregarding back-ordering and negative inventory settings.
Enable Item Badge – An item badge is a small image that is shown on the top or bottom of your product’s image. For more guidance, please refer to our tutorial on How to set up Item badges.
Item Categories – Lists down all the B2B and B2C categories a product is assigned to. You can also choose which category will be used for Canonical URL.
Filter Settings – This section helps to associate filters to the product. For more information, see our guidance on How to assign filters to products.
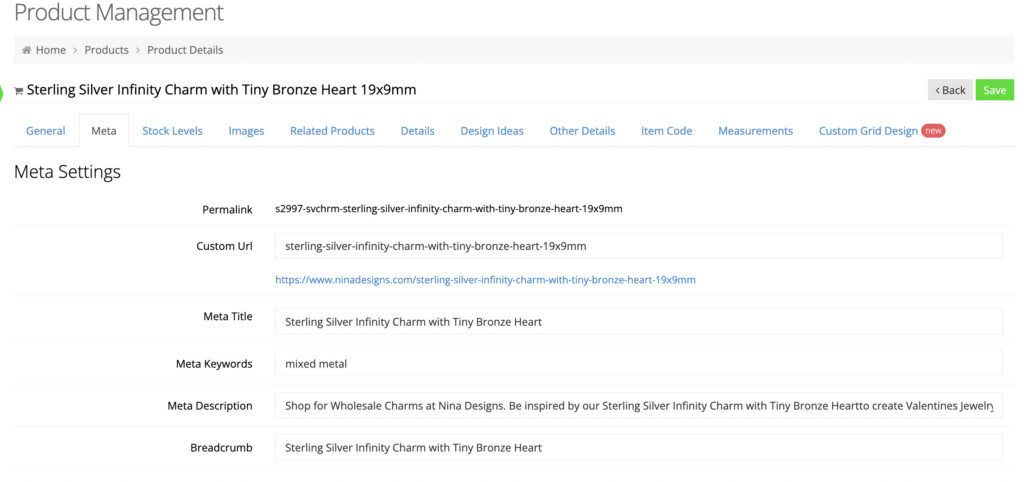
Meta
Meta tags are pieces of information you use to tell the search engines and those viewing your site more about your page and the information it contains. Meta-information includes:
Permalink – It is system generated and is a concatenation of an item code and its description. Unless Custom URLs is enabled, a permalink is a URL for the product page.
Custom URL – This setting, if enabled, is used to define your own URL for the product. See our tutorial on Custom URLs for product permalinks for more information.
Meta title – the title of your page, which should be unique for every page you publish.
Meta Keywords – A comma-separated value that is important for SEO for search engines because the ranking algorithm uses the meta keywords tag to identify the core topics for the web page.
Meta description – a description of the content on the page.
Breadcrumb – indicates the current page’s location within a navigational hierarchy. You can choose the text to be displayed when a user lands on a product’s page.

Stock Levels
This is a read-only section to give detailed information on stock for a product from all warehouses.

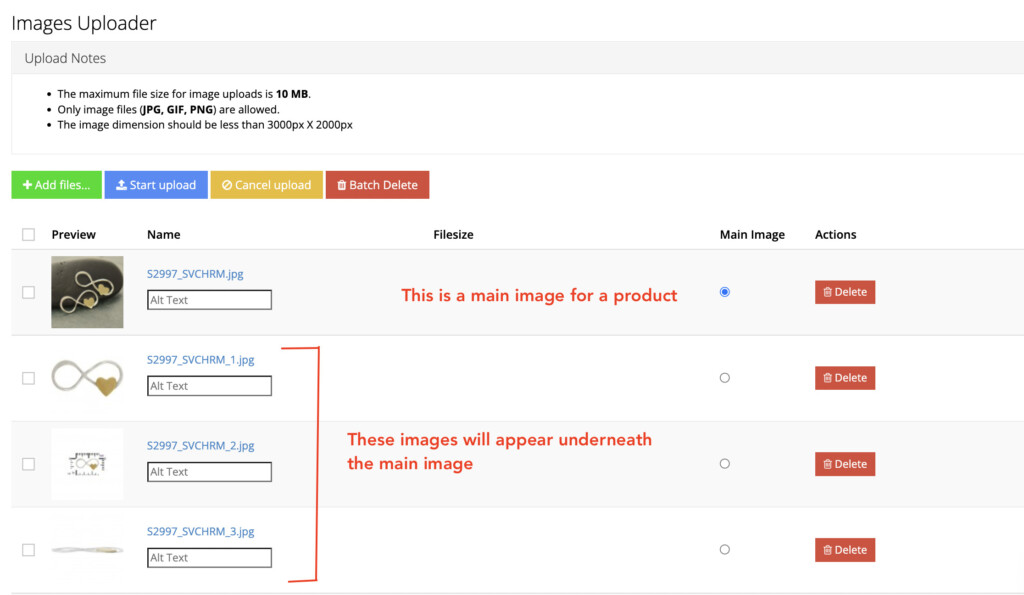
Images
On this tab, you can assign your product a hero image as well as a series of secondary images that will appear underneath the main image.

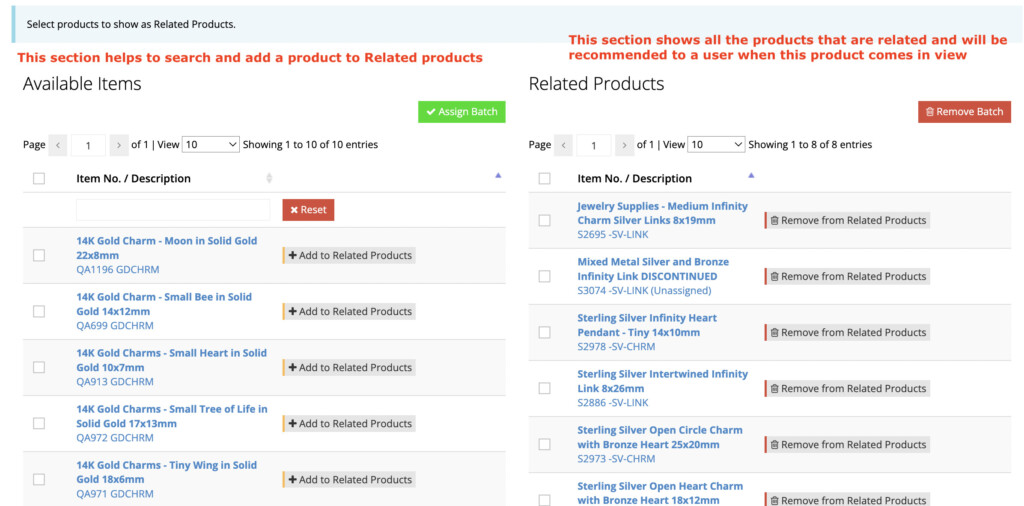
Related Items
This section will let you assign other products that are related to your main product. Related and recommended products can help boost sales by making buyers aware of other products available to them or providing more information to help them with their purchasing decisions.
The settings for this section can be found under System > Modules > Other Settings where you can choose its heading, the number of products to be displayed, and a choice to include a cart button, wishlist, and favorite icons.

Additional Tabs
Product tabs are what house most of the content that you can place on any product page. They are called “tabs” because, in the admin dashboard, they appear as tabbed Content Editors. In the front end, however, you can display these tabs in different ways; on their own as a “standalone” and/or as tabs as well.
There are a total of 5 tabs you can utilize to display content on your product pages. Each tab will contain its own content and you will be able to name and determine where they’re displayed. This can be achieved from Catalog > Product Settings > Product Tabs.
It’s not mandatory to use all 5 tabs for every item (or at all). If you do not input any information inside a tab, the tab will not appear in the front end for that specific product whereas a product with information in that tab, would.
If you have a product grid setup, then to enable or disable a particular tab, navigate to Content management > Default Pages. Click Edit for “Product” and identify the Product Tabs Module to edit its settings.
For more information, see our guidance on Product Tabs and their placement and Populate product tabs with content.
Custom Grid
If you want to design a particular product page that is different than the rest of the product pages. you can create a custom grid using this section.

