In this tutorial, we’ll help you sign up for Cloudflare and add your domain to their services. This process is slightly technical. If you’re not familiar with Domain Name Systems (DNS) and their various records, you might consider reaching out to a technical contact or commercebuild support for assistance.
Create your Account
To sign up, all you need to do is:
- Navigate to https://dash.cloudflare.com/sign-up
- Enter an email
- Enter a password
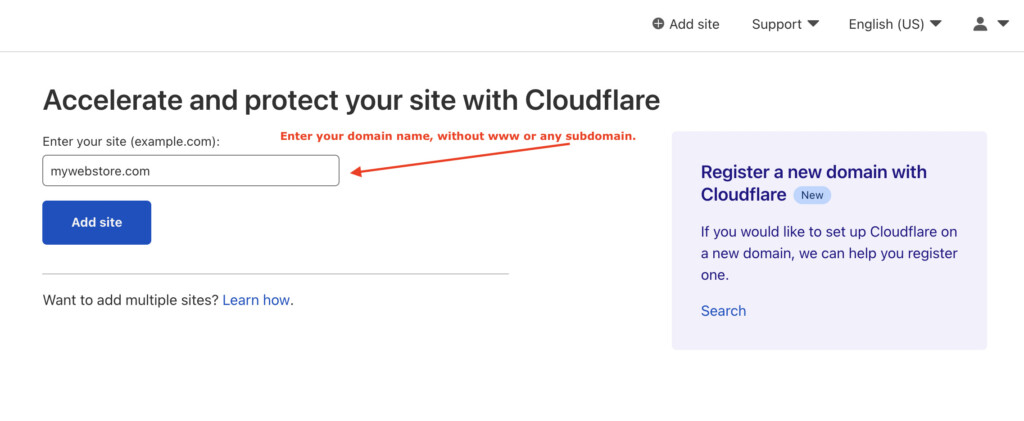
Add Your Domain
In the next step, you’ll want to add your domain name.
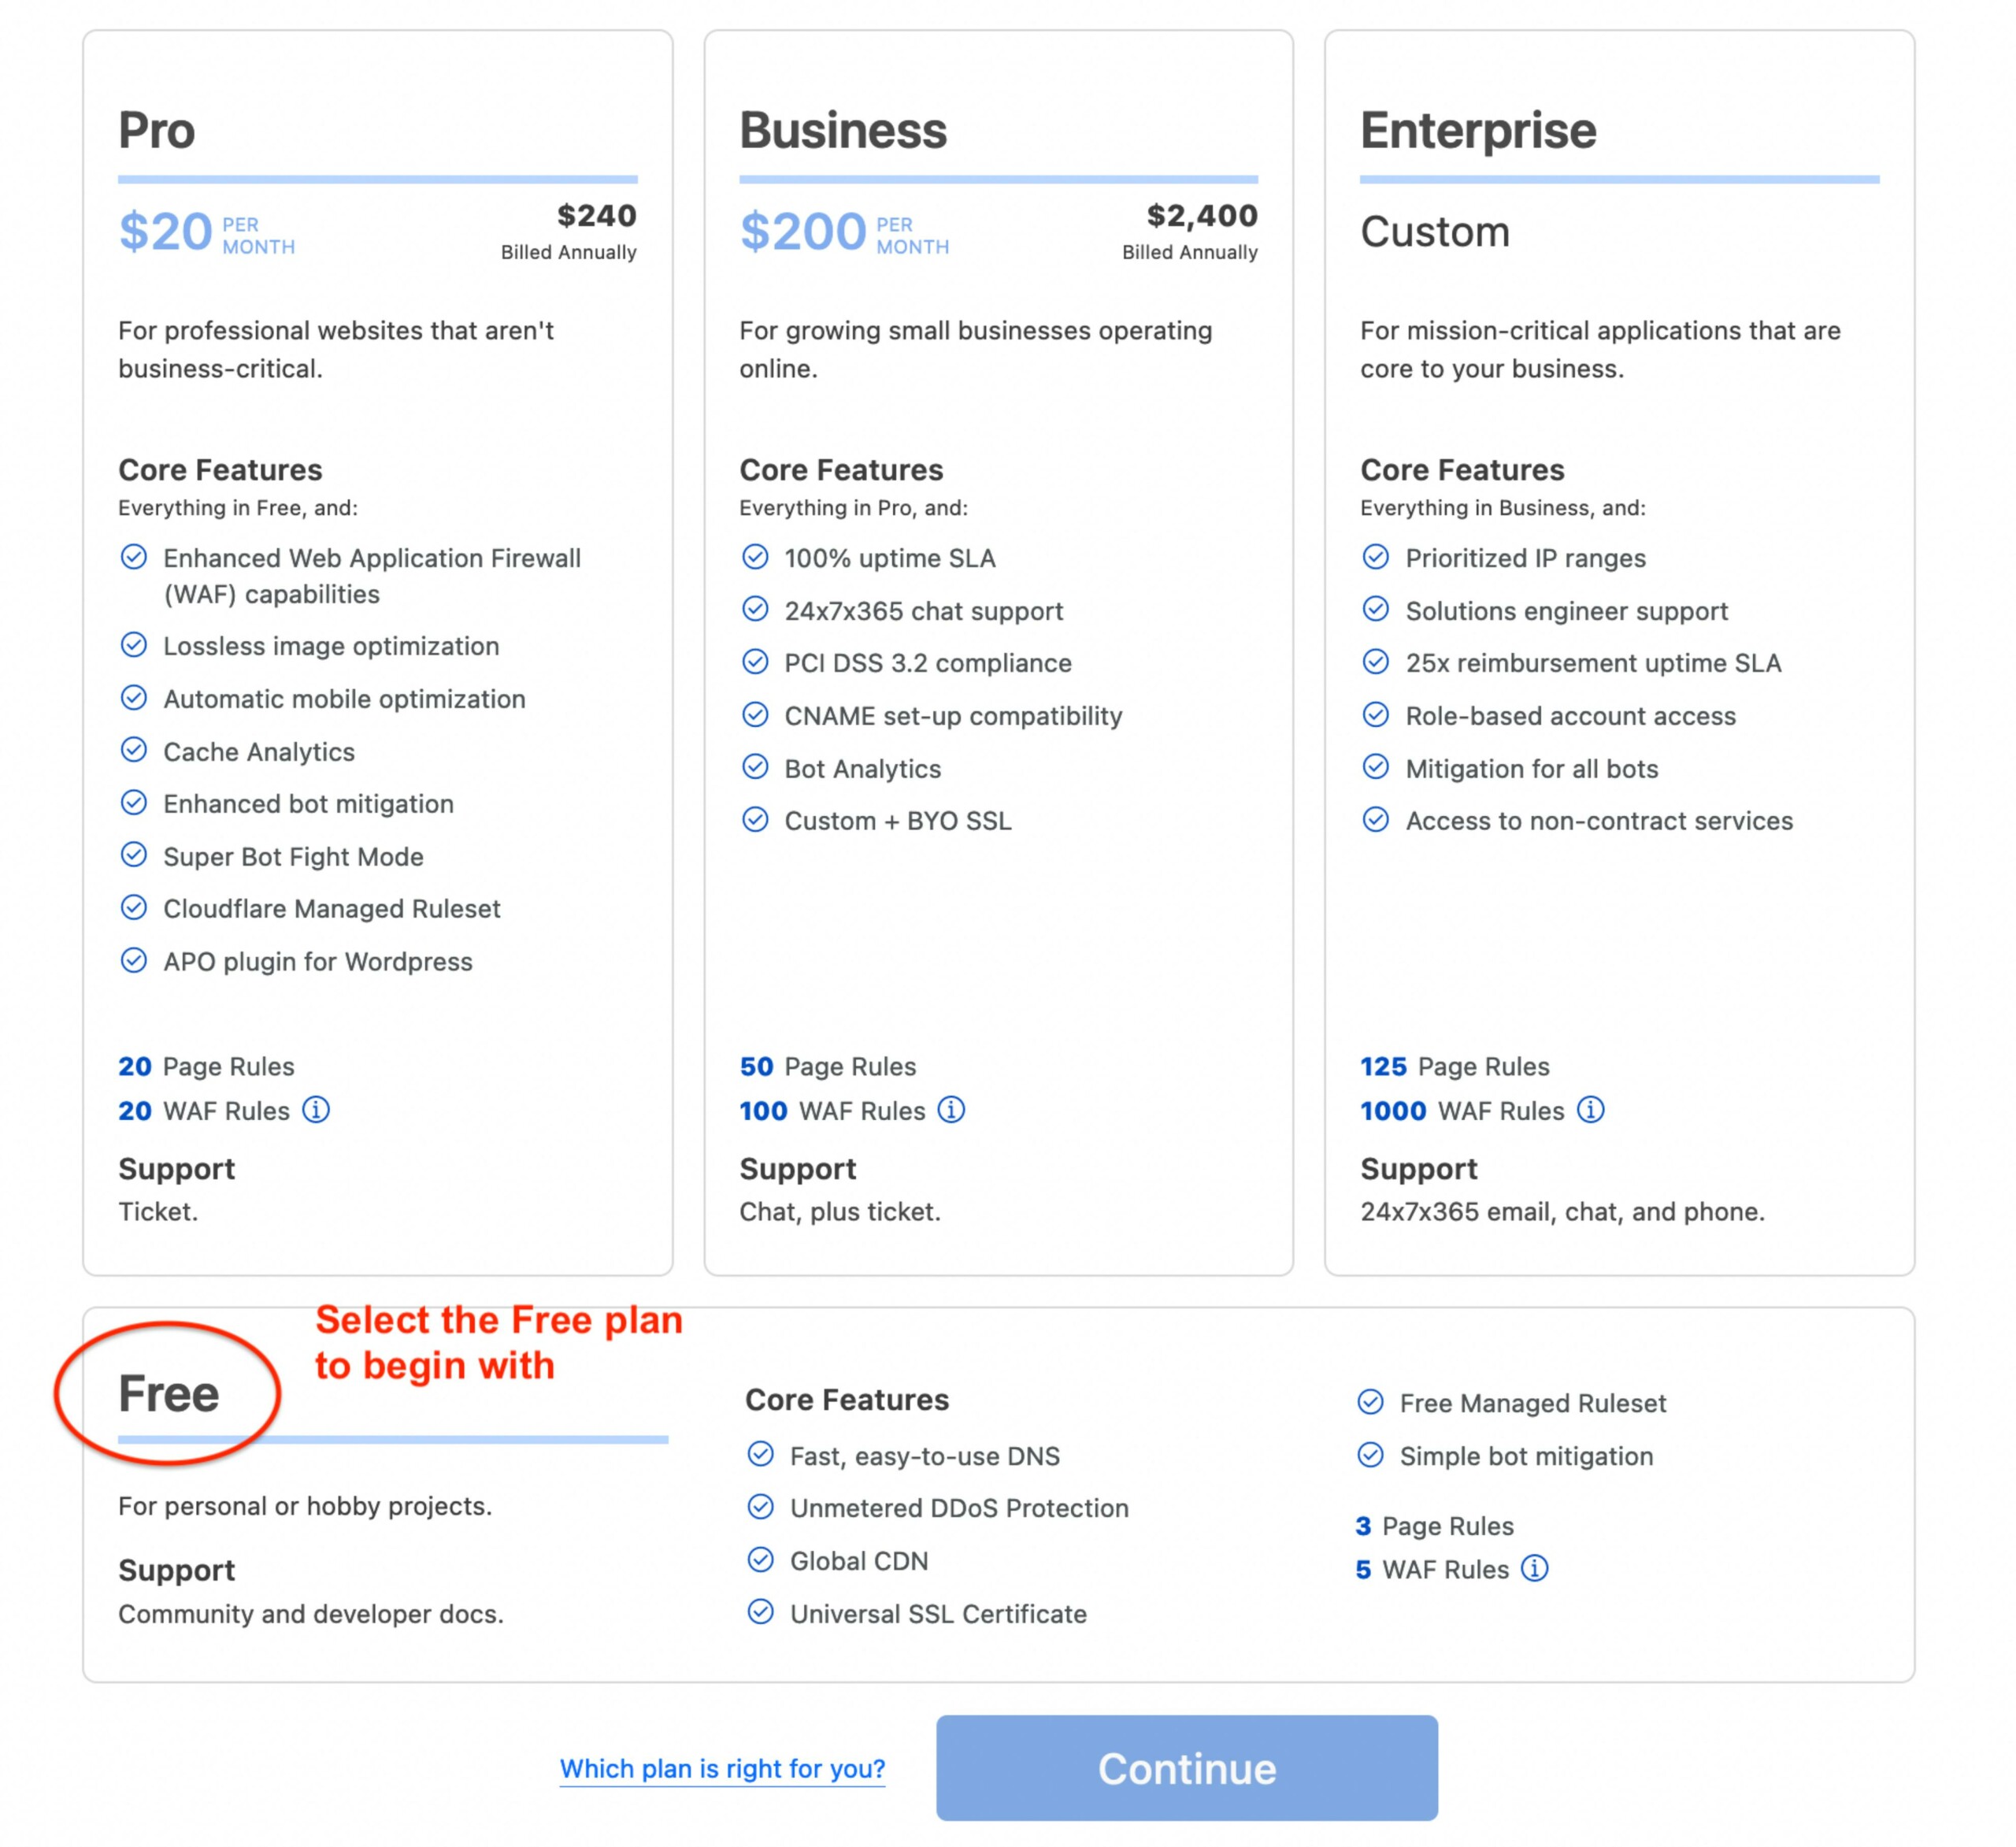
Select a Plan
For the purposes of commercebuild web stores, you do not need a paid plan at Cloudflare to leverage their services. Thus, we recommend selecting the free plan, but any plan will suffice.
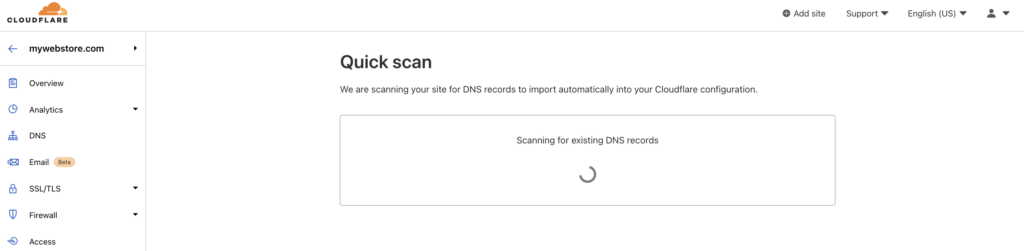
DNS Records Scan
Once you’ve selected a plan, Cloudflare will then import publicly queryable DNS records. These records include those necessary for your website to load (e.g. A and/or CNAME or records), as well as email records (known as MX records).
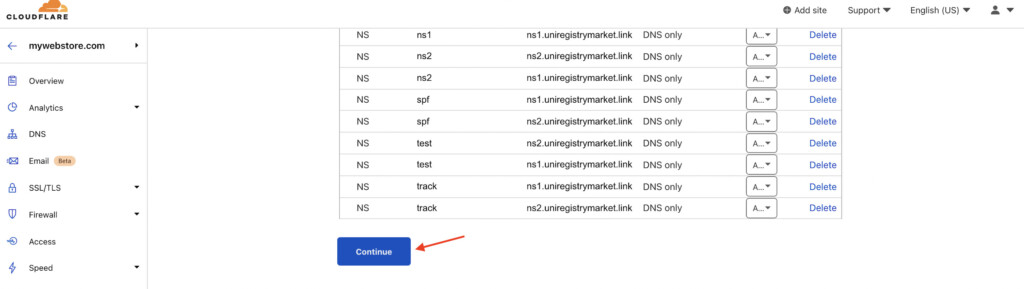
However, there are almost always DNS records that are not publicly queryable. For example, if you have a subdomain set up that points mymarketingpages.mywebstore.com to an IP address, Cloudflare will likely not be able to detect this record.
For that reason, it is imperative that a technical contact verify that all currently used records at your current DNS host are imported into Cloudflare, which will become your new DNS host.
Once you have verified that the DNS records are all imported, click Continue.
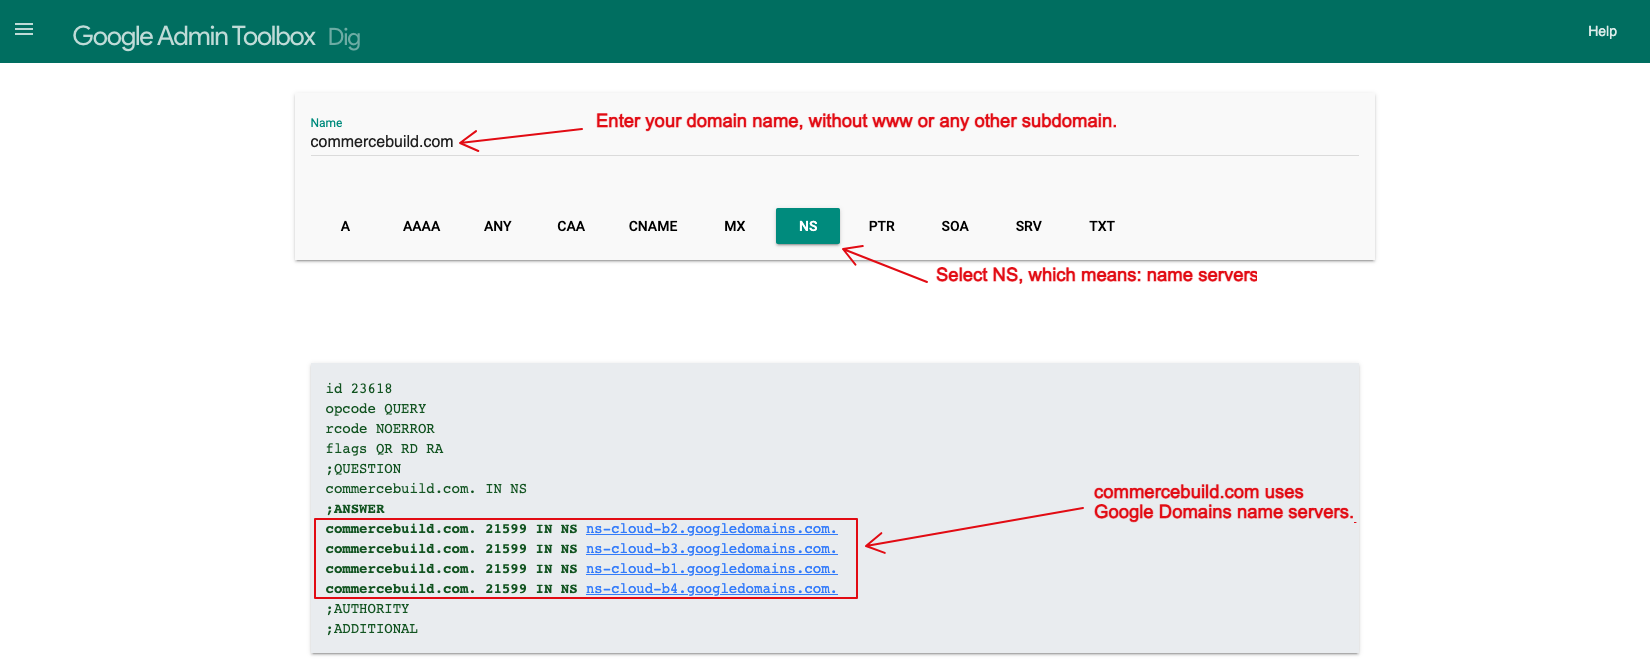
How do I know who my current DNS host is?
When you purchased your domain, you did so through a domain registrar. Sometimes, a domain registrar also offers DNS hosting services, e.g GoDaddy.com or Name.com. Other times, domains can be purchased at one company, but use another company to host their DNS records. Your domain’s DNS host is determined by where you have pointed your domain’s name servers.
You can check your name servers by using this tool from Google.
Update Name Servers
After you have verified that all currently used DNS records have been imported into Cloudflare, you are now ready to make the DNS change at your domain registrar. As previously mentioned, your domain registrar is the company from which you purchased the domain.
If you’re not sure where you purchased the domain, please reach out to commercebuild support for further assistance.
If you do know where you purchased the domain, please proceed to update your name servers.
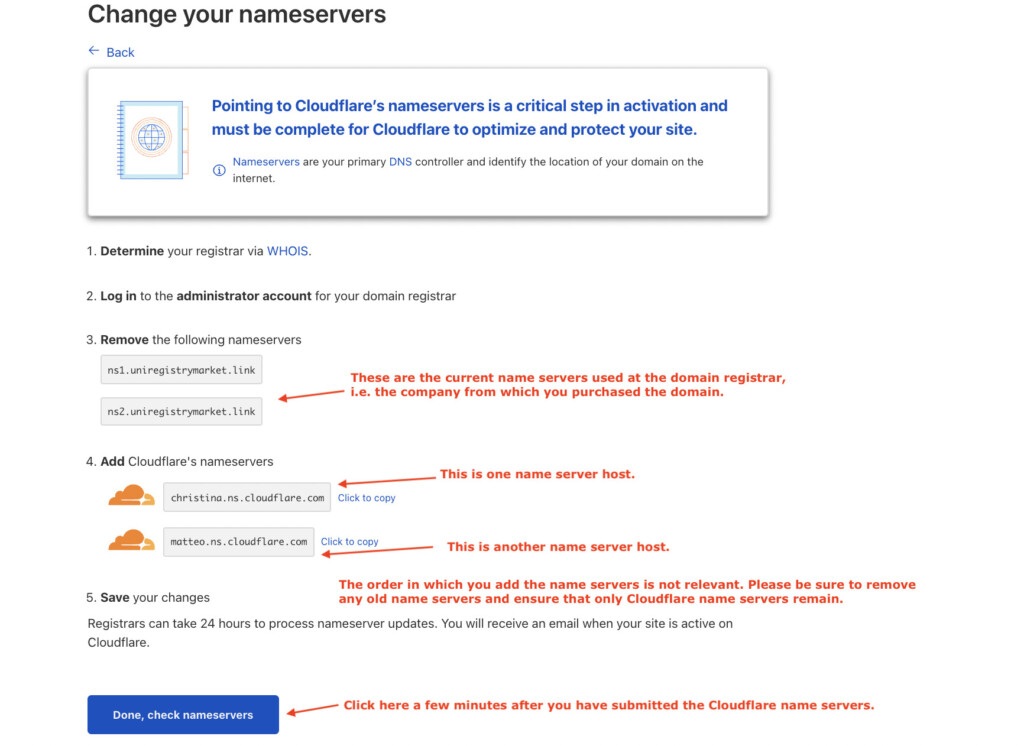
- How to change your name servers at GoDaddy
- How to change your name servers at Google Domains
- How to change your name servers at eNom
- How to change your name servers at Name.com
DNS Propagation
It may take 24-48 hours for a name server change to update. However, assuming that all DNS records were imported correctly, this change should not affect the availability of your site.