Global filters allow users to narrow down results in the entire site for a whole session of use. As a contrast, regular filters narrow down results at a specific category level.
An example might be for automotive parts, where you want to narrow down all search results for the specific car you’re working on. Users will still navigate or search as normal, but the results will only show for items that are tagged with your specific car.
It’s a requirement that filters are set up first: see our instructions for setting up regular product filters.
It’s also important to note that when you use filtering, that all products are assigned a searchable value. If you have a filter for colour, with values of Red, Green, and Blue, then all of your products need to have one of these values assigned to it. If there is a blue product that is not assigned to Blue, then users will not see that product when filtering for Blue. If there is a yellow product that didn’t get assigned a colour because it’s not in the filter list, then users are less likely to find that yellow product as it is not a value to filter for, and therefore always excluded when filtering.
Show Filter in the Header
Turning this on means we will feed that data to our global filter module in our header.

Add the Global Filter Module
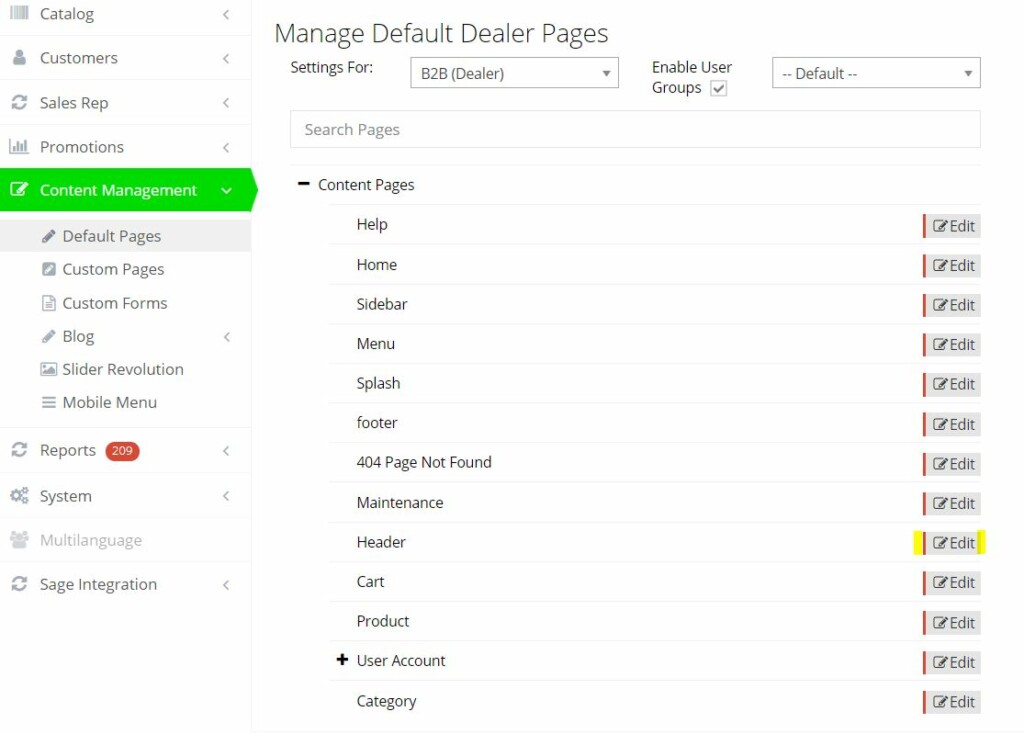
Under Content Management > Default Pages find the Header and Edit (note, there are separate B2B and B2C headers).

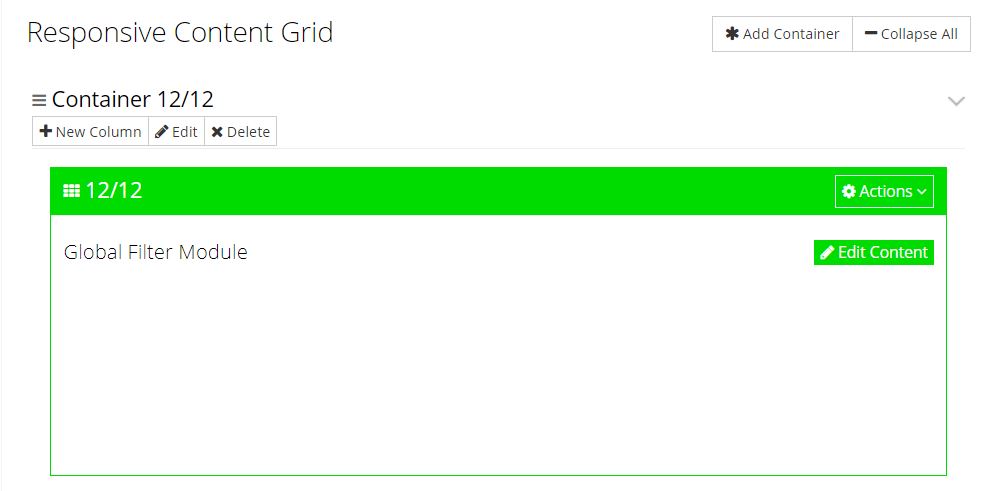
Add a container block, and set the column type to Global Filter.

Add Values to the Global Filter
Go to Catalogue > Product Filters and at the top of the page, find the Tools and select Export Global Filter Data. Note that the Tools button will not appear unless filters are enabled in the header already.

Fill in the spread sheet with the Key values for all the columns. If you leave a column blank, no filters will show. Typically that means you’re duplicating the key values found in the Manage Filter Keys


Here, into the sheet:

