- What are brands?
- How to set up brands in the webstore
- How to set up brands using Excel
- How to assign products using Excel
- How to add a link to the brands page in your navigation bar
- How to place a brands module onto a page
What are brands?
When it comes to your webstore, brands are considered a grouping of products very similar to what a category is used for. This can be utilized for actual company brands, manufacturers, collections, series, or whatever may be relevant for your own business. The difference between using a standard category and the brands feature is that brands will automatically generate some useful elements throughout your webstore. Elements such as a dedicated brands page, logo thumbnails on product pages, etc.
This provides just one more way for your users to shop your webstore while generating useful links and organizing it for you in the backend Control Panel.
Benefits
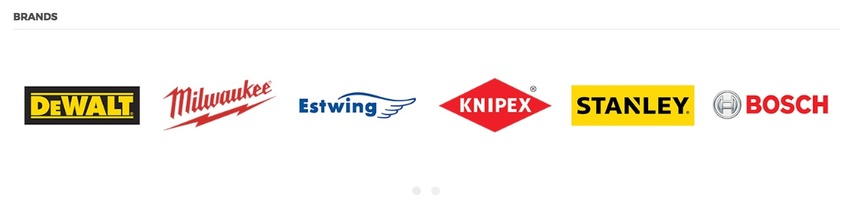
- Creates a dedicated brands page where you can have a grid of logos or images
- Organizes your brands in a separate section
- Creates a link of each assigned product page for visual and navigational purposes
- Enables the ability to use a brands rotating carousel on any content page or section
You should use it if you…
- Sell products that belong to a brand, manufacturer, collection, series, etc
- Have brand loyal customers who shop accordingly
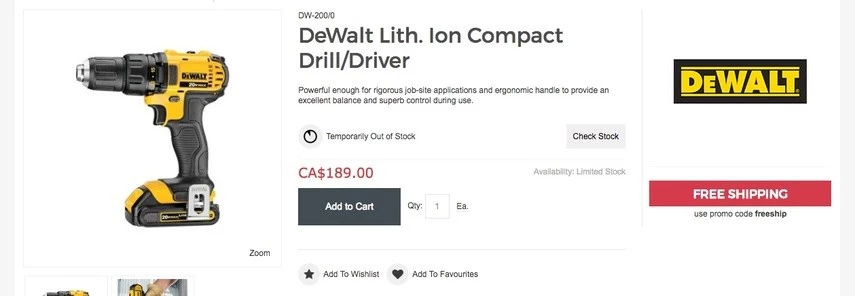
- Want to upload a logo or image on particular product pages that serves as a link back to the brand grouping
The brands page
Product page with brand logo
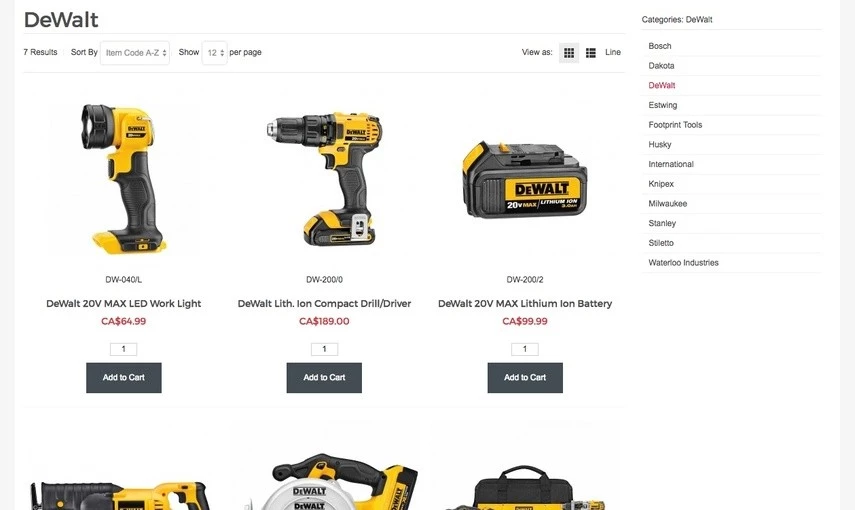
Brand grouping
Brand carousel

How to set up brands in the webstore
Creating brands is very similar to regular categories where you can create them in the same steps as you would using the eCommerce Console or Excel as well as how it comes to assigning products to them. However, you cannot create child brands as they can only be one level deep.
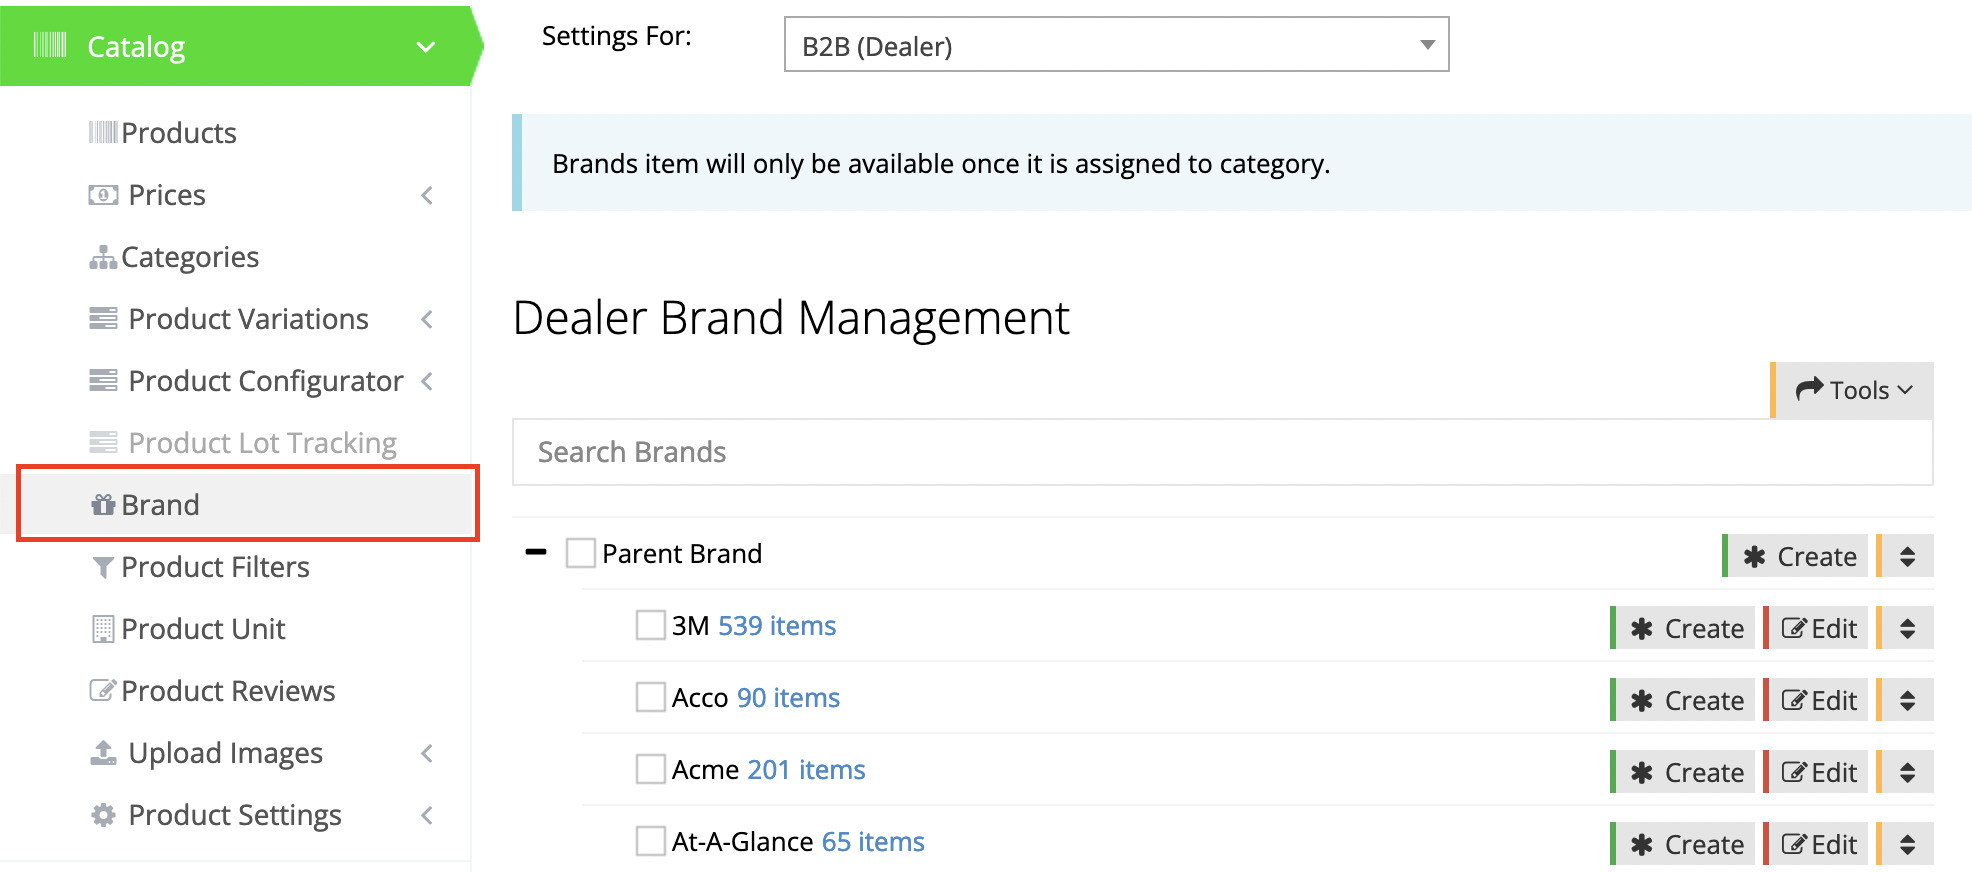
First, navigate to Catalog → Brand in the eCommerce Console.
Creating brands
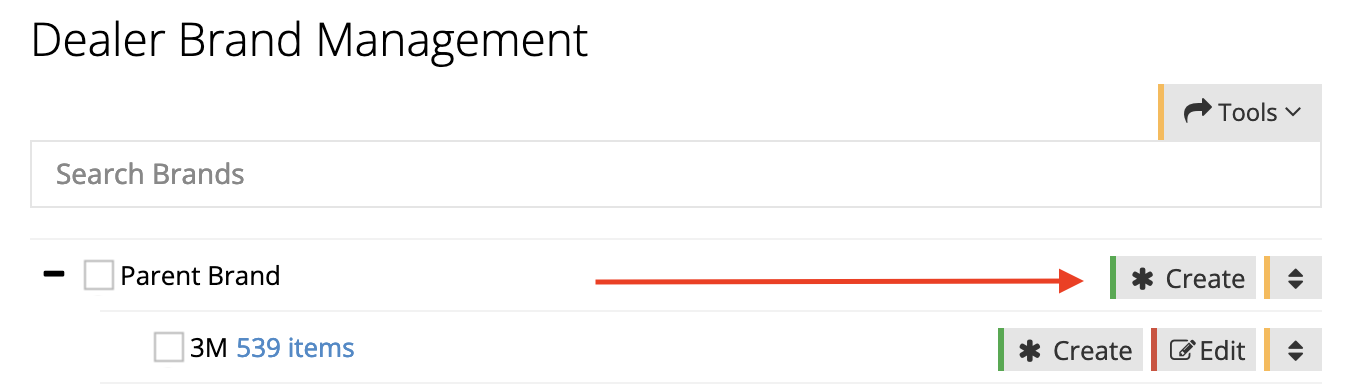
Click Create next to the title Parent Brand
Type in your new brand’s name and press Enter

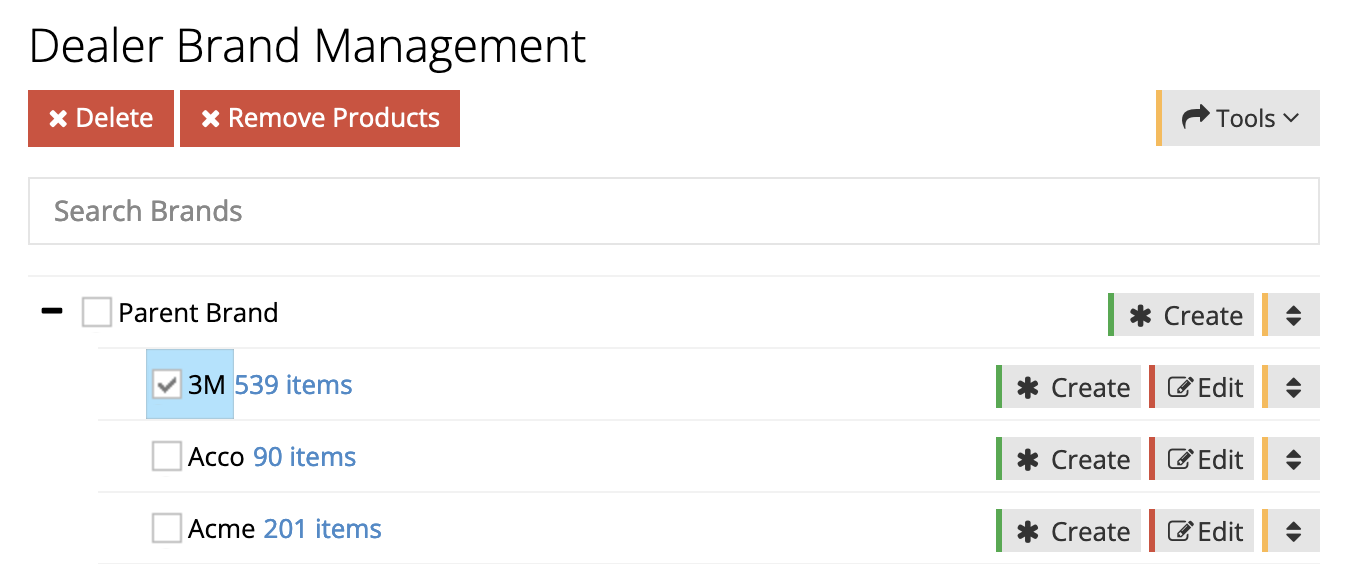
Assigning products to brands
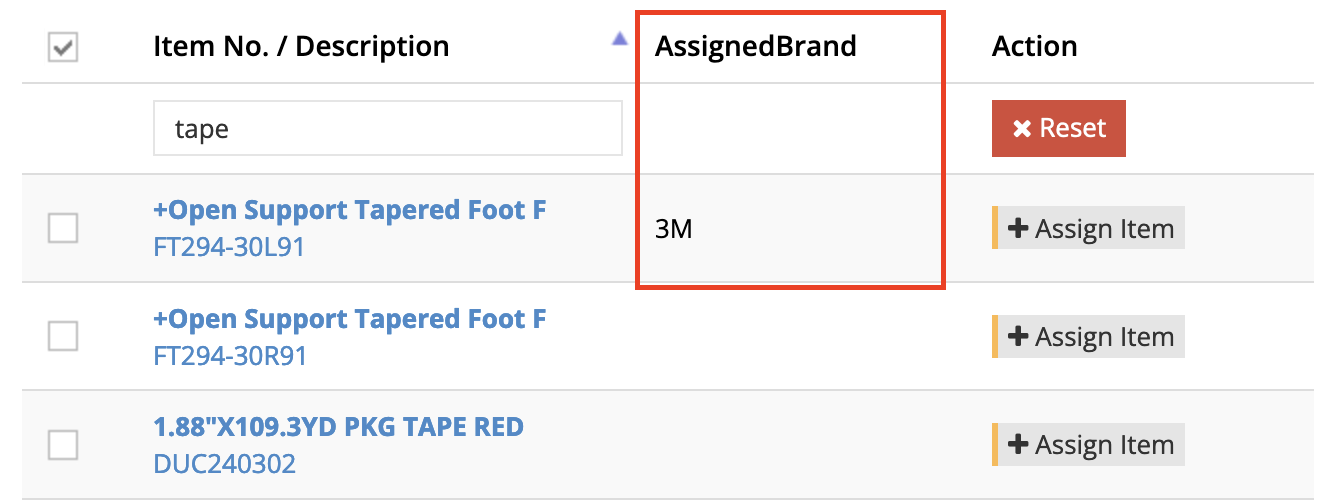
Check the box(es) of the brands you’d like to assign an item to
Search for your item(s) under the section Assign Items to Brands. You can search by partial or full item codes and descriptions
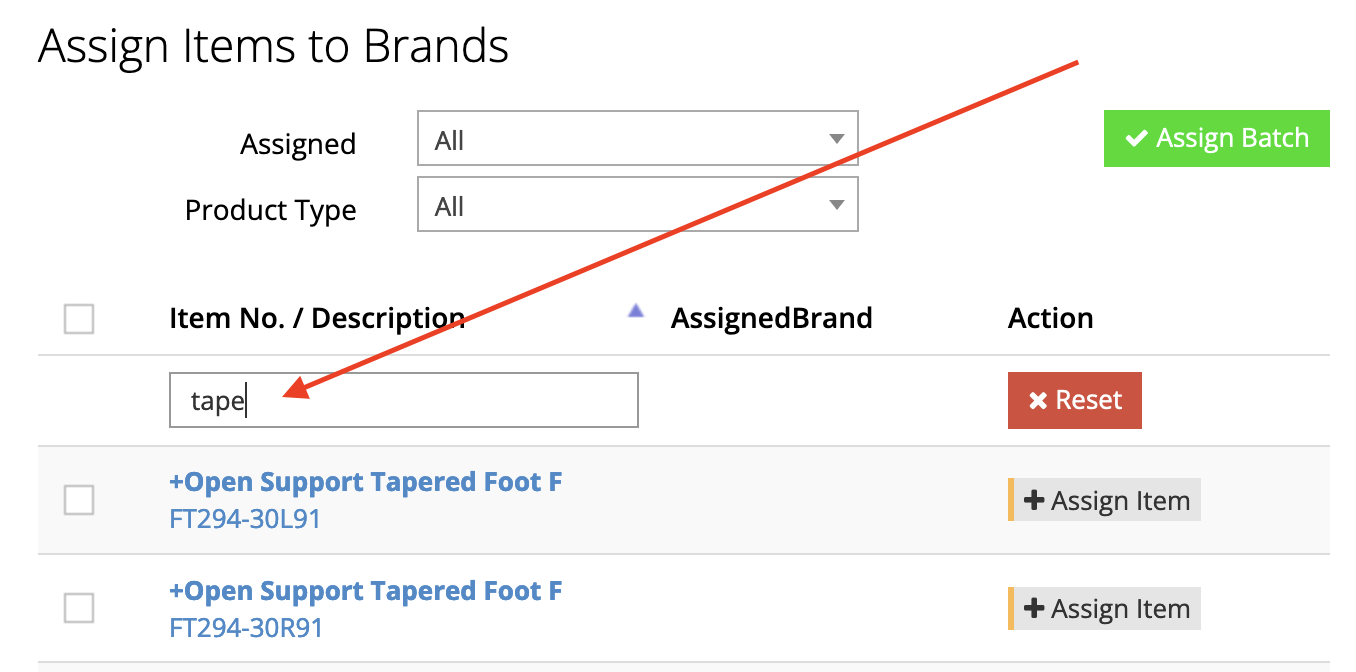
Click the Assign Item button next to the item
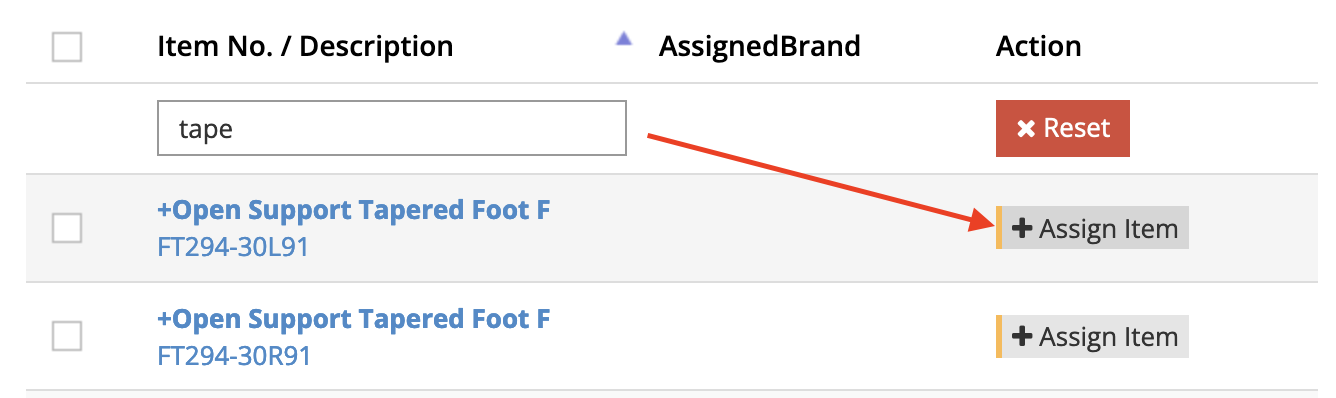
You will see the updated items link beside your brand and brand name beside your products
How to set up brands using Excel
Creating brands is very similar to regular categories where you can create them in the same steps as you would using the eCommerce Console or Excel as well as how it comes to assigning products to them. However, you cannot create child brands as they can only be one level deep.
First, navigate to Catalog > Brand in the eCommerce Console.
Creating brands
Create at least one brand in the eCommerce Console
This is so there is an example in the exported Excel sheet.
Check the box of a brand, click Tools and select Export Assigned Items
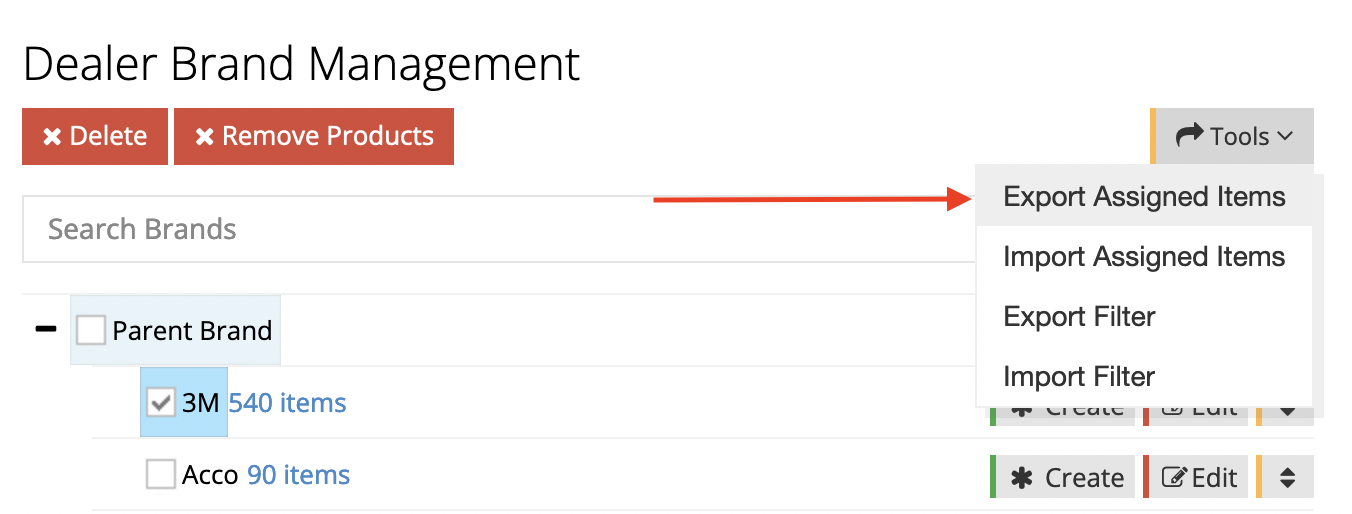
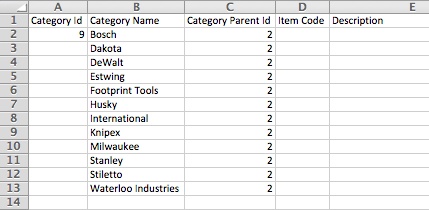
3) Open the Excel file and note the parent ID in column C
The file will contain any items that have been assigned to the brand you selected. In the creation of brands, the exported sheet is important for two reason; it provides the exact format you’ll need to import and it contains the parent ID required.
Any additional information, you may delete or clear out of the spreadsheet (lines with items, etc).
4) Type new brand names under Category Name
Note that there can only be one brand name per row.
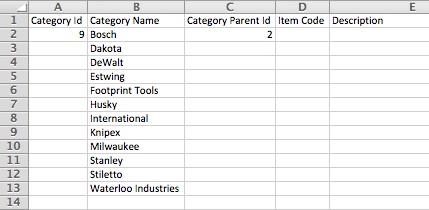
5) Copy the Category Parent ID for all new brand names (leave Category ID blank)
You must leave the Category ID field blank as your webstore will automatically generate an ID for you. If an ID is filled in here, your webstore will look for that ID number (that doesn’t exist) and return an error.
6) Save your file and return to the eCommerce Console
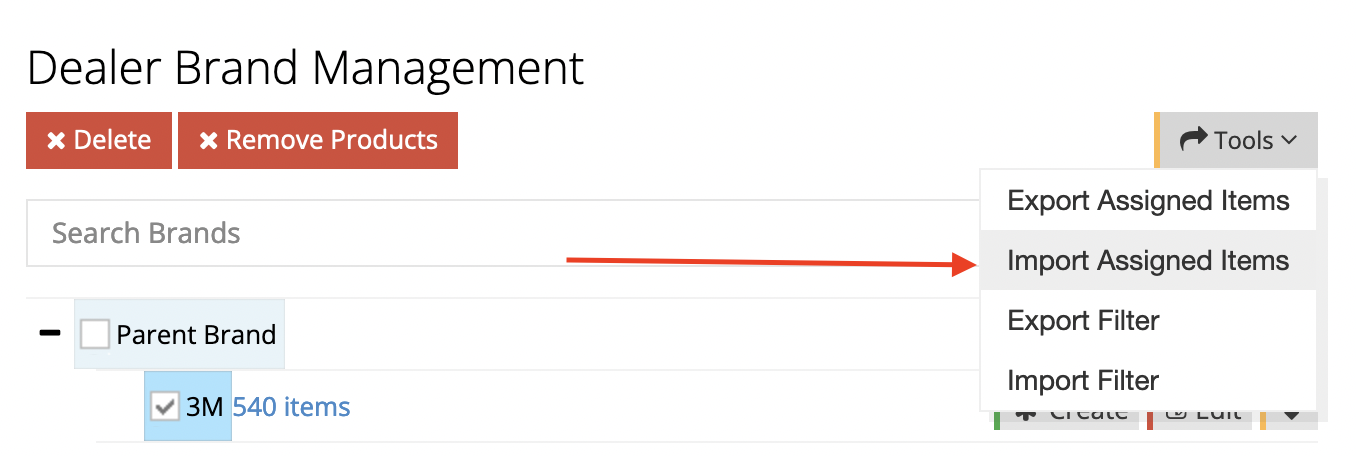
7) Click the Tools dropdown and select Import Assigned Items
Import your file
How to assign products using Excel
1) Check the box(es) of the brand(s) you’d like to assign items to
2) Click the Tools dropdown and select Export Assigned Items
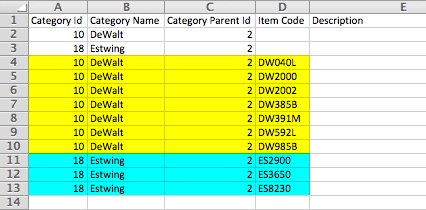
3) Open the Excel file and note ID numbers
To assign items to a category, you must copy the Category ID, Category Name, and Category Parent ID fields for each line of an item.

4) List your Sage item codes in column D and copy ID’s and name for each line
You must copy the Category ID, Category Name, and Category Parent ID for each row containing an item code. This is why it is important to export the sheet containing the brands you’d like to work with; the ID’s and structure are in the exported sheet.
5) Save your file and return to the eCommerce Console
6) Click the Tools dropdown and select Import Assigned Items
7) Import your file
How to add a link to the brands page in your navigation bar
Since the brands page is separate from your entire category tree, there is no immediate link to the brands page grid. At first, the only links to the brands tree will be through the link on assigned item pages or in the brands carousel module.
You can either create a link your brands page or a common solution is to place a brands link in your navigation bar by using a regular category and forwarding that link to the dedicated brands page grid.
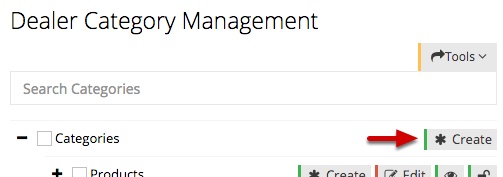
Navigate to Catalog > Categories in the eCommerce Console.
Follow these instructions
1) Click Create next to Categories at the top of the tree
2) Type in the name of the link and press Enter

3) Click Edit next to the name of the link you created

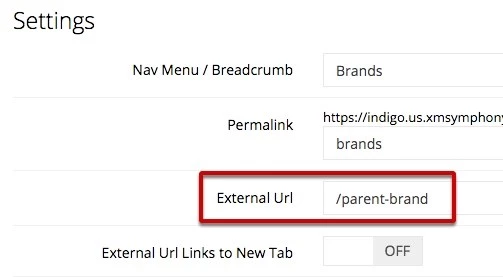
4) Select the Settings tab

5) Type in “/parent-brand” in the External URL field
For all webstores, the path to the brands page grid is “/parent-brand” regardless if you use different vocabulary such as collections, manufacturers, etc. What this does is when a user clicks on the link in the navigation bar instead of taking them to the category, it will forward them on to the /parent-brand page.
6) Click Apply
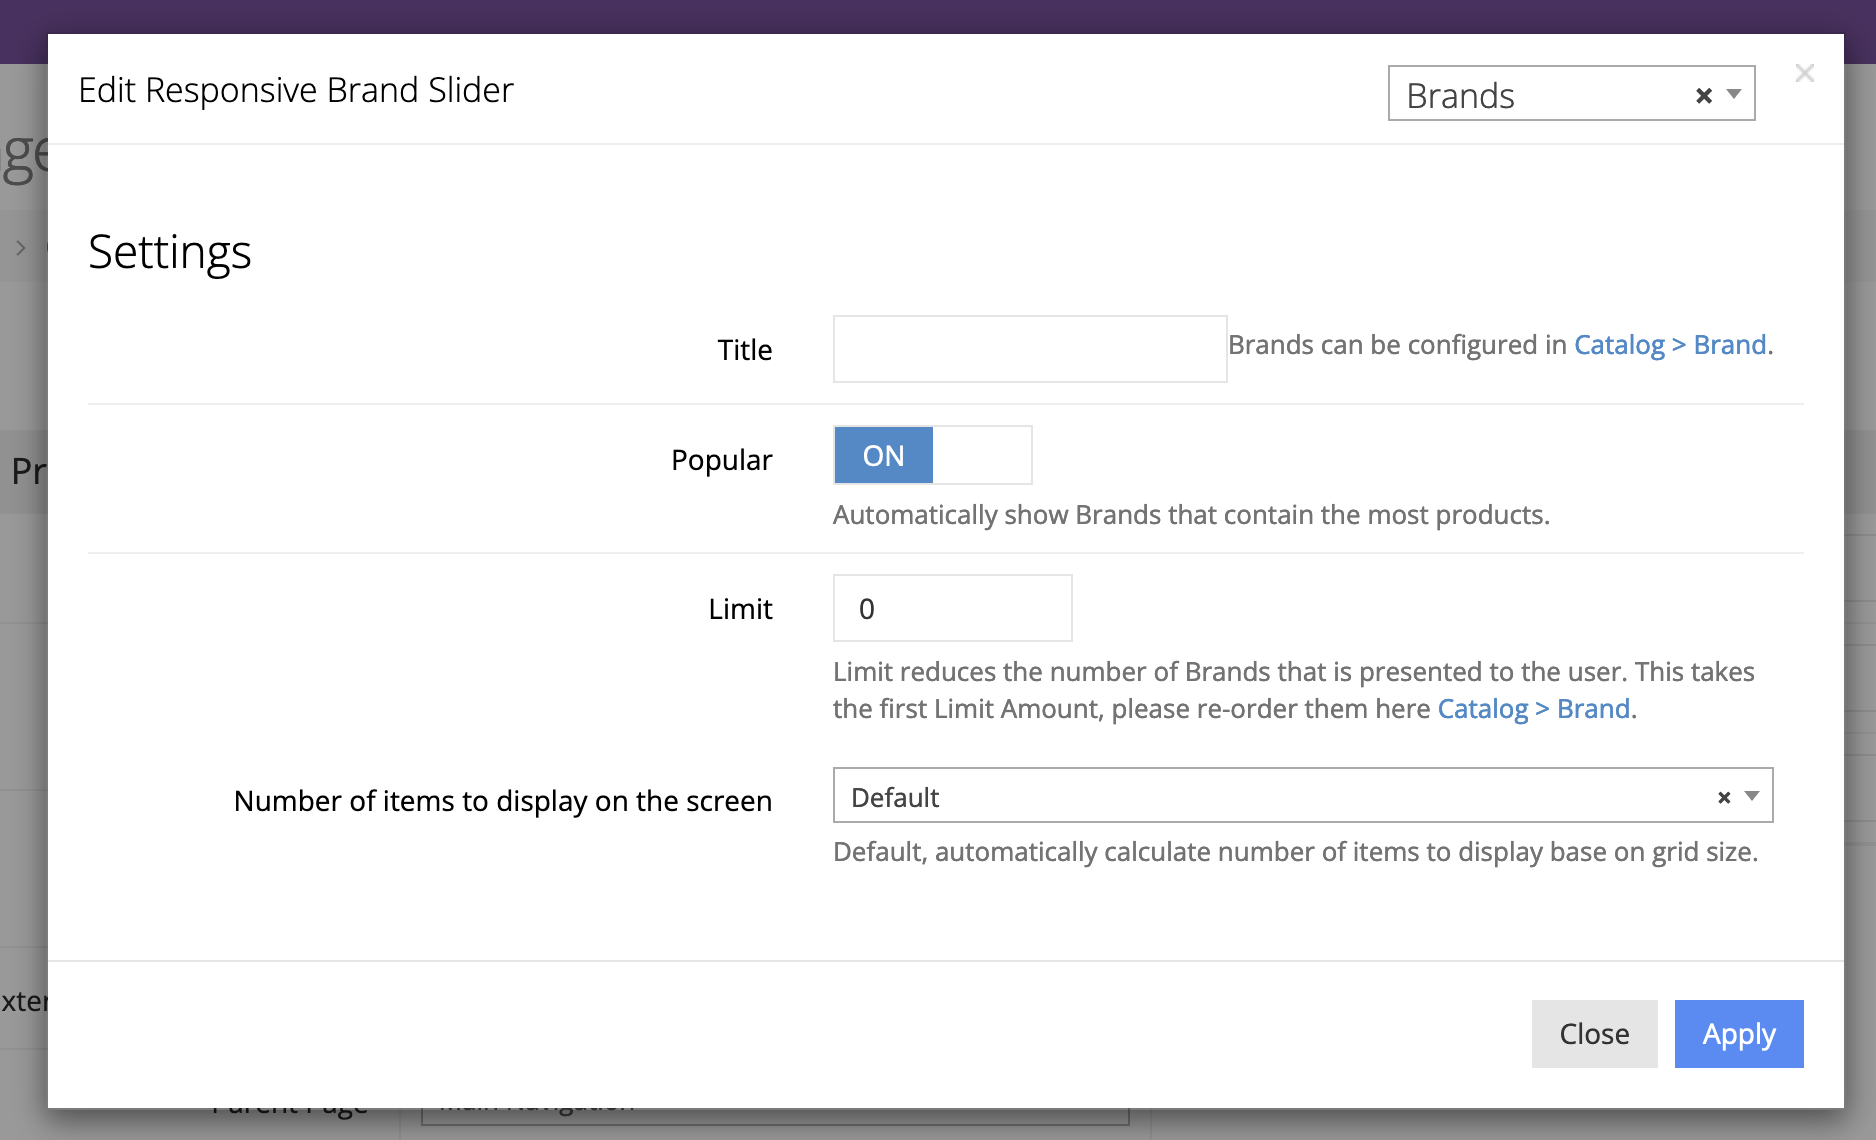
How to place a brands module onto a page
The brands module is a rotating carousel of links to each individual brand page. You can place it anywhere there is a responsive content grid as it will automatically adjust how many brands are being displayed in the module depending on the with on the device it’s being viewed on.
Follow these instructions
1) Navigate to anywhere there is an RCG
In this example, we’ve gone to Content Management > Default Pages > Home > Edit so we can place the brands module onto our homepage.
2) Create a content block where you’d like to place the brands module
For a review of understanding the RCG, click here. For review of how to use the RCG, click here.
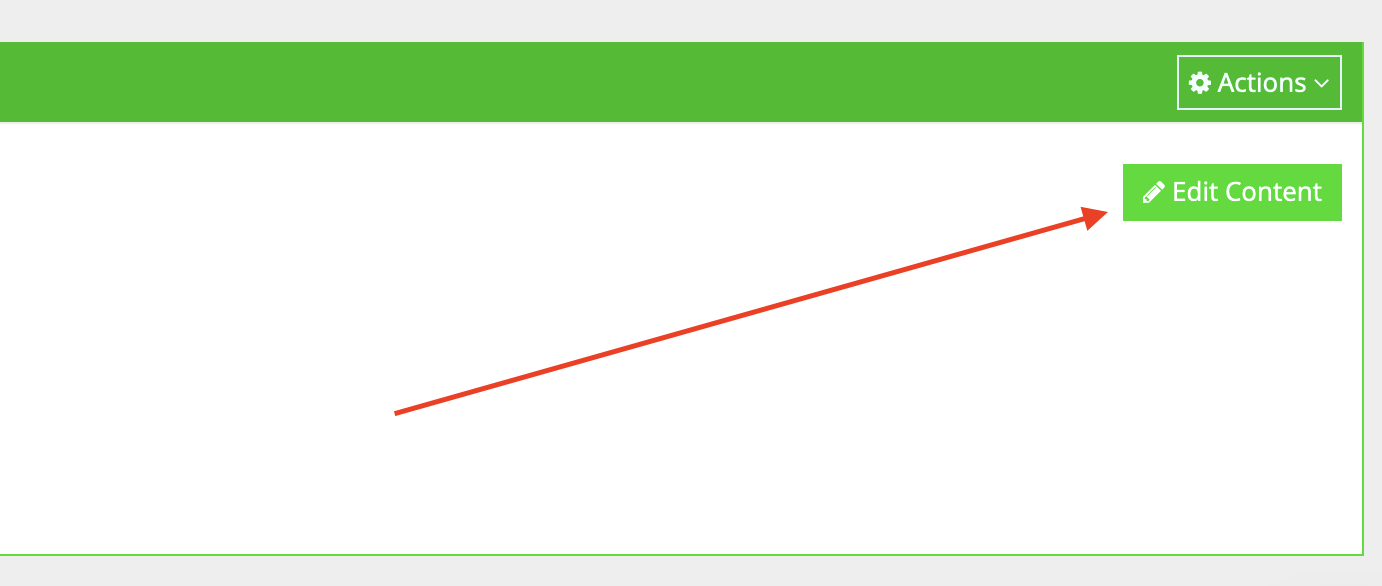
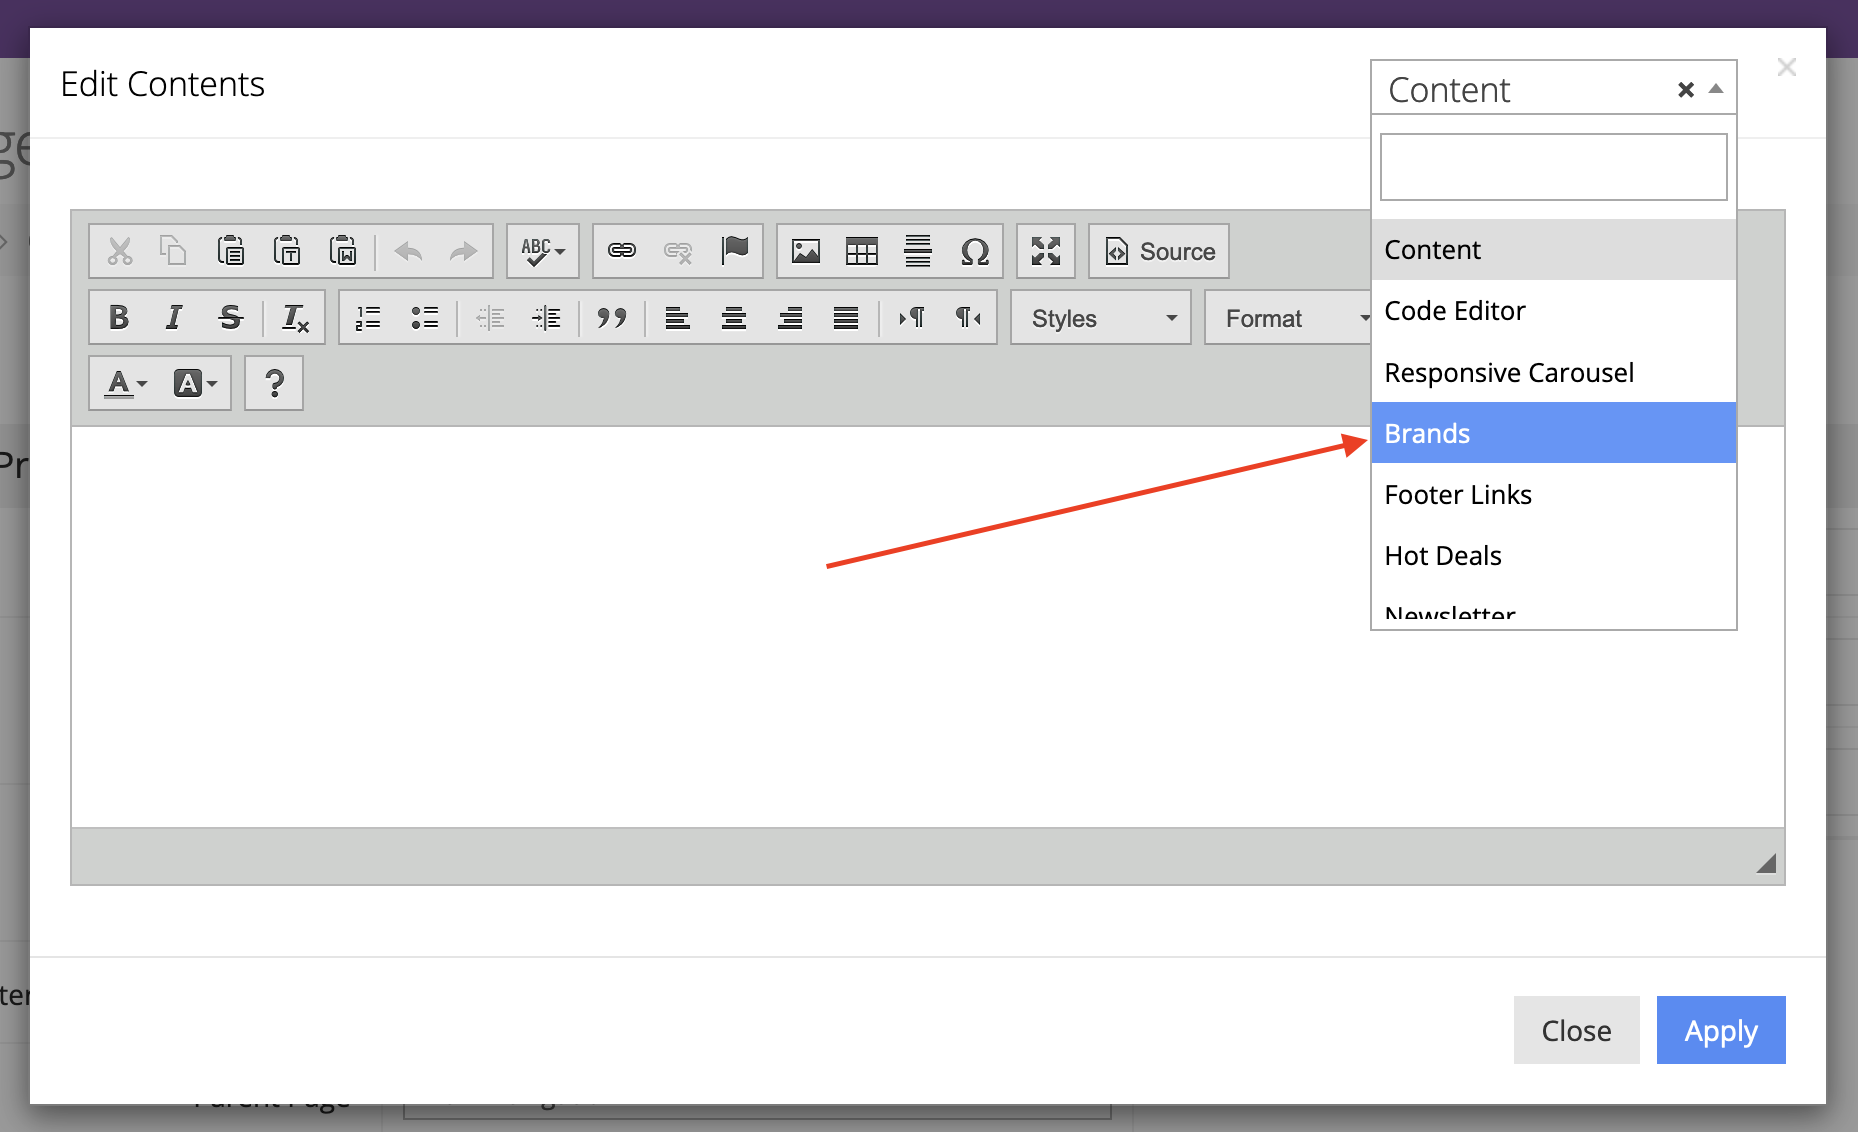
3) Click Edit Content of the block
4) Set or ensure the module is set to Brands
5) If setting it now, wait and click Apply of popup
6) Configure your settings