The Google API key is required for three features in the web store:
- Blog, if you choose to use Google’s Blogger service. (Blogger API)
- Store Locator (Maps JavaScript API, Geocoding API, and Places API)
- Google Address Auto Complete (Maps JavaScript API, Places API)
Each of these APIs requires the enabling of specific services to function correctly. Our recommendation is enable all applicable APIs and then configure your API key to use those APIs. This tutorial will cover how to achieve this.
Sign Up for Google Cloud Platform
To get signed up, you will need to visit the Google Cloud Platform (GCP) Console. You can use your existing Google account, if you have one. Once there, you will also be asked to set up your billing account. Once your billing account is set up, you can begin enabling the required APIs.
Enable APIs
As mentioned above, we recommend enabling all APIs that can be used in the web store. However, you may also only enable the APIs that you will use for now. For example, Google Address Auto Complete only requires Maps JavaScript API and the Places API.
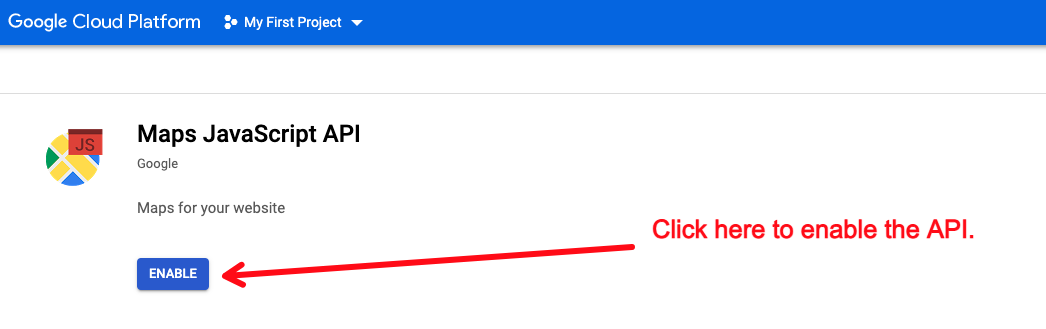
To enable APIs, just follow these direct links and click the Enable button.
- Blogger API (Blog)
- Geocoding API (Store Locator)
- Maps JavaScript API (Google Address Auto Complete, Store Locator)
- Places API (Google Address Auto Complete, Store Locator)
Once these APIs are enabled, you can create an API key that will be authorized to use these APIs.
Create Your API Key
To create your API key, go to Credentials, click + Create Credentials, and then click API key.
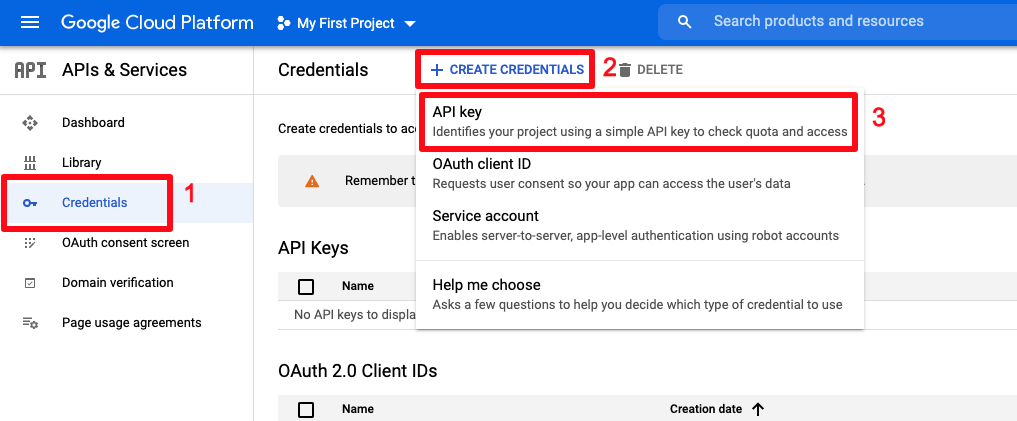
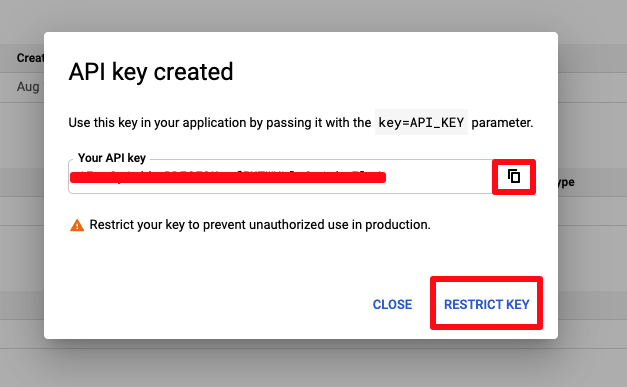
An API key will then be created. Copy your API key, and then click RESTRICT KEY.
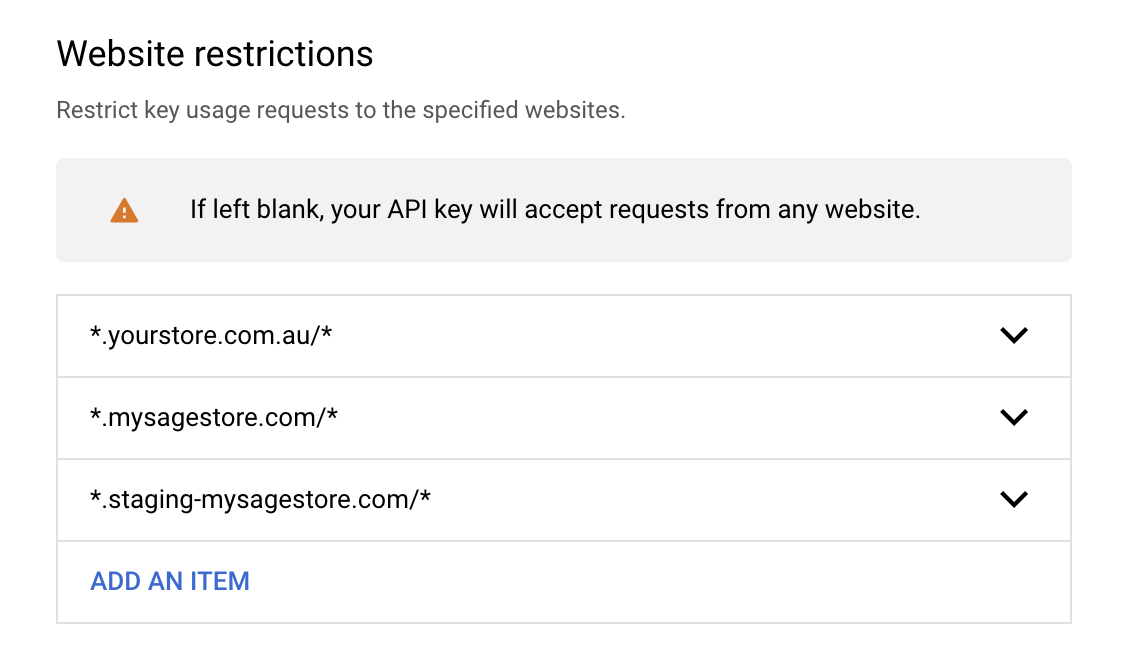
Website Restrictions
We recommend only allowing your API key to be used on specific websites. Please be sure to use * to include subdomains of your web store’s domain and also include our staging and production domains, like so:
API Restrictions
For added security, please also restrict your API to the aforementioned Google API services, like so:
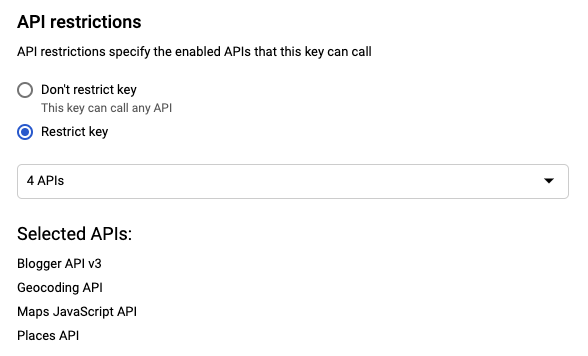
Finally, click Save to finish the configuration of your API key.
Install Your API Key
The final step is to go to your web store and paste your new API key into Google API Settings. Go to System > Site Settings and scroll down to the bottom of the page to locate this section.
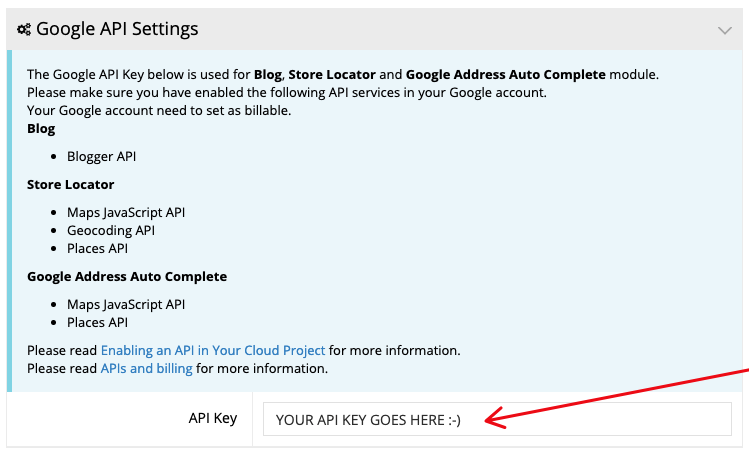
Once you paste your API key, go to the top of the page and click Apply.
Note that it could take a few hours for these settings to take effect. If after waiting for a bit you’re still not seeing the functionality in the web store, view your browser console to see if the Google APIs are returning any noteworthy errors.