- What is ERP Order Documents Synchronization?
- How to output your ERP Documents
- How it works
- Process
- Setting up S3 on AWS
- Setting up AWS S3cmd on Windows
- Configuring Windows Scheduler
- Enable Order Documents Synchronization
- Set Up ERP eCommerce
- Troubleshooting
What is ERP Order Documents Synchronization?
ERP Order Documents Synchronization provides a powerful ability for webstore users to view their invoices, using its own built-in invoice template. This template has minimal options for customization and so will not match the invoice template you designed for your ERP system.
With the Order Documents Synchronization module enabled, you can automatically attach copies of your own invoices, shipping notes, proof of delivery, T&Cs, or any other document of your choosing, to your customer’s orders. Now when your webstore users wish to view any sales order related documents, then can do so at the click of a button.
The files that you wish to make available to your ERP eCommerce webstore users are synchronized from your server(s) to your Amazon (AWS) S3 (cloud storage service) account. More information about AWS S3 can be found here.
How to output your ERP Documents
Various tools exist that automate the output of your ERP documents as PDF copies. For Microsoft Dynamics 365 Business Central, consider Spindle or DocLink. For Sage 300, consider Spindle or PrintBoss, for Sage X3, consider Spindle, Version1, or DocLink. With your documents automatically saving PDF copies to a local drive on your network, the processes below describe how the documents are copied securely to the web to make them available to your customer through your commercebuild webstore.
You can make ANY sales order related documents available for your webstore user to download. This might include an order acknowledgement, Proof of Delivery(s), Sales Invoice(s), customer’s PO, plus documents relating to the items on the sale order (specifications, certificate of conformity, how-to etc.).
There are 2 important factors:
- Save the documents to a folder location that includes the customer account code and the sales order number as folder names. For example, let’s say the root of the folders is called “ERPDocs” (and could be a local or network folder), under which customer ABC123, and order number SO12345, would have a folder path of \\ERPDocs\ABC123\SO12345\
- In folder \\ERPDocs\ABC123\SO12345\, save your documents, ensuring no spaces or special punctuation characters (a hyphen is ok) – something like this e.g.
\\ERPDocs\ABC123\SO12345\Order-Acknowledgement-SO12345.pdf
\\ERPDocs\ABC123\SO12345\Purchase-Order.pdf
\\ERPDocs\ABC123\SO12345\Shipment-SHP3337463.pdf
\\ERPDocs\ABC123\SO12345\invoice-INV98765432.pdf
NOTE: there is no requirement for the document name to contain any specific naming convention, other than no spaces or special characters
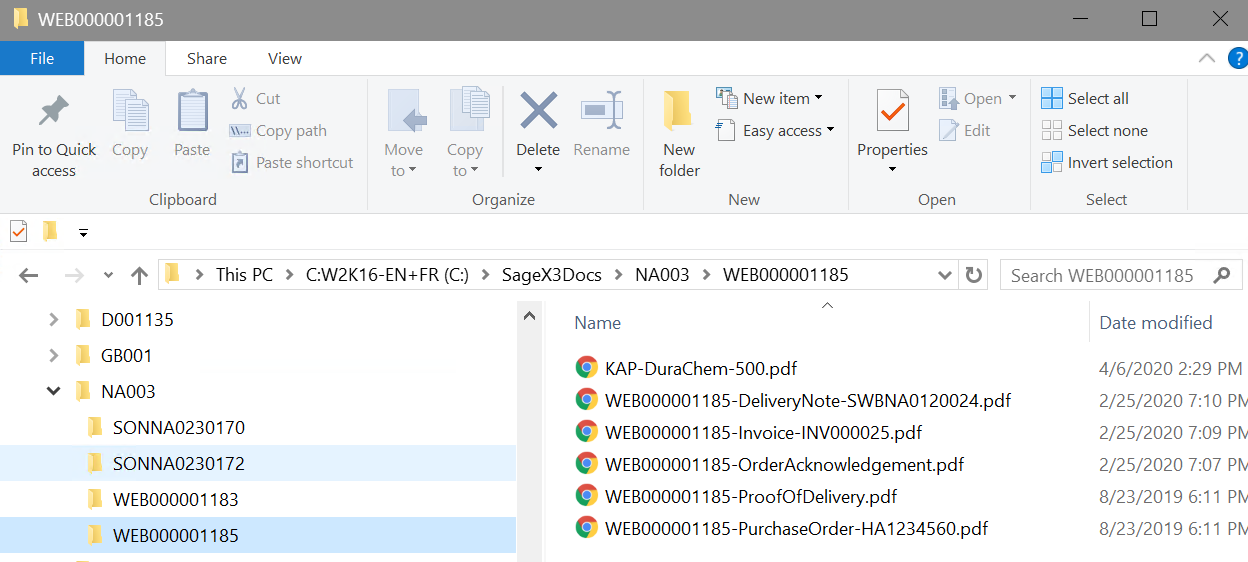
What you will see on your server:
The screenshot below is an example showing multiple customers (D001135, GB001, NA003) and the orders for customer NA003 (SONNA0230170, SONNA0230172, WEB000001183, WEB000001185), and the documents for order WEB000001185:
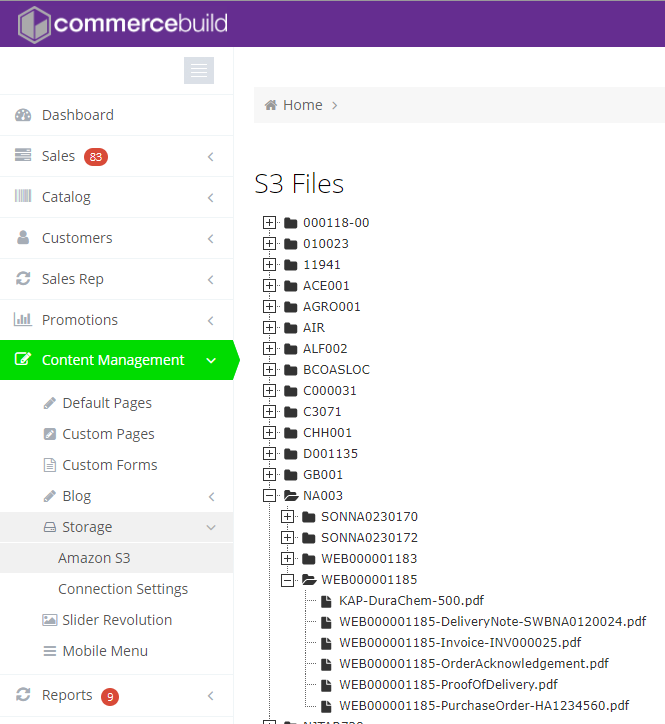
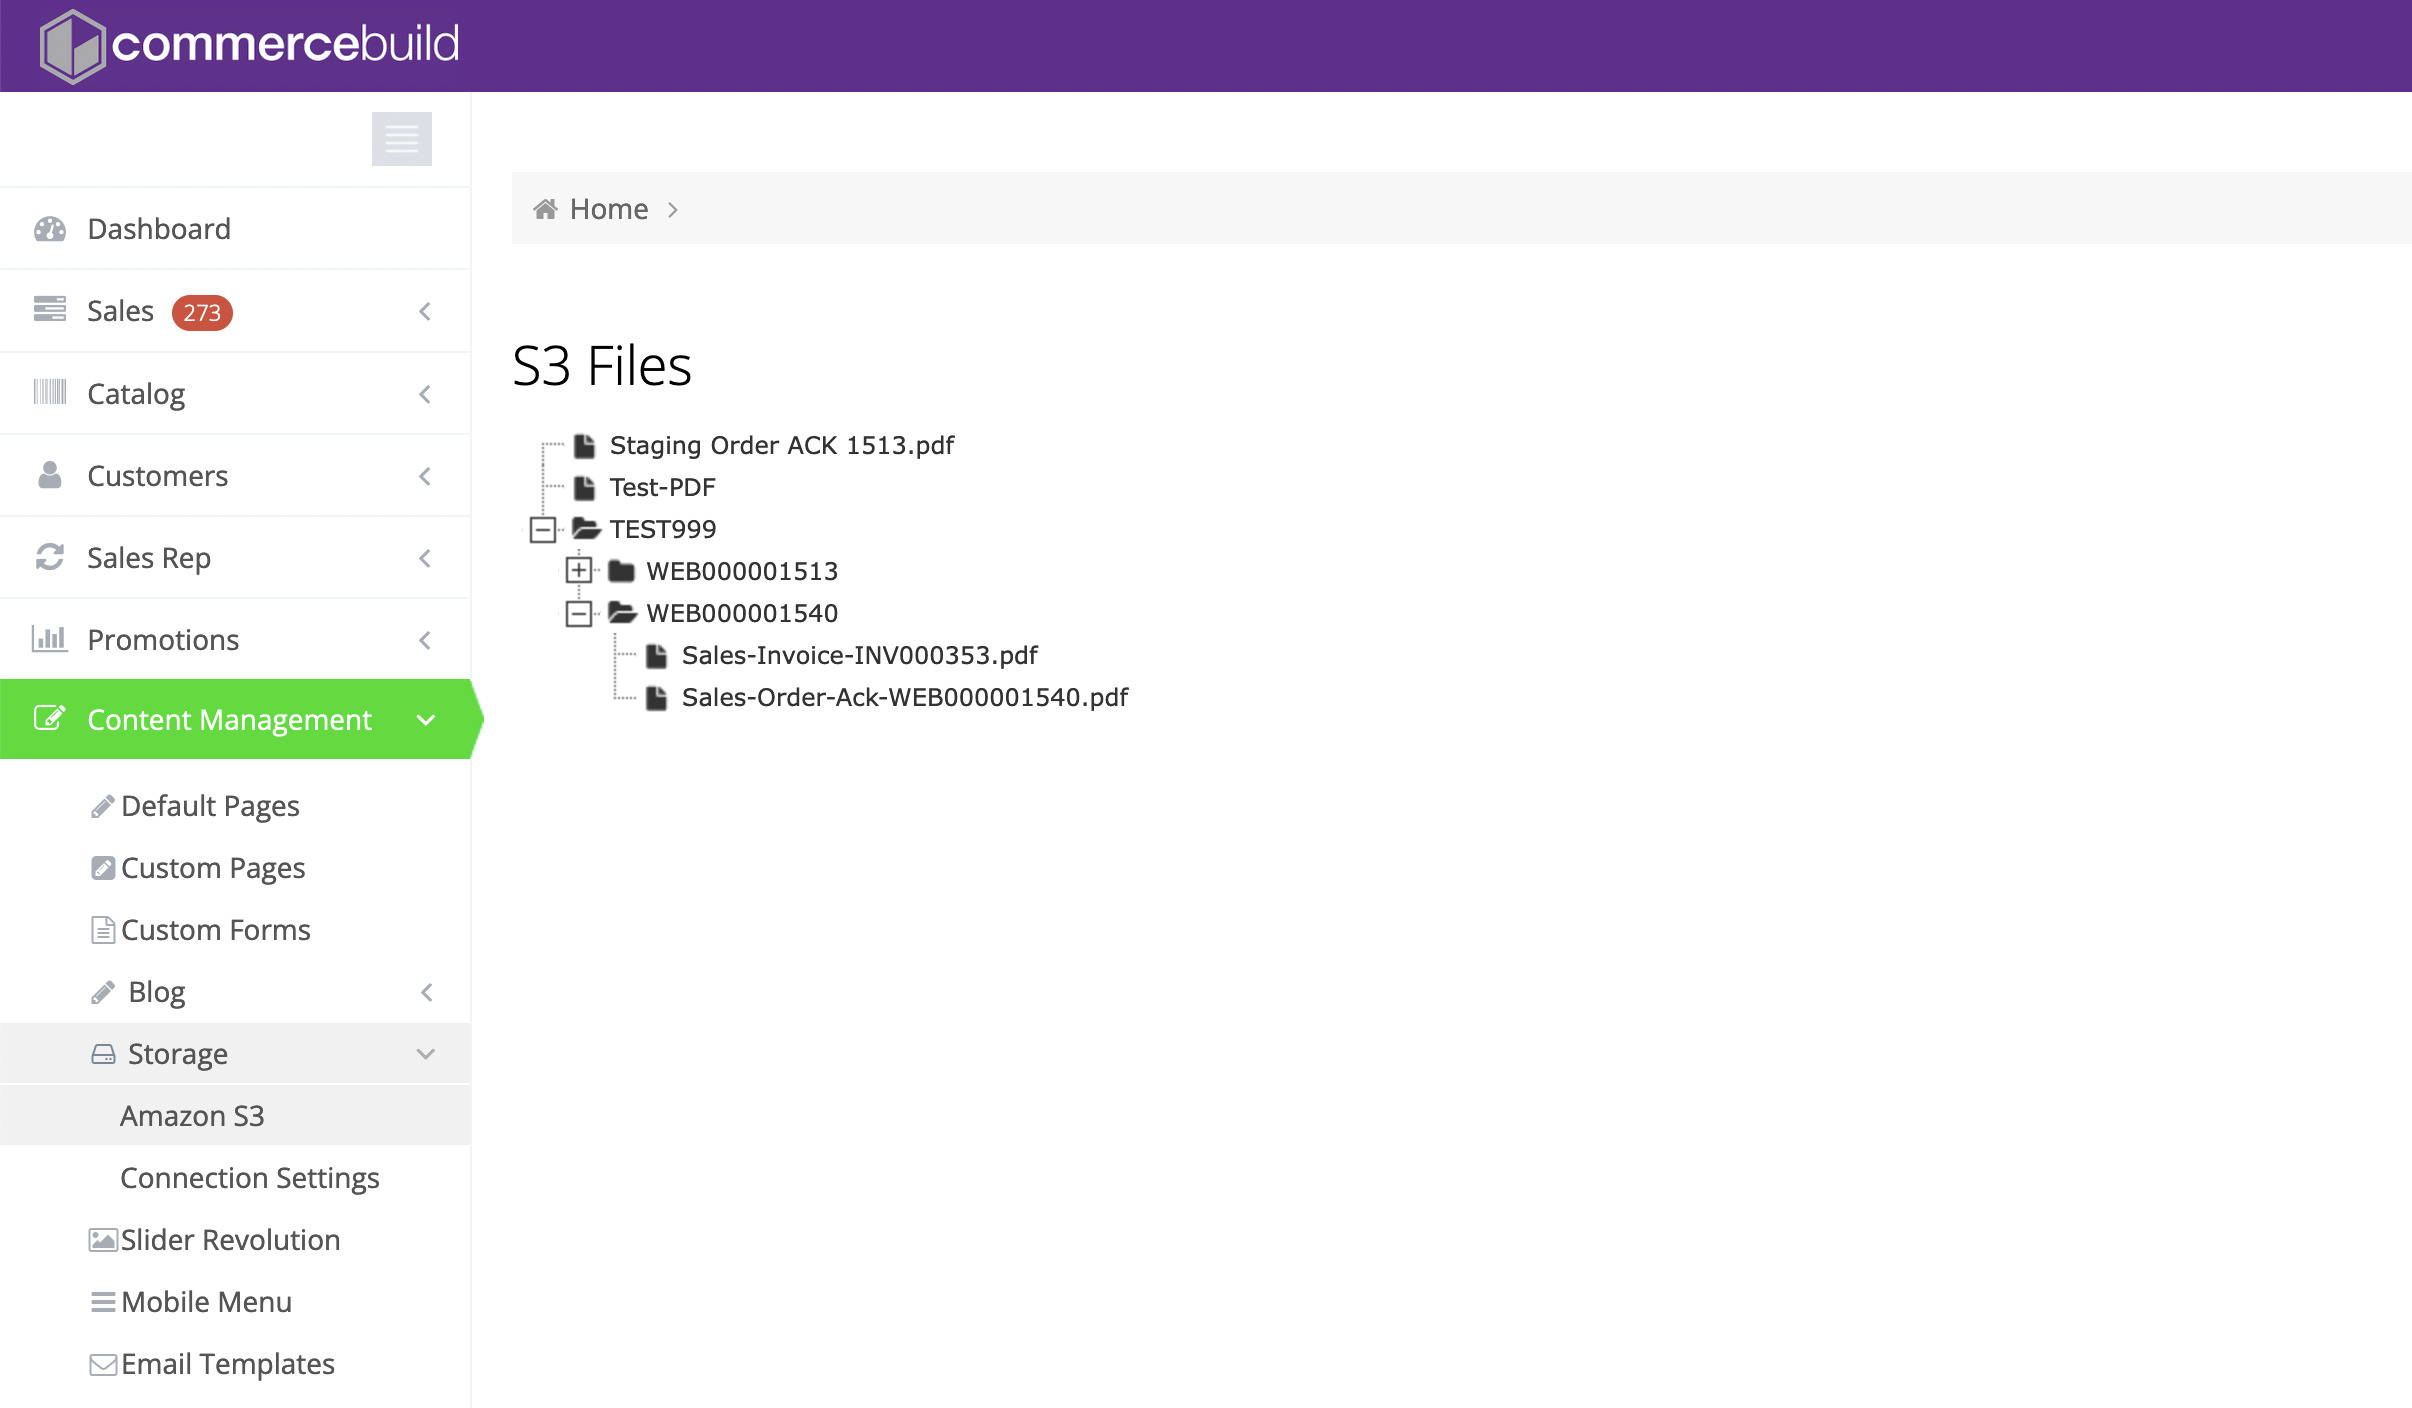
What you will see in Amazon S3
The screenshot below shows the view of the documents after they have been synchronized with Amazon S3:
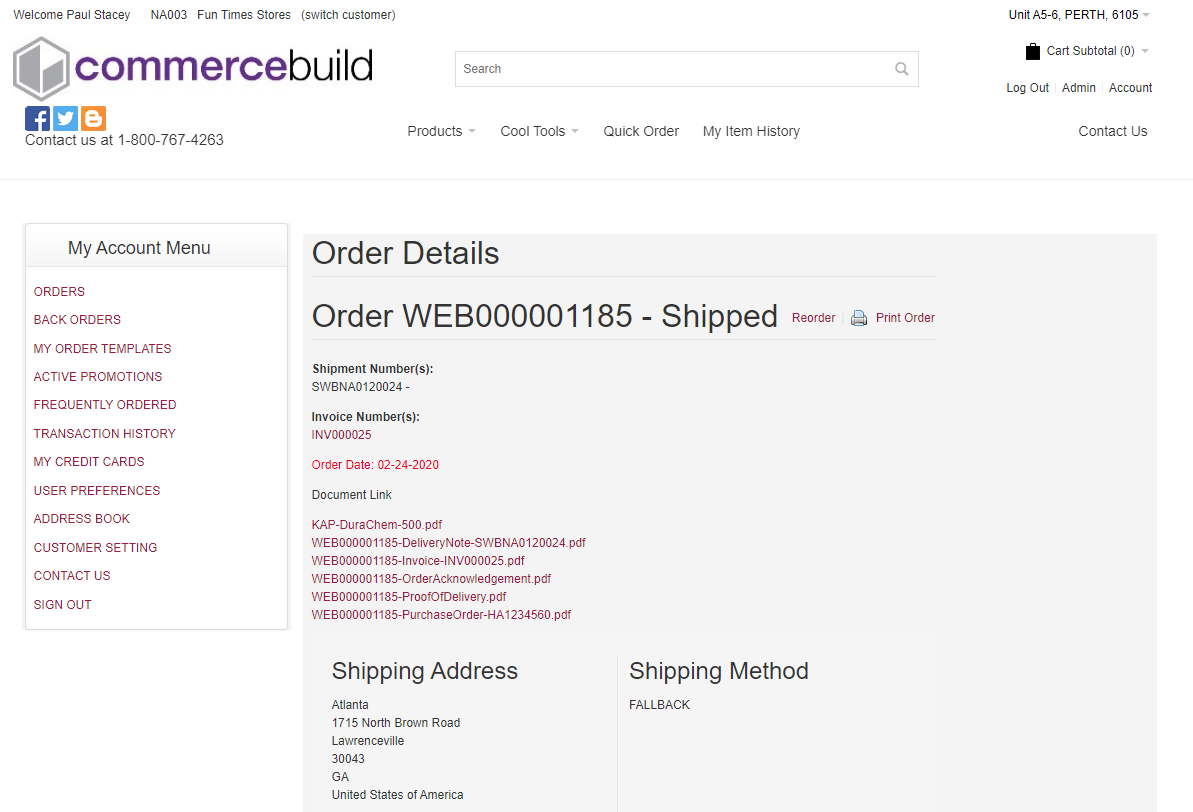
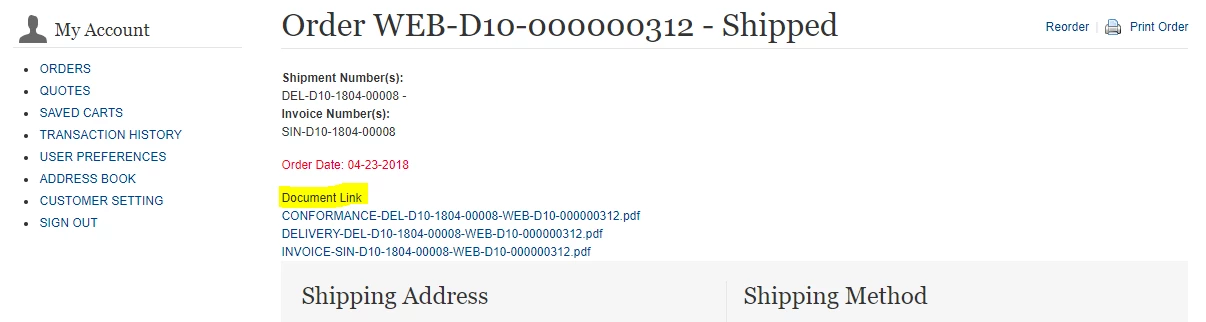
What the webstore user will see
The screenshot below shows the view of the documents for the webstore user when viewing order WEB000001185
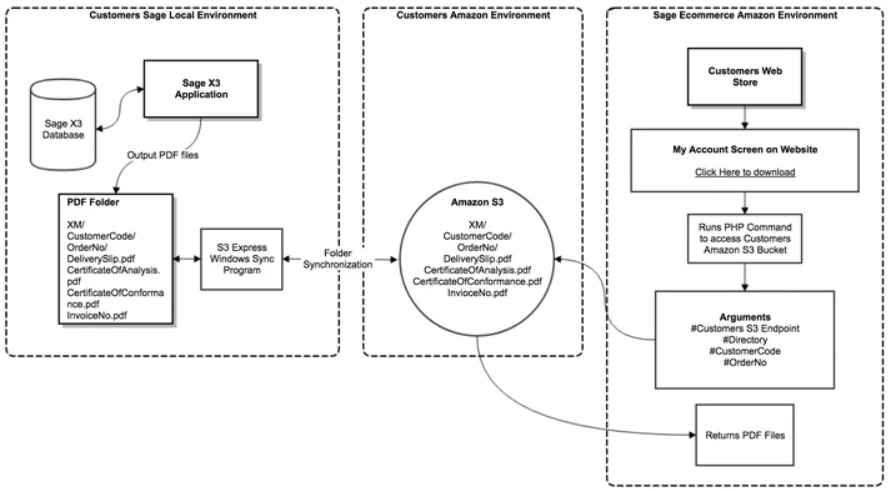
How it Works
Using AWS S3 software (“S3cmd”) installed on your server(s), your appropriately named files and documents are automatically synchronized to a specified S3 bucket. The following structure is recommended: Root / Customer Code / Order Number / Document
When a webstore user views a sales order in your ERP, a request is made to the S3 storage location for any associated files available for downloading.
Here is detailed schema:
Prerequisites
- An AWS S3 account
- An AWS S3 bucket and user have been created
- The AWS “S3cmd” client is installed on your server (to synchronize your files and documents)
- A scheduler is configured to synchronize your files and documents at regular intervals
Process
Other documentation here: https://tecadmin.net/setup-s3cmd-in-windows/
Setting up S3 on AWS
Creating an IAM User
- Log in to AWS and navigate to Services → IAM, then Users and Add User.
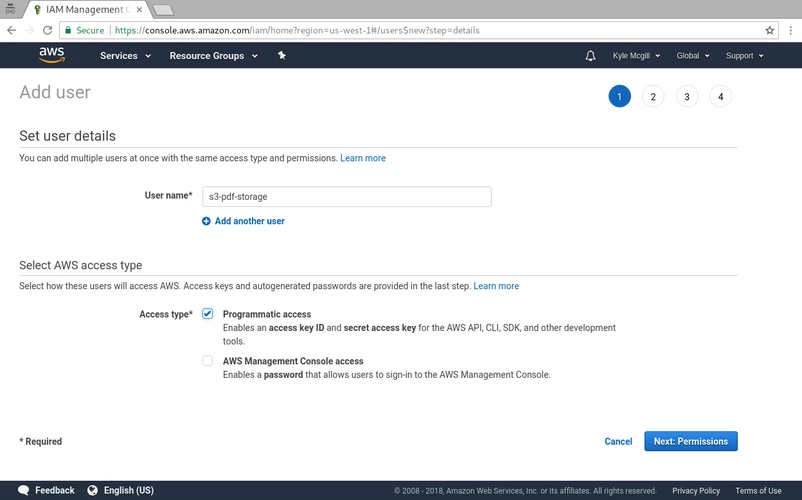
2. Add a Username, and Enable “Programmatic access”.
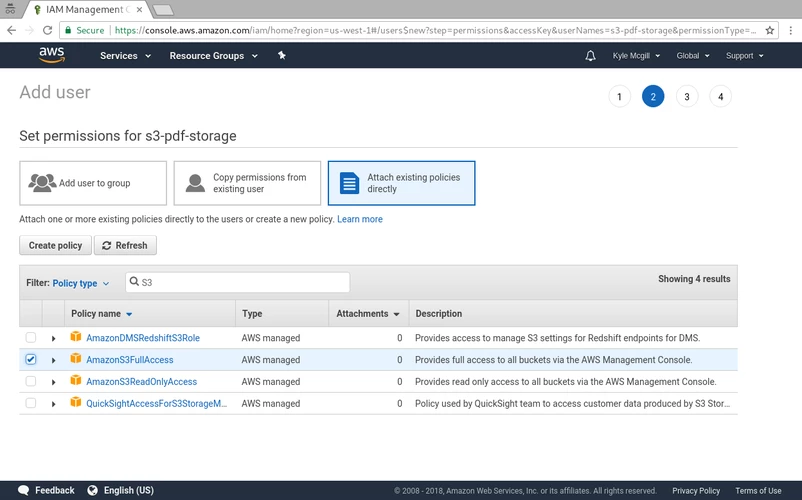
3. On the next screen, add AmazonS3FullAccess to the user and continue.
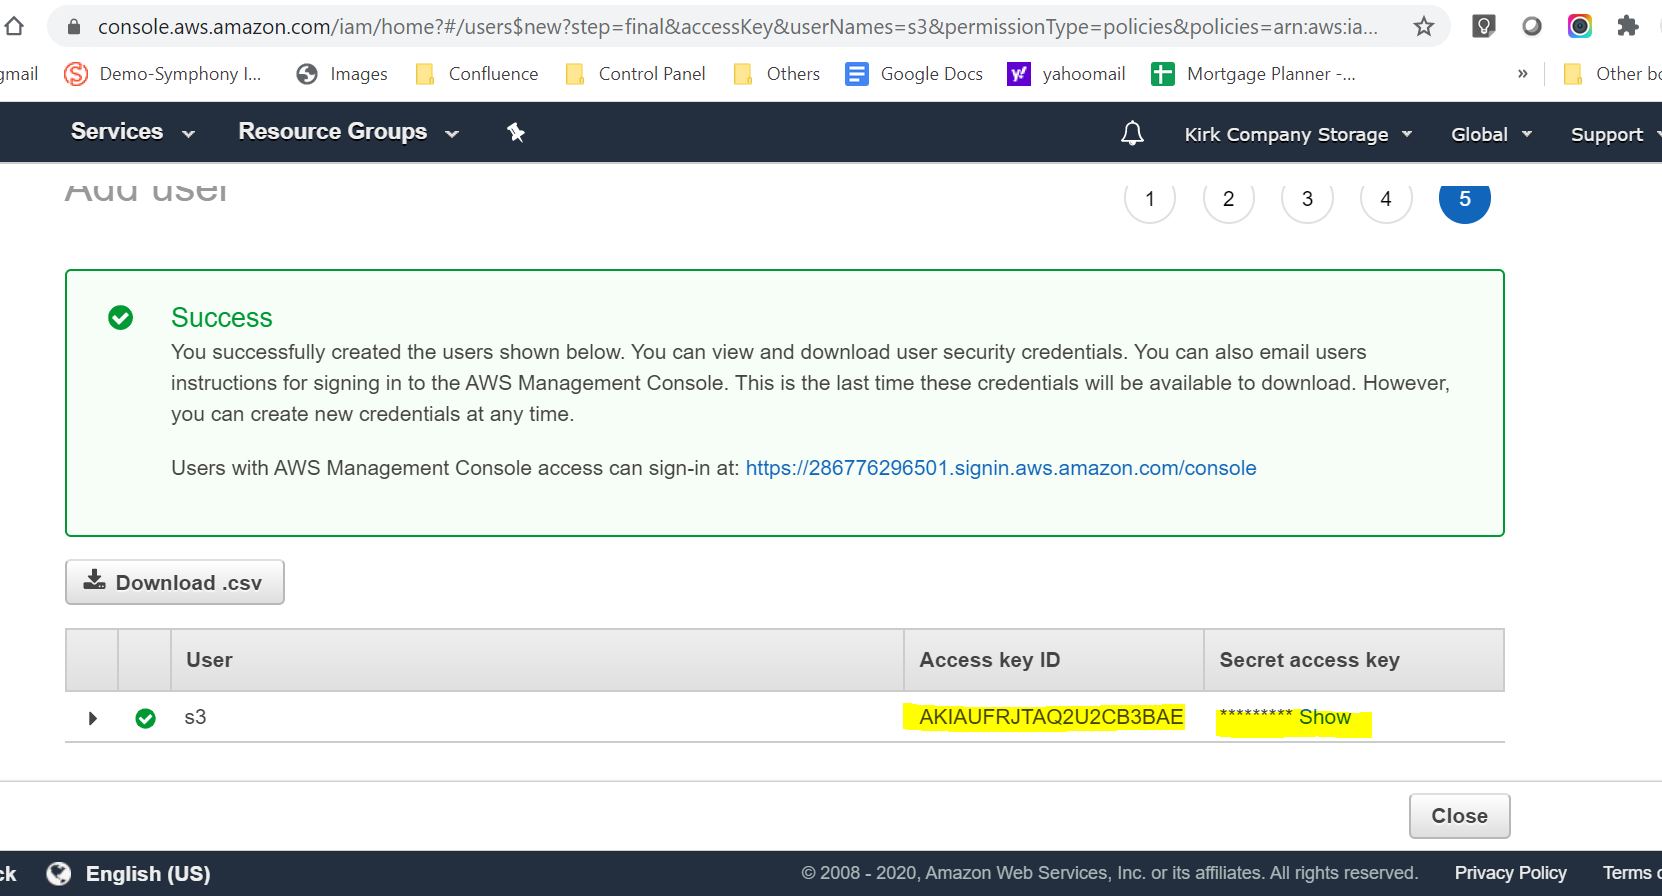
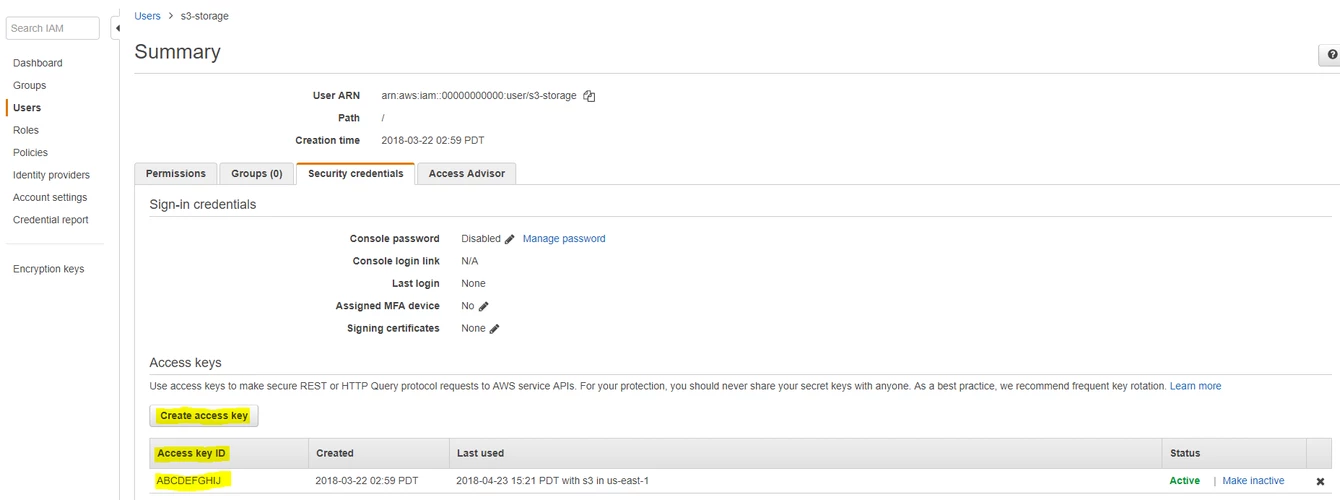
5. On the next page, click finish. You will get an Access Key ID and Secret Key. Please save it as it cannot be retrieved after (It will only display once), we will be using them further below.
Creating an AWS S3 Bucket
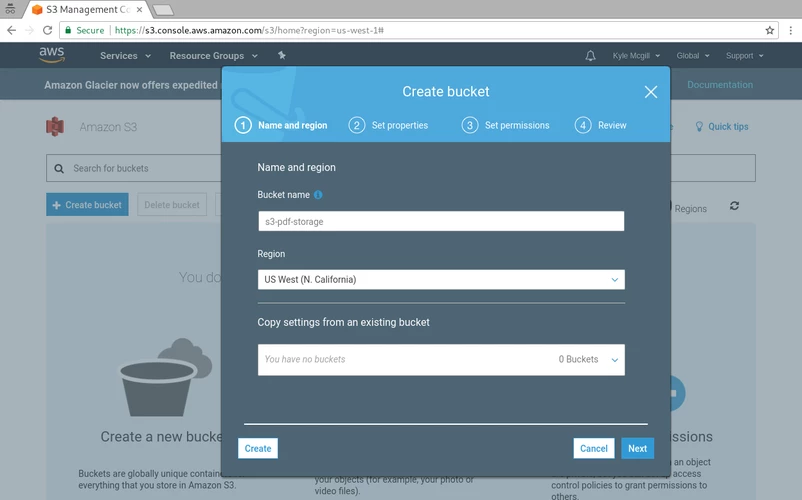
1.- Navigate to Services → S3 and “Create bucket”.
2.- Give your bucket a unique name and continue.
Setting up AWS S3cmd on Windows
Install Python
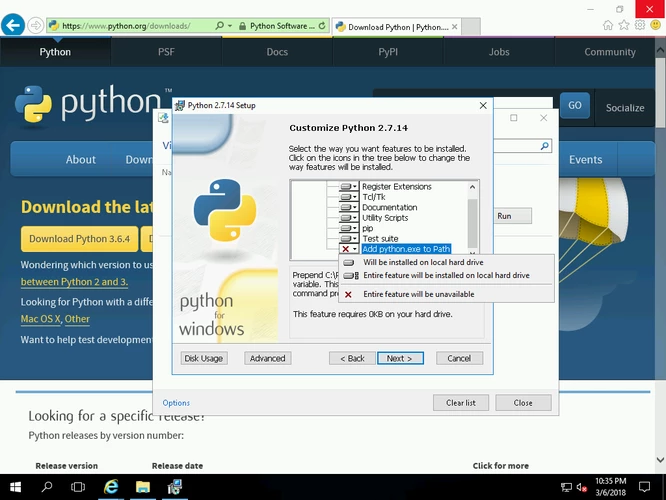
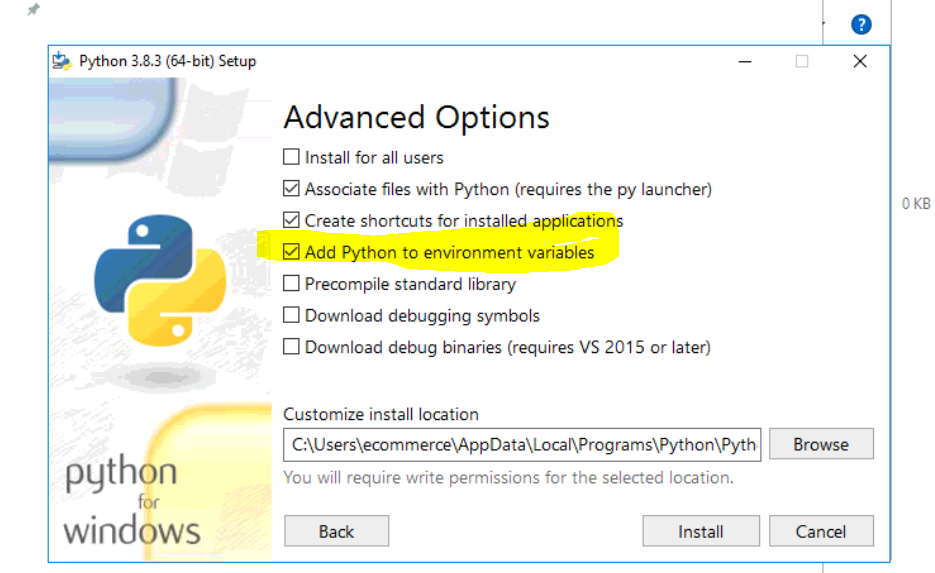
- Download and install python 2.4 or higher version 3.8 is recommended (do not use Python 3.9) from python official site and install it. https://www.python.org/downloads/
- Install Python in C:\Python (to make the exe file accessible). You must add python to the environment variables.
After the installation,
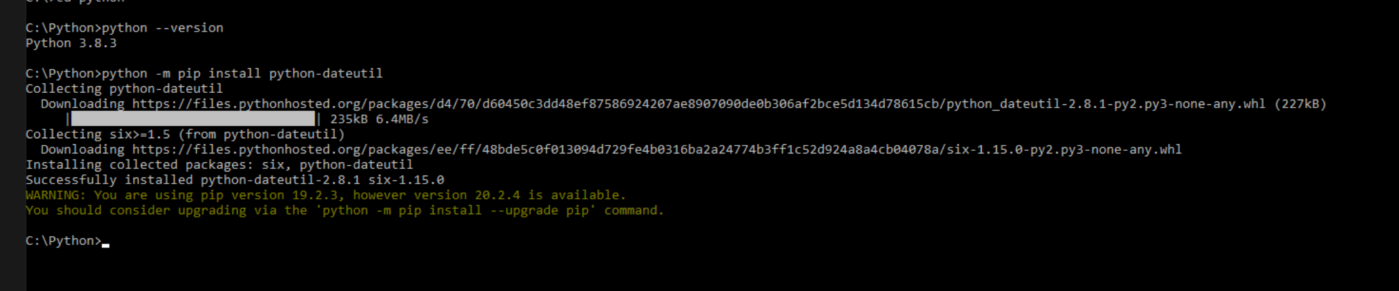
- Open the command prompt and verify the python version. You will need to the folder where Python was installed
Type: C:\Python\python.exe –version at the CMD prompt
accordingly)
Install GPG for Windows
- Gpg4win (GNU Privacy Guard for Windows) is Free Software to install. Use the following link to download and install it: http://www.gpg4win.org/download.html (By default this will be installed on C:\Program Files (x86)\Gpg4win\..\GnuPG\bin\gpg.EXE, you will need the path to configure s3cmd )
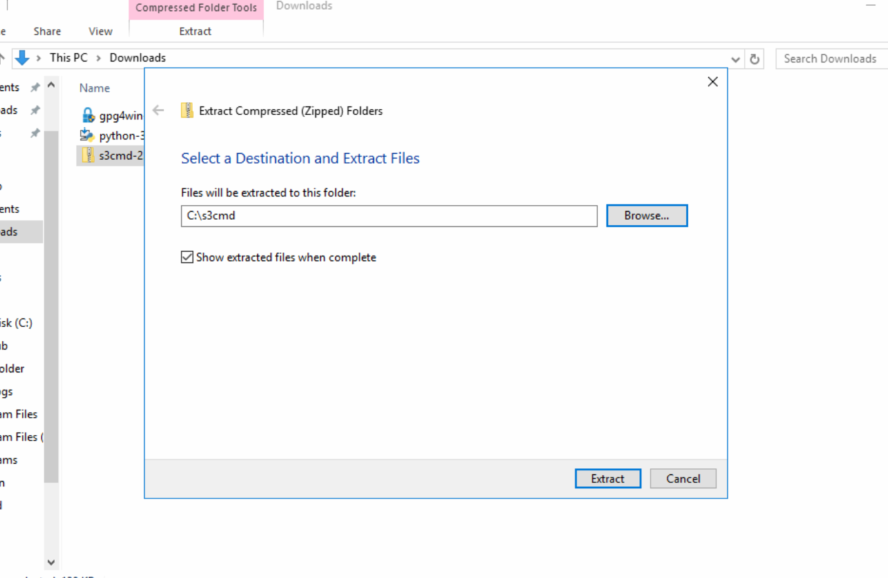
Install S3cmd
- Download latest s3cmd source code from s3cmd official page
- Create a folder in C:\ and named it s3cmd. Then go to the downloaded zipped folder and “extract all” in the folder that was just created (C:\s3cmd).
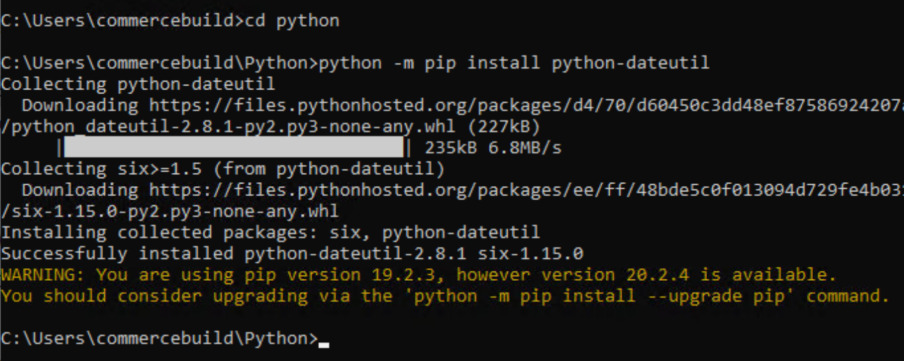
Configuring S3cmd
After extracting the source code, use the following command to set up the AWS S3 environment. Note: It will ask for your AWS S3 account information (AccessKey and SecretKey, the path to GPG command) per below:
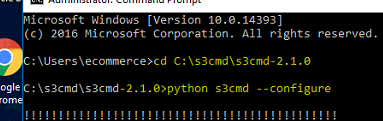
On the command prompt run the following command from the location where you extracted s3cmd :
cd C:\s3cmd\s3cmd-2.0.1 python s3cmd –configure
(another example screenshot from LIG set up)
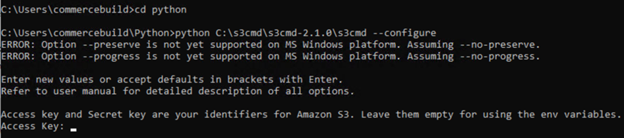
You will be presented with a few questions.
Enter new values or accept defaults in brackets with Enter.
Refer to user manual for detailed description of all options.

Access key and Secret key are your identifiers for Amazon S3. Leave them empty for using the env variables.
Access Key []: XXXXXX
Secret Key []: XXXXXXYYYYYZZZZZ
Default Region [US]: US
Use "s3.amazonaws.com" for S3 Endpoint and not modify it to the target Amazon S3.
S3 Endpoint [s3.amazonaws.com]:
Use "%(bucket)s.s3.amazonaws.com" to the target Amazon S3. "%(bucket)s" and "%(location)s" vars can be used
if the target S3 system supports dns based buckets.
DNS-style bucket+hostname:port template for accessing a bucket [%(bucket)s.s3.amazonaws.com]:
Encryption password is used to protect your files from reading
by unauthorized persons while in transfer to S3
Encryption password []: supersecurepassword
Path to GPG program []: C:\Program Files (x86)\Gpg4win\..\GnuPG\bin\gpg.exe
When using secure HTTPS protocol all communication with Amazon S3
servers is protected from 3rd party eavesdropping. This method is
slower than plain HTTP, and can only be proxied with Python 2.7 or newer
Use HTTPS protocol [Yes]:
On some networks all internet access must go through a HTTP proxy.
Try setting it here if you can't connect to S3 directly
HTTP Proxy server name:
New settings:
 Access Key: XXXXX
 Secret Key: XXXXXYYYYYZZZZZZ
 Default Region: US
 S3 Endpoint:
 DNS-style bucket+hostname:port template for accessing a bucket: s3-storage
 Encryption password: supersecurepassword
 Path to GPG program: C:\Program Files (x86)\GnuPG\bin\gpg.exe
 Use HTTPS protocol: True
 HTTP Proxy server name:
 HTTP Proxy server port: 0
Test access with supplied credentials? [Y/n] Y
Verify AWS S3cmd
To verify s3cmd configuration use the following command in Command Prompt. the successful result should list the buckets created in your configured AWS S3 account.
cd C:\s3cmd\s3cmd python s3cmd ls
Result: 2018-03-06 22:59
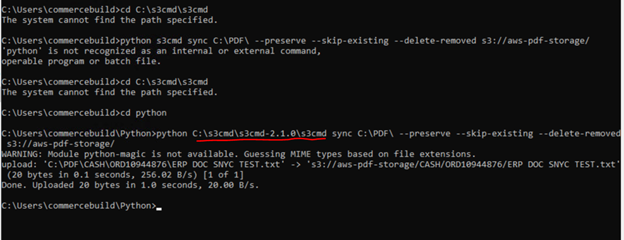
Initial Sync for Local files to AWS S3
Initially, sync the folder for the first pass with the command prompt, especially if we have a lot of initial data. Here, we are assuming that C:\PDF\ contains all of our PDF’s and the S3 Bucket s3-storage, these will need to be replaced as with the folder where clients will store their data and with the bucket name.
cd C:\s3cmd\s3cmd

python s3cmd

sync C:\PDF\ --preserve --skip-existing --delete-removed

s3://s3-storage/
(another example from LIG)
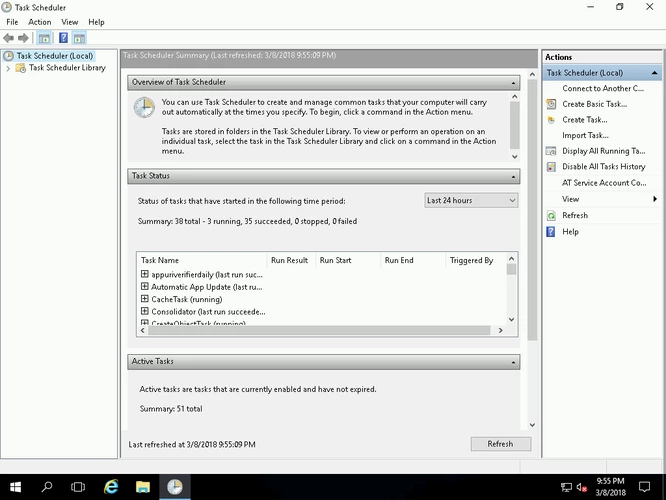
Configuring Windows Scheduler (need full admin rights)
- Open Task Scheduler
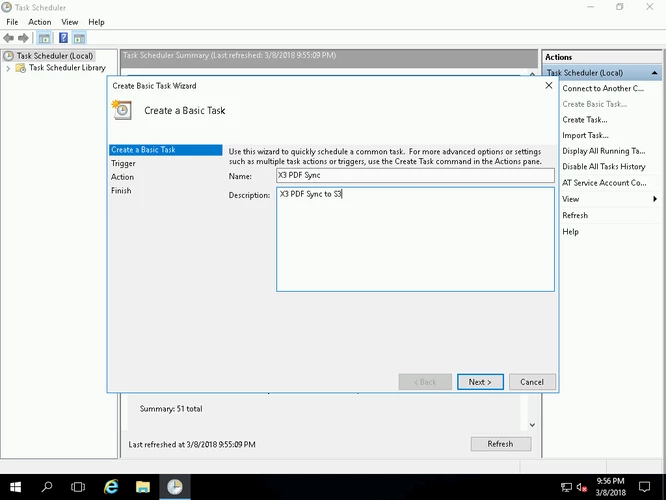
2. Create a New Basis Task and give the Task a Name and a Description.
3. Select when the Computer Starts.

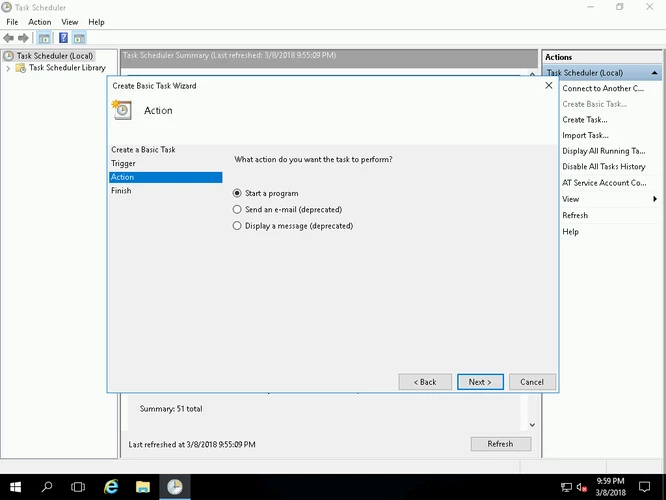
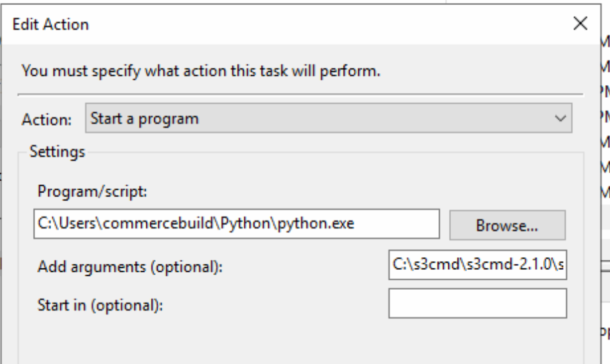
4. Start a Program.
5. Enter into the Program/Script text area the following: C:\Python27\python.exe
Start in: C:\s3cmd\s3cmd
6. Enter into the “Add Arguments” the following: s3cmd sync C:\PDF\ --preserve --skip-existing --delete-removed
7. Replacing the above with what we used above.

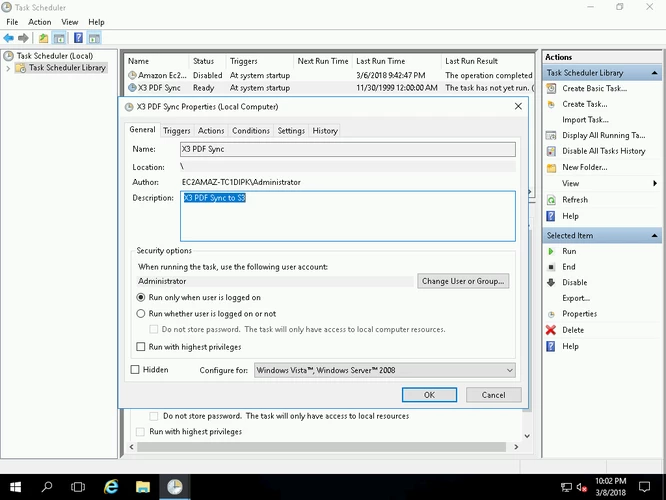
8. Finish up the Basic Task Wizard and proceed to right-click on the newly created task and select Properties.
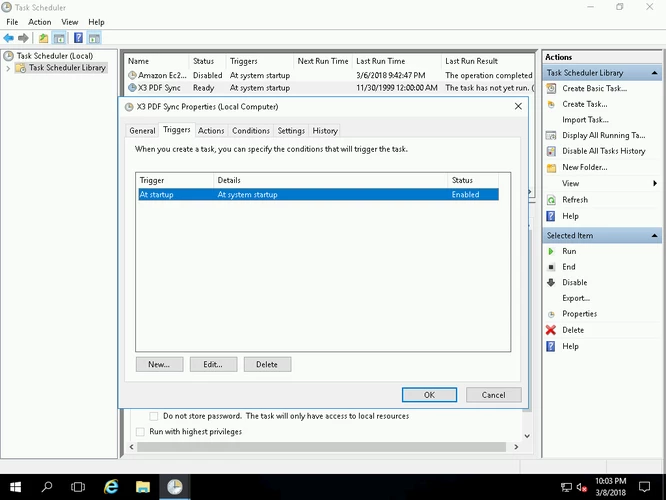
9. Navigate to Triggers and edit the “At startup” task.
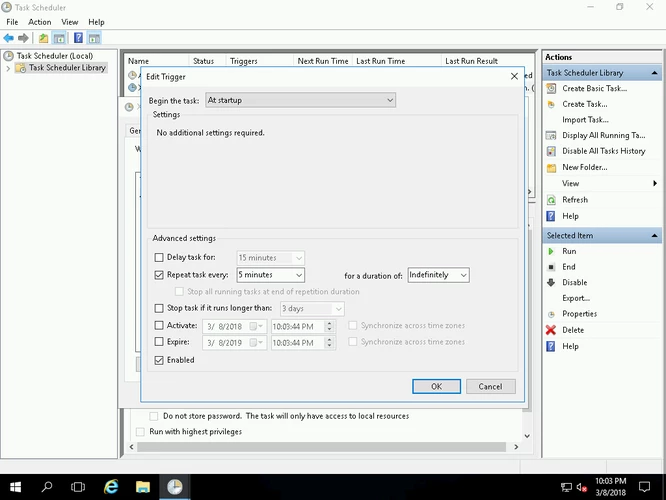
10. Check “Repeat task every” and select an occurrence you wish to use, this is how often we will sync the folder with S3, this depends on how often you have generated documents into the designated folder. Change “for a duration of” from 1 Day to “Indefinitely”.
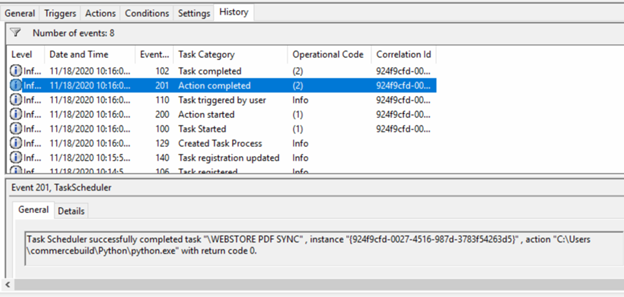
(NOTE: you will see a return code 0 if the task is running successfully)
Set Up ERP Order Documents Synchronization
Once the feature is enabled, update S3 Connection Settings.
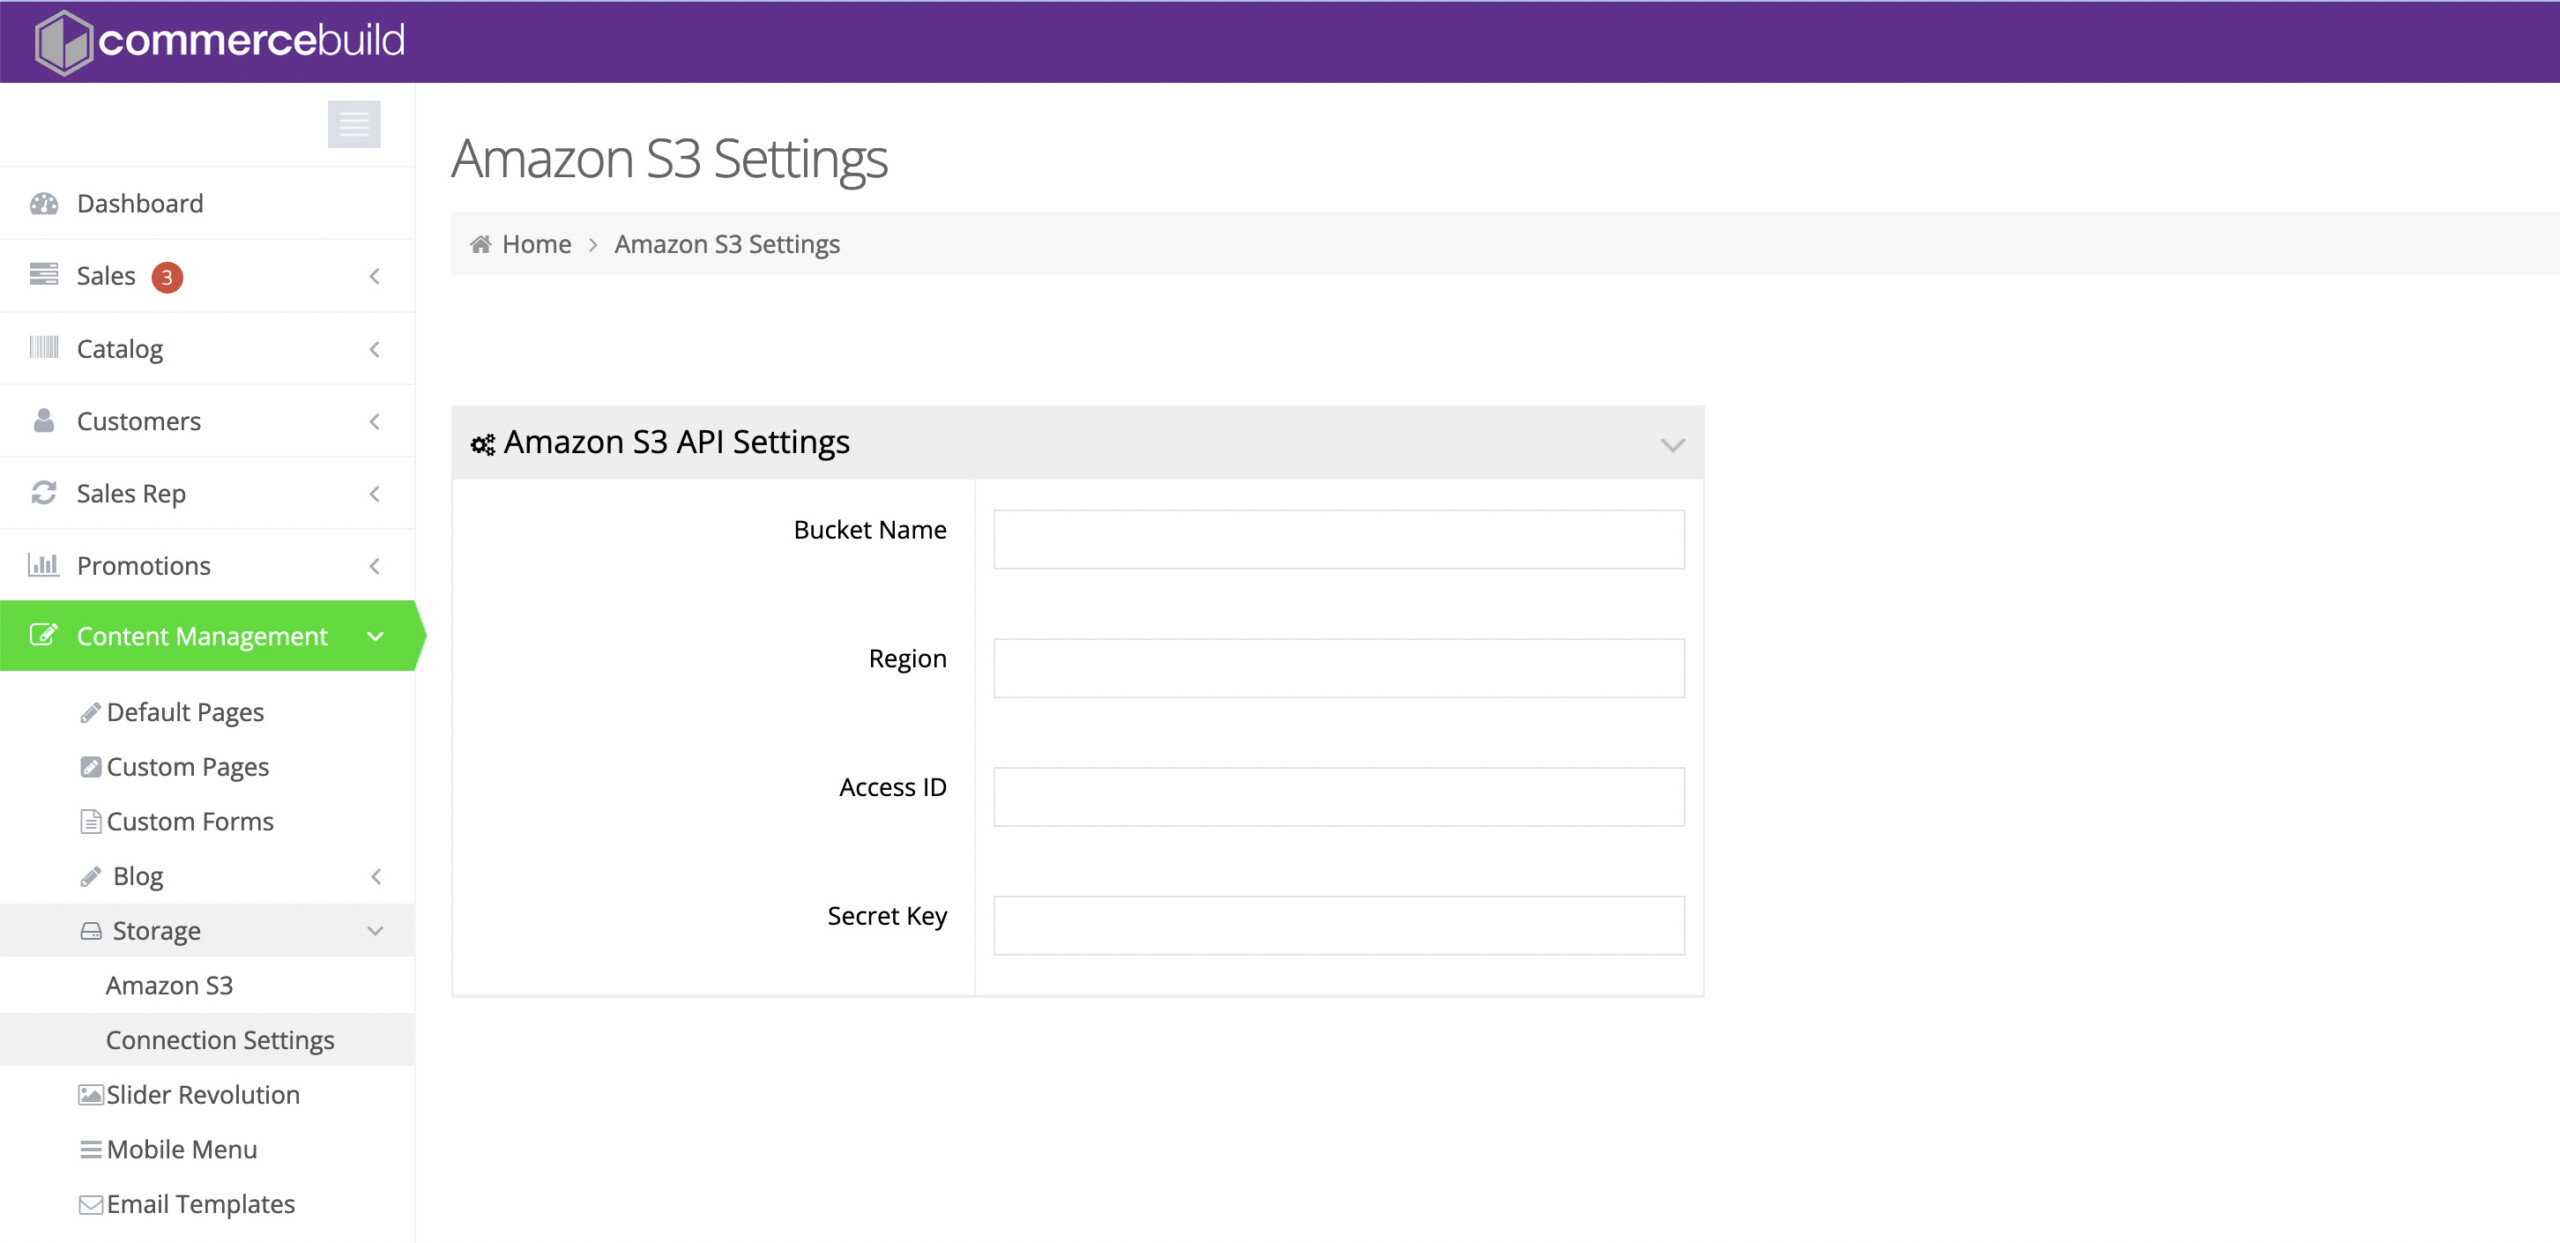
If you don’t remember, the Bucket Name can be found here.
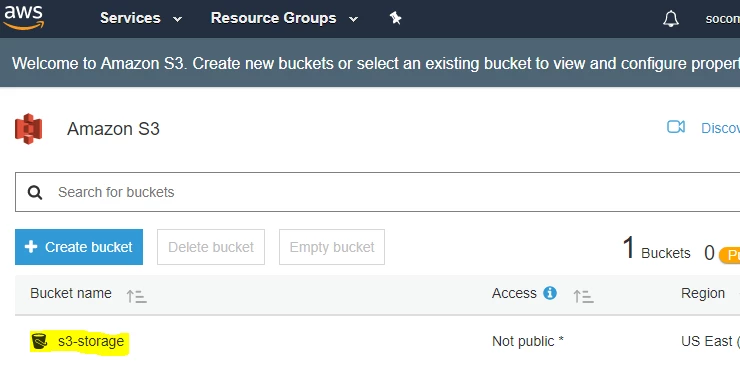
The easiest way to see the Region code is the URL.
![]()
You can create or get the Access ID and Secret Key from Amazon IAM Management Console.
To check the connection is established successfully, go to Content Management → Storage → Amazon S3 to see the list of Amazon S3 files.
This should be the same as what you can see in your Amazon bucket.
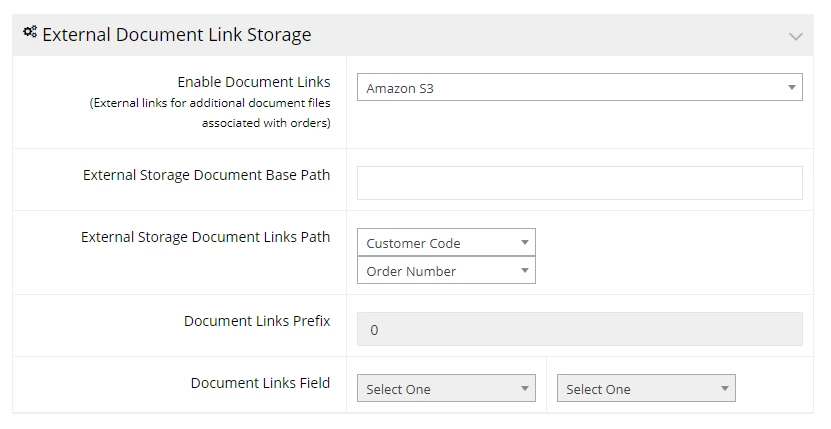
Next, you need to set up the External Document Link Storage from System → Order Settings.
And determine what the directory structure looks like.
It is not necessary to populate the External Storage Document Base Path.
Test
ERP Order Documents Synchronization will display, from the account section, the links with the ability to download the documents.
NOTE: document names must not include spaces
Under the Account section on the Order page, make sure the grid has enabled the “Document Link” column, so users can access documents through the pop-up.

The links will be displayed under the receipt. The link titles will be whatever they are named as in the directory.
Sage300 – implement PrintBoss Enterprise Edition (cost $750USD + annual maint)
Sage X3 – implement preferred document management solution e.g. Version 1
Troubleshooting
If the Pop up displays broken links, then create a JS tag on the Customer Tags under the Modules
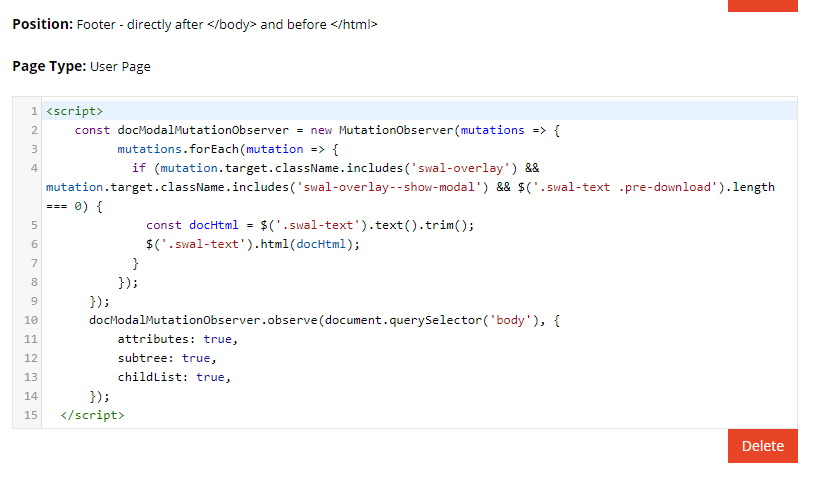
- Add a new module in custom tags, change the page type to “User page” and change the position to “footer.
- Paste this code:
<script>
const docModalMutationObserver = new MutationObserver(mutations => {
mutations.forEach(mutation => {
if (mutation.target.className.includes('swal-overlay') && mutation.target.className.includes('swal-overlay--show-modal') && $('.swal-text .pre-download').length === 0) {
const docHtml = $('.swal-text').text().trim();
$('.swal-text').html(docHtml);
}
});
});      docModalMutationObserver.observe(document.querySelector('body'), {
attributes: true,
subtree: true,
childList: true,
});
</script>
3. Save and Update
4. Refresh the page on the front end