You can add custom JavaScript snippets to your site via System > Modules > Custom Tags. This tutorial will walk you through the process step by step.
Copy the Snippet
Copy the snippet so that you can easily paste it in the following steps. For the purposes of this tutorial, let’s assume that our JavaScript snippet is:
(function(h, o, t, j, a, r) {
h.hj = h.hj || function() {
(h.hj.q = h.hj.q || []).push(arguments)
};
h._hjSettings = {
hjid: 1,
hjsv: 5
};
a = o.getElementsByTagName('head')[0];
r = o.createElement('script');
r.async = 1;
r.src = t + h._hjSettings.hjid + j + h._hjSettings.hjsv;
a.appendChild(r);
})(window, document, '//static.hotjar.com/c/hotjar-', '.js?sv=');
Go to Custom Tags
Once you’ve copied the snippet, go to System > Modules > Custom Tags.
Create a Custom Tag
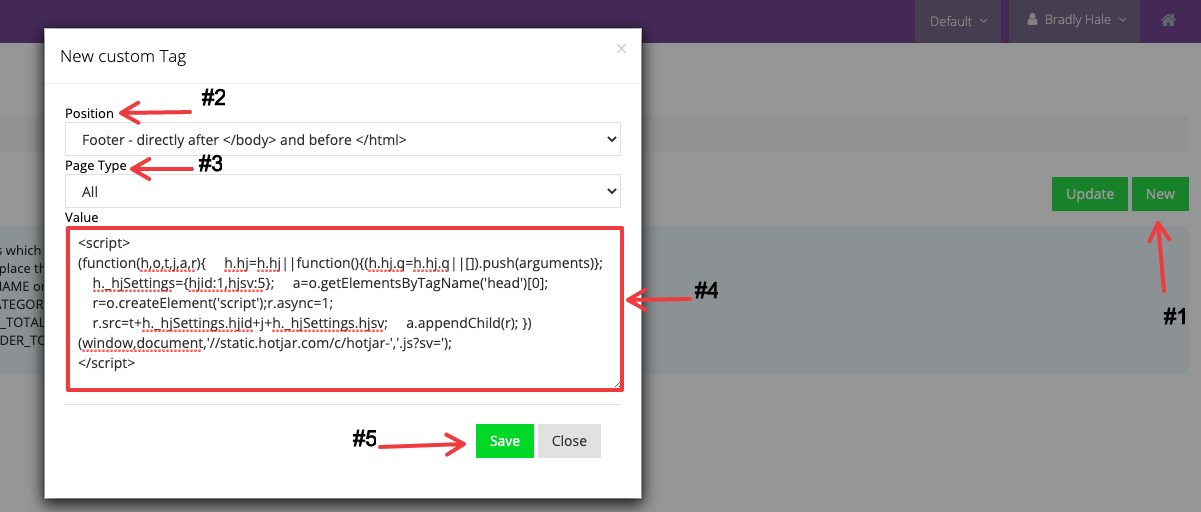
- Click “New” to begin.
- Select the position of your snippet. In most cases, “Footer – directly after
</body>and before</html>” will be suitable, but verify this with your developer or the third party service, if applicable. - Select the page type. For our example, we will have this snippet load on all pages in our web store.
- Paste your script. If JavaScript, make sure your script includes an opening
<script>tag and a closing</script>tag. - Click “Save”. You should be set!
Verify Your Script
To verify that your script has indeed been added to your page, go to a URL where it should be and view the HTML source code: view-source:https://yourstore.com
You can then press Control and F (WindowsOS) or Command and F (MacOS), and search for a keyword in the code you added. For example, in our case, you might search for hotjar:
