With Sendinblue, you can set up abandoned cart emails that remind your web store users that they have items in their cart awaiting purchase.
Sendinblue is a digital marketing platform that allows you to do email marketing, create landing pages, build signup forms, and much more. With their automation features, as well as a bit of JavaScript code, you can also set up abandoned cart emails.
Getting Started
The first step is to register an account with Sendinblue. Their basic account is free, and you can view more information about their plans here.
Creating the First Workflow
[videopress pLm7BNg3]
Once you’re signed up, you’ll be redirected to the Sendinblue Dashboard:
- From the Dashboard, click the Automation tab in the menu.
- Next, click the button to Create your first workflow.
- Once on the Create your first workflow page, you can select the default Abandoned Cart workflow and click Create.
See the video above for these three steps.
Configuring the Abandoned Cart Workflow
In the next steps, we will configure the abandoned cart workflow. Please watch the video and/or follow the instructions below:
[videopress 28GwvxDf]
- In step 1, configure the custom event that will trigger the workflow. This, by default, should be “cart_updated“. If it is not please type “cart_updated” into the text input, and then click next.
- In step 2, you will configure the delay for the abandoned cart workflow. The delay essentially gives the user time to finish the checkout process. Our recommendation would be to check analytics data you have to see how long, on average, most successful purchases on your store take, and then, based on that data, set a reasonable delay time for the workflow to continue.
- In step 3, you will configure the email template that gets used. (Need assistance with building the email? See their guidance or reach out to their support team.) For our purposes, we will use the default template provided by Sendinblue, but you have the ability to customize it completely. You also have other settings; for example, if you’d like to BCC yourself on the email that gets sent to the user, you can toggle on this option. If you’d like to set the times during which your emails get sent, you can toggle on this option. Finally, you’ll want to toggle on “Use my event data to customize the email” and type “cart_updated” for the “data from last received” event setting. Once completed, go ahead and click next.
- In step 4, we need to tell Sendinblue when to stop this workflow. When a user completes the checkout process, for example, we would no longer want this email to be sent. Make sure this is “order_completed.”
- In step 5, we need to tell Sendinblue what to do when someone empties their cart. If the custom event doesn’t say “cart_deleted,” be sure to change the input so that it does.
- In step 6, we need to tell Sendinblue when someone updates their cart – this will restart the workflow. For example, if you send the email 24 hours after the user abandons the cart and the user returns to the store 23 hours after last updating their cart to add an item, the workflow will be restarted, meaning that the 24 hour clock will reset to 0. Ensure the Custom Event here is “cart_updated.” Click “Finish” and your workflow is set.
- Finally, go back to the Automation tab and click “Activate the workflow” to initiate your workflow.
Add the JavaScript Snippet to Your Web Store Custom Tags
There are a couple of JavaScript snippets that we need to add to the web store Custom Tags.
In your web store, navigate to System > Modules > Custom Tags, and create a new tag positioned in the Footer – directly after </body> and before </html> on All pages.
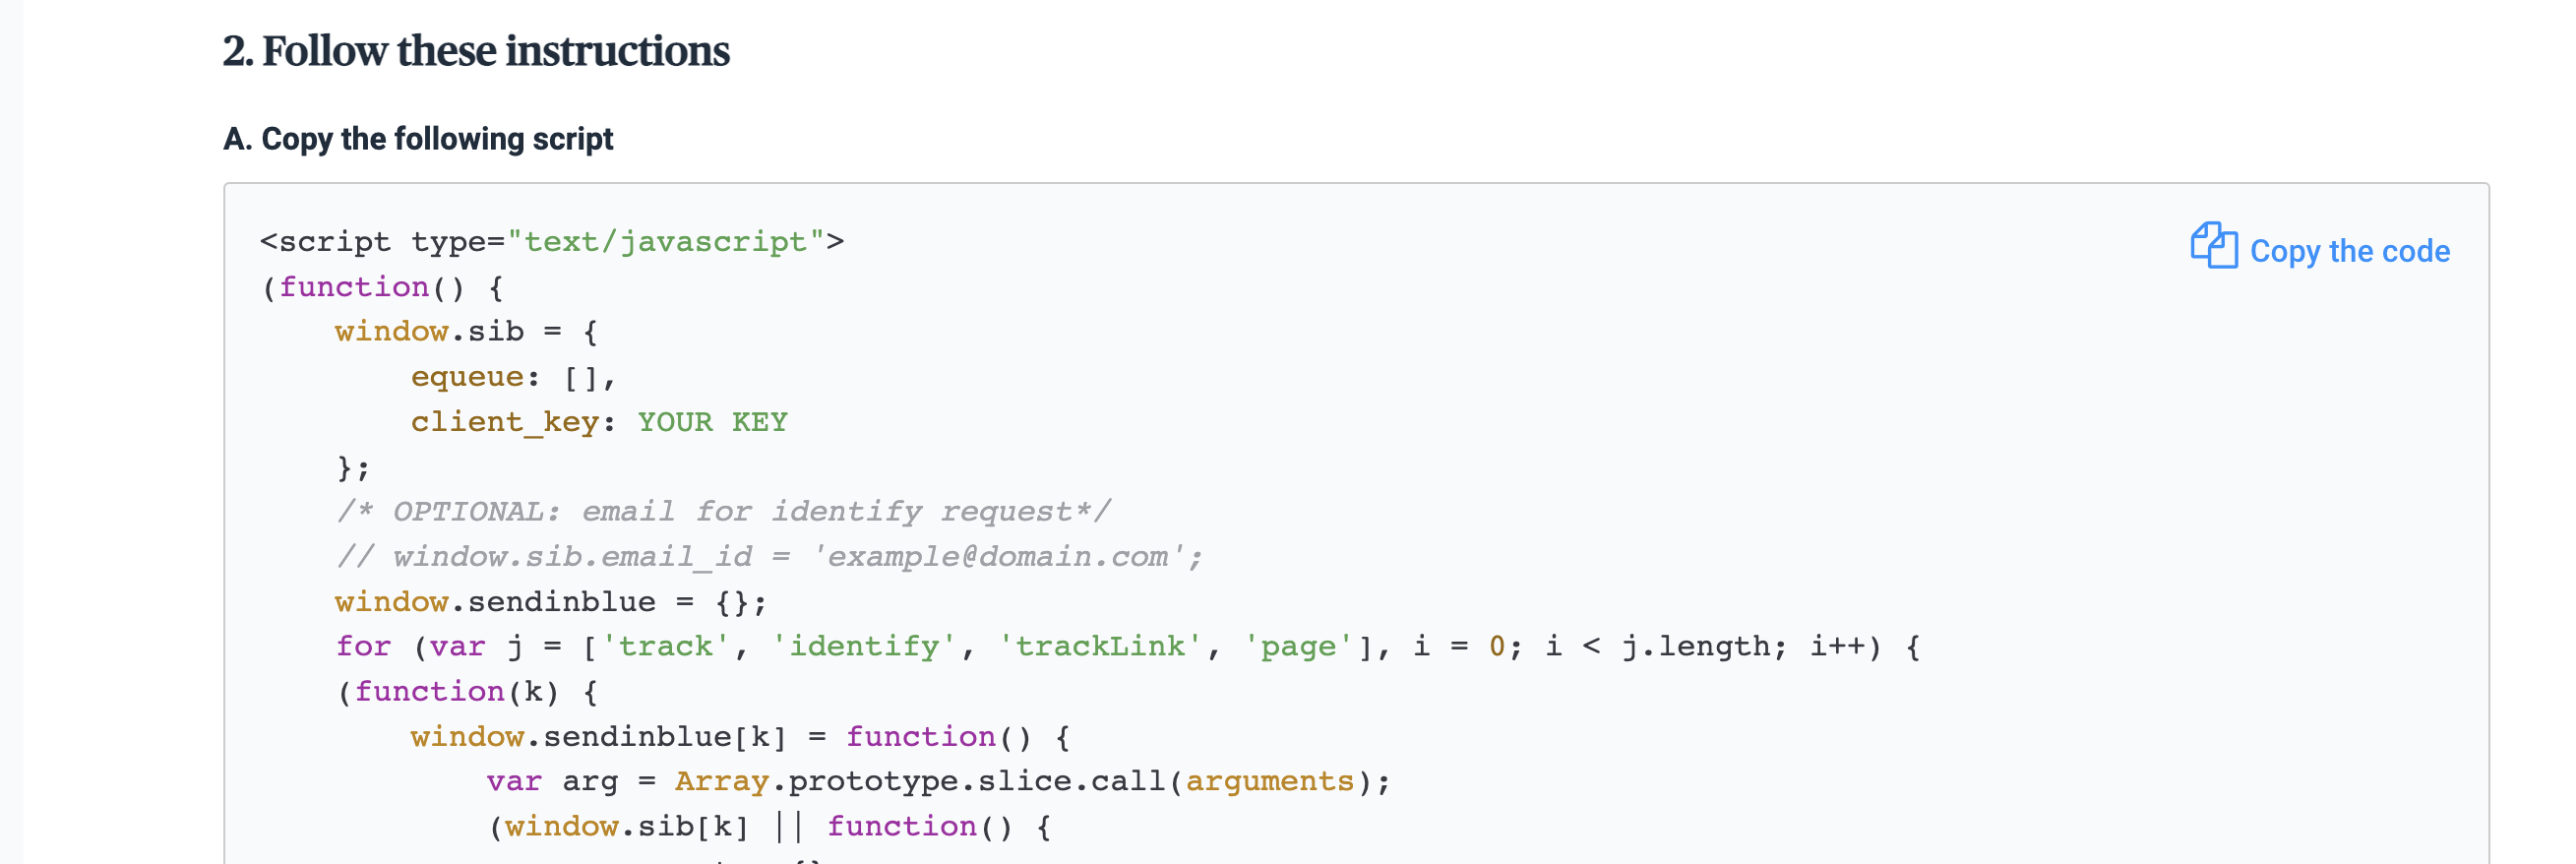
Add Sendinblue’s JavaScript
Firstly, copy/paste Sendinblue’s JavaScript snippet from their dashboard. It should look something like this:
Add commercebuild’s Sendinblue JavaScript
Next, add in our JavaScript just below the Sendinblue snippet:
<script src="https://customizations.commercebuild.tools/abandoned-cart/ac.js?v=1.0"></script>

<script>
new cbAbandonedCart('USD','BOTH').init();
</script>
- The first parameter — in this case,
USD— is the web store currency. - The second parameter determines for which scope the JavaScript should run.
BOTHmeans that it will run for both B2B and B2C users. On the other hand,B2BorB2Cmeans that it will only run for those respective user types. See here for more information on the difference between B2B and B2c users on our platform.
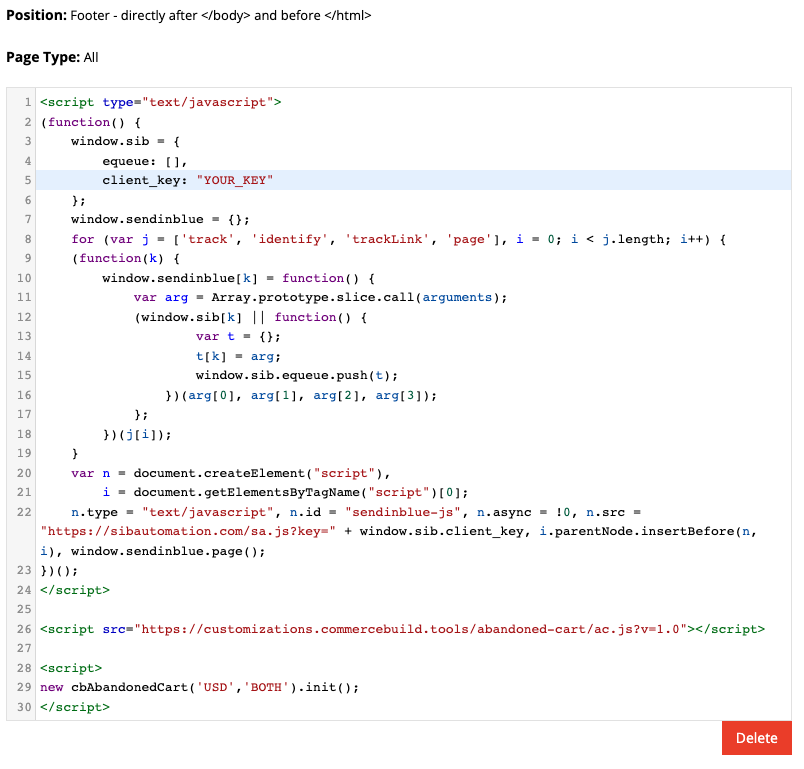
How Your Custom Tag Should Appear
This is how your custom tag should appear once you’ve added in all the required snippets:
Testing Your Workflow
The Sendinblue Logs are a helpful tool when it comes to debugging any potential issues or monitoring events and workflows.
- Workflow Logs – This table lists out when a user enters the work flow, when they’ve entered the wait process, etc.
- Event Logs – This table shows each event as configured above, such as cart_updated and order_complete.
- Contacts in Workflows – This table shows all users who are currently in a workflow. You also have the option to remove users from the workflow in this table, if you wish.
For further information and additional support, please review Sendinblue’s guidance.
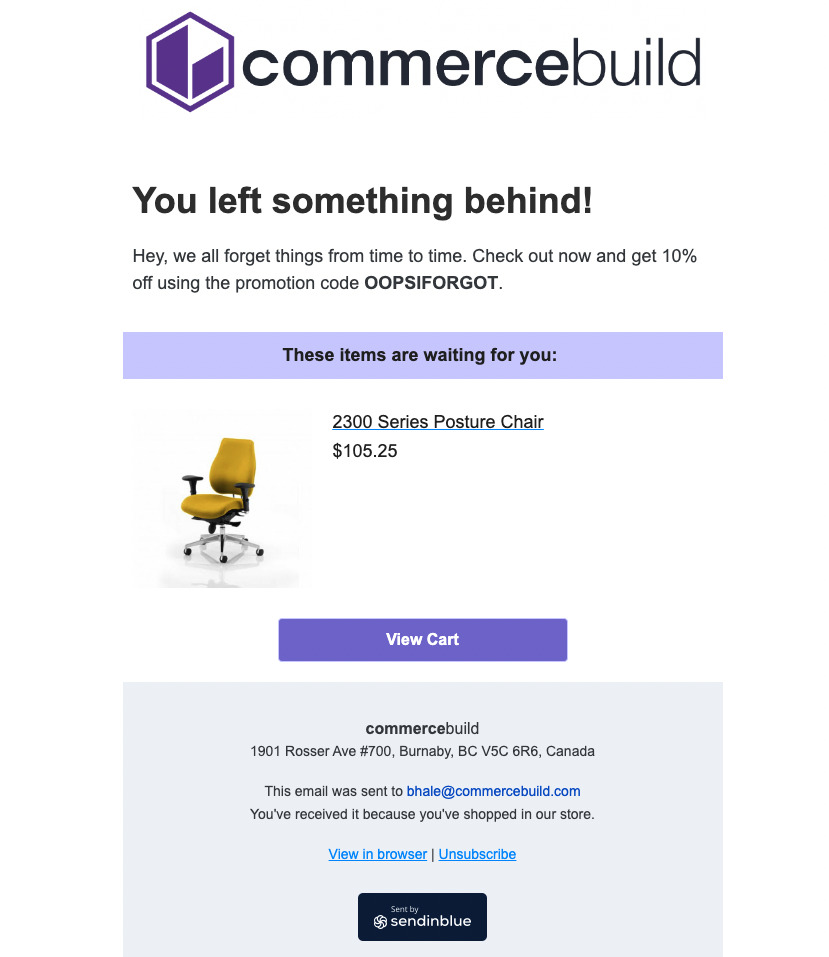
Final Results
Once you’ve completed all of the steps above, your users will begin receiving emails like this one: