This guide will walk you through the steps to configure Stripe as a payment method in your web store. A prerequisite is that you already have a Stripe account.
Obtain Your API Keys
Log into your Stripe account and navigate to https://dashboard.stripe.com/apikeys. First decide if you want your account in “Test Mode” (for testing purposes). If so, be sure to toggle on that option.
Next click on the “Publishable Key” to copy it to your clipboard. Save that key to a safe place. Next press “Reveal Secret Key” if one already exists and copy that to your clipboard. If you do not yet have a secret key, press the button to create one.

Configure Stripe in the Web Store
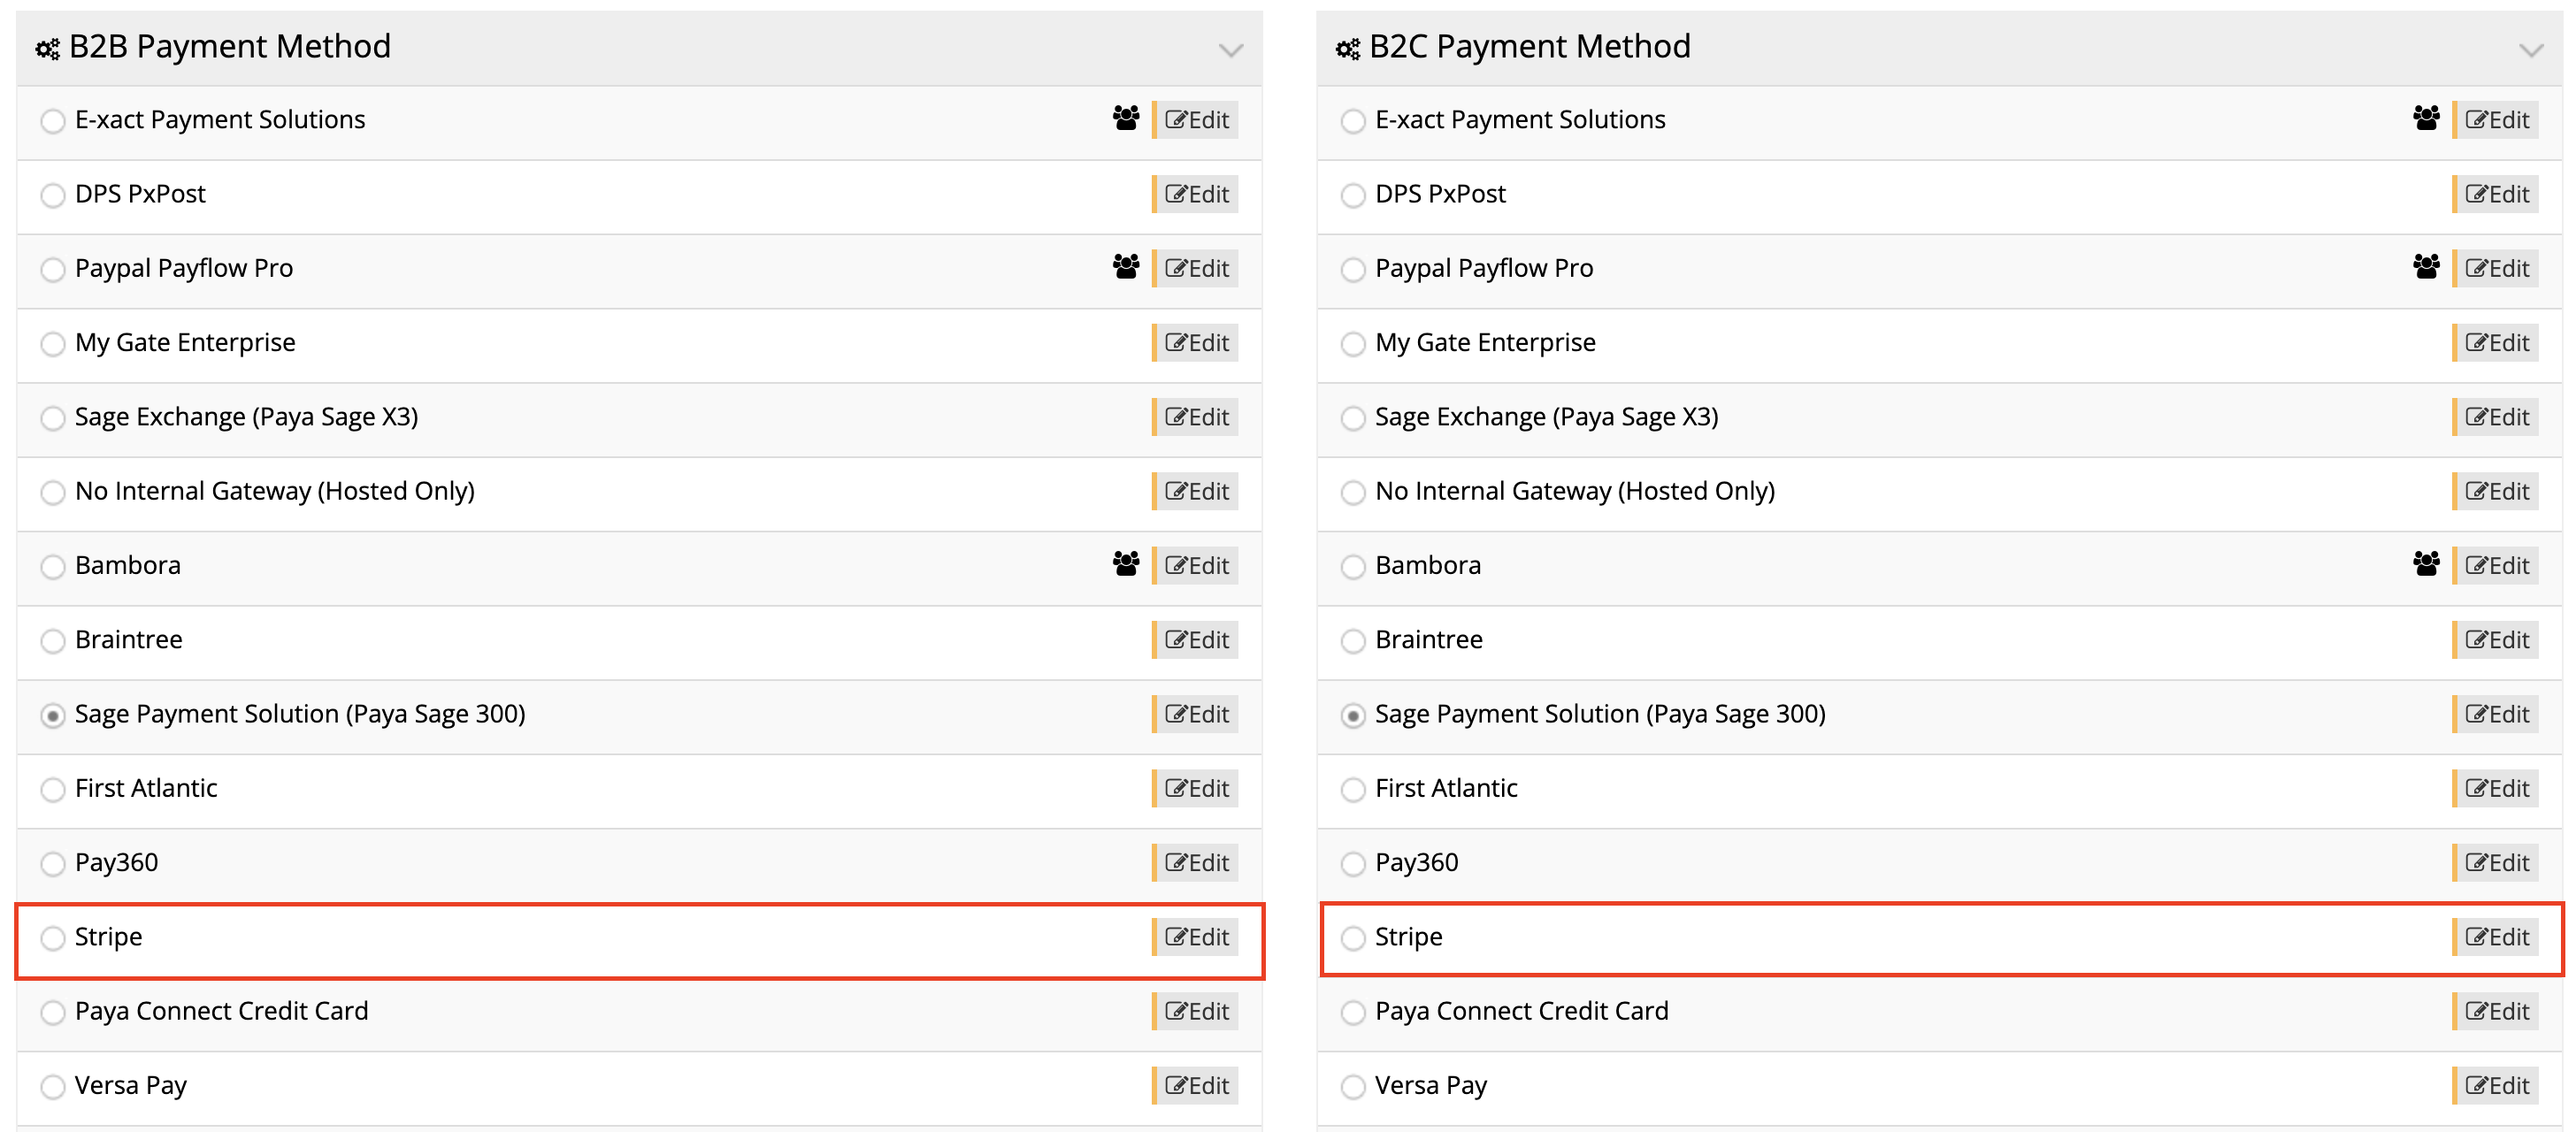
Next log into your commercebuild store and navigate to System → Payment Settings → Payment Method (/admin/mpayment/payment). Locate the payment method you want to modify (B2B, B2C, Open Invoices). Within that payment method, locate “Stripe” and press the “Edit” button found to the right of the option. Then press “Edit” again.

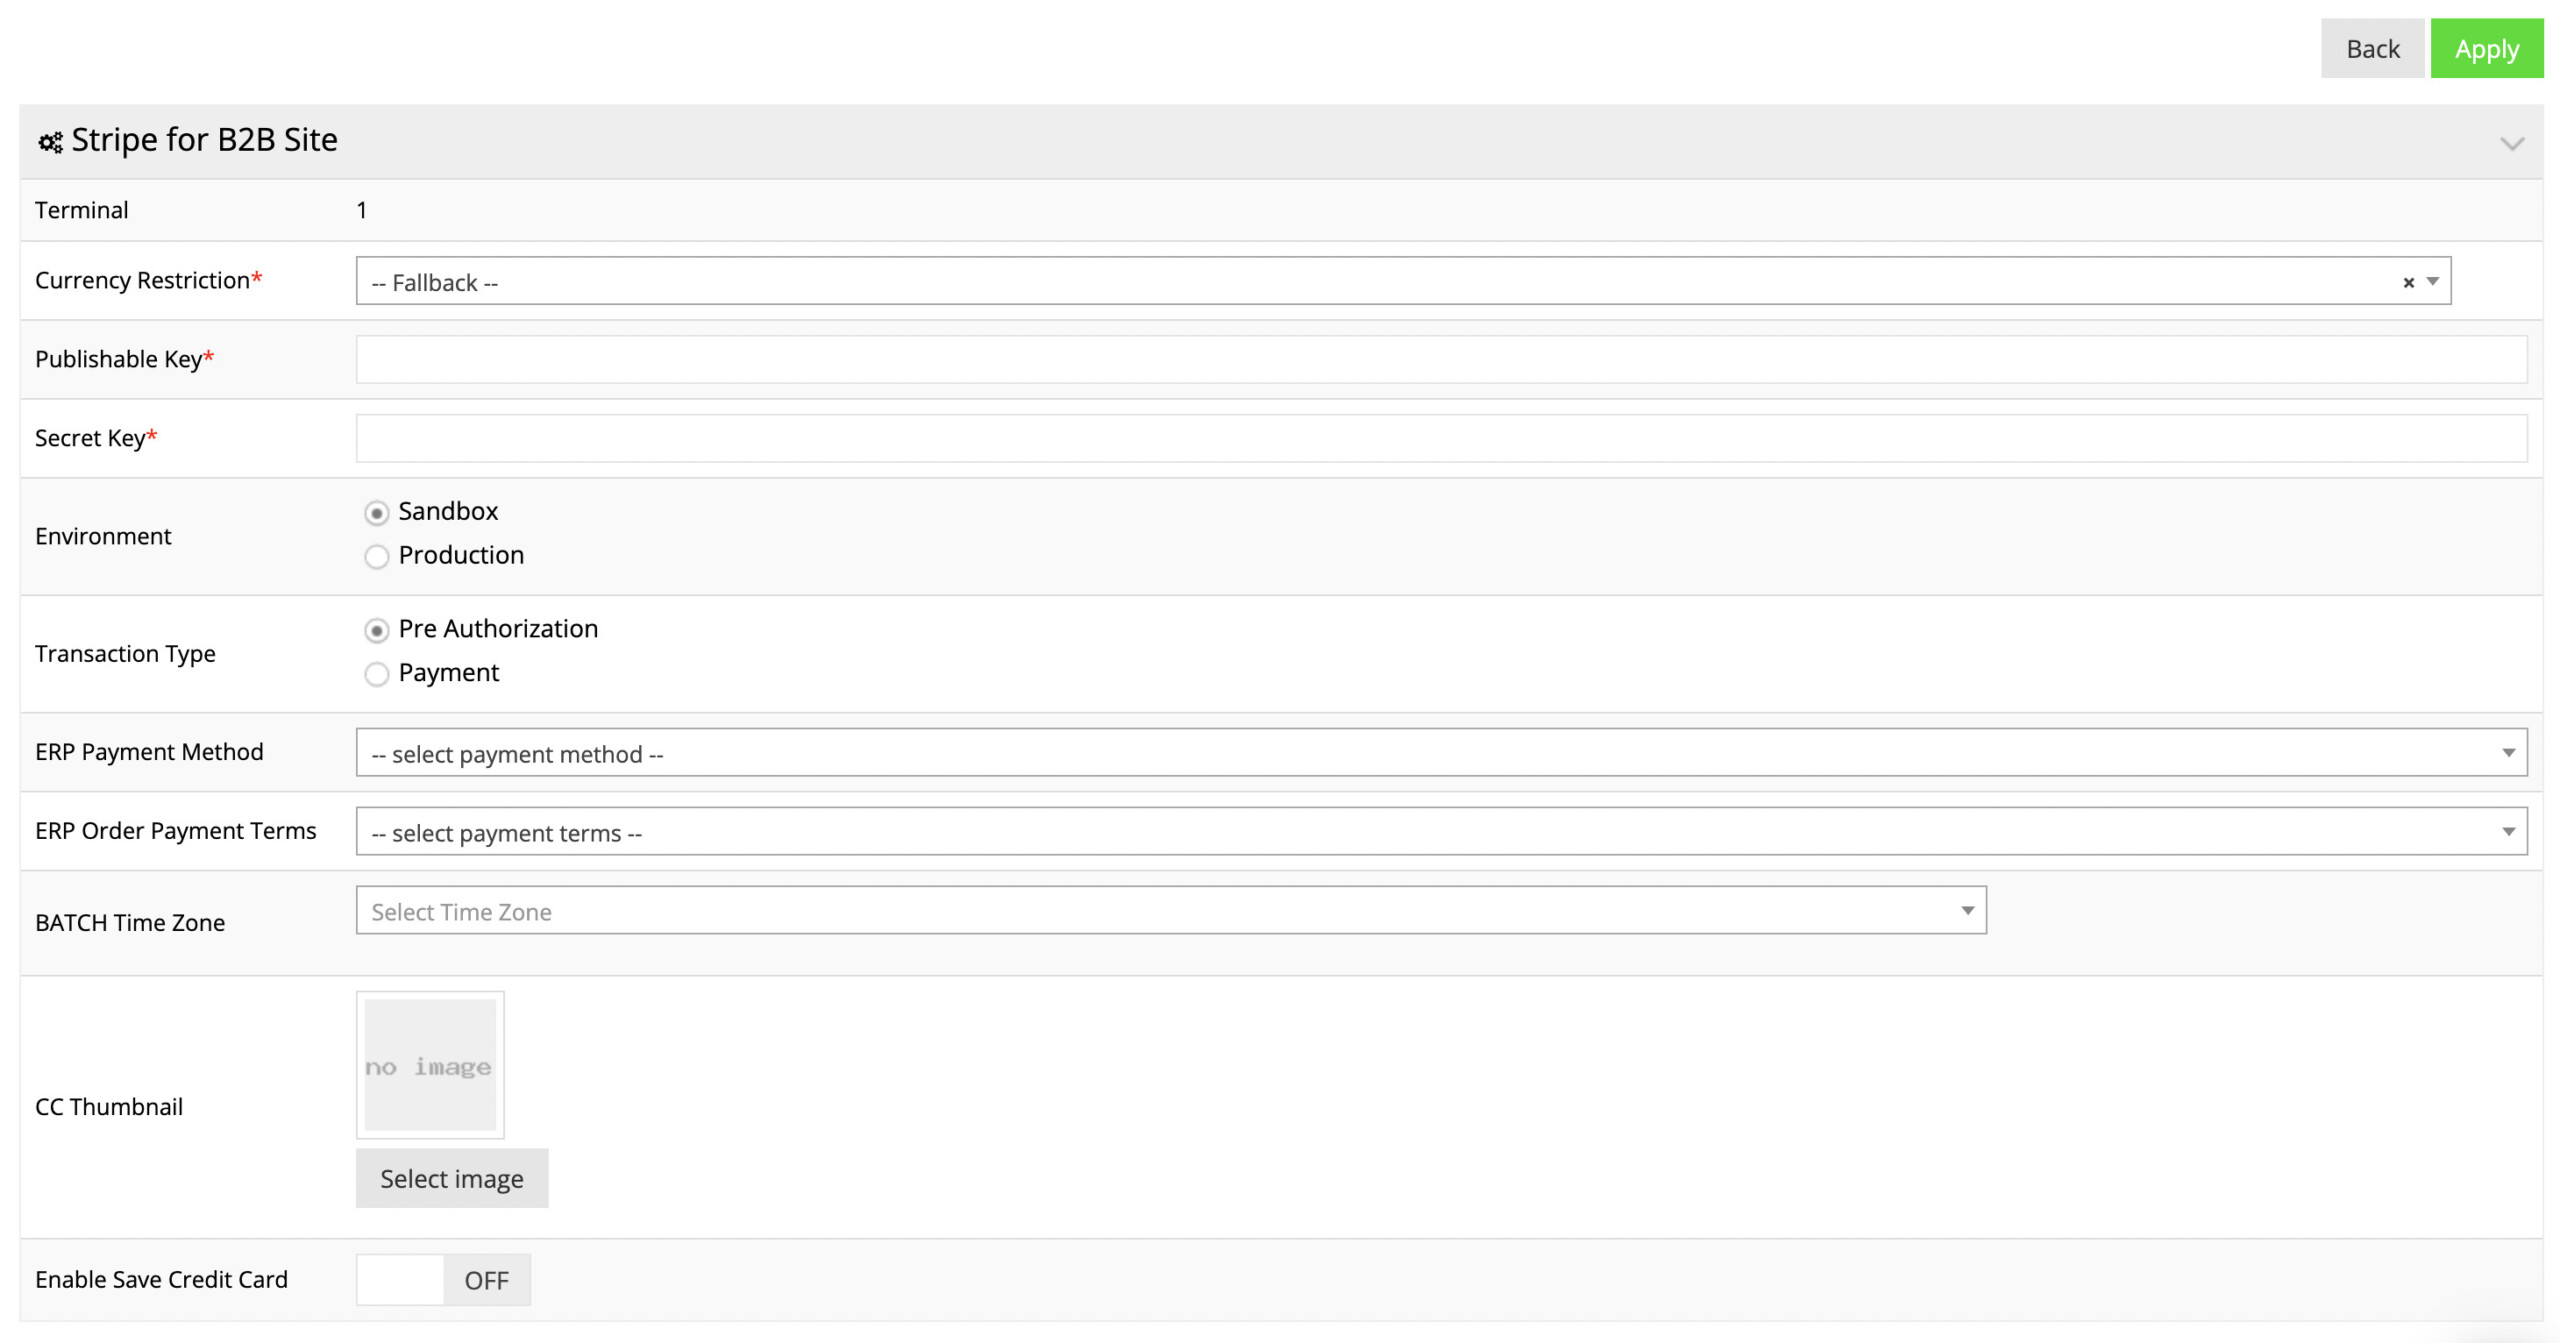
Fill in the details on the page. Ensuring that “Enviroment” is set to either “Production” or “Sandbox”, depending on whether your Stripe account is in test mode or not. Set the “Transaction Type” to either “Pre Authorization” or “Payment”. The Publishable and Secret Keys on this page can be pasted in from what you copied earlier. Press the Apply button to save those changes.

Next navigate back to System → Payment Settings → Payment Method (/admin/mpayment/payment). Ensure that the radio button is selected next to Stripe for that payment method.

Test
Finally, perform a test order through the site using Stripe. If you enabled “Pre Authorization” in the Stripe settings, check that the preauth is appearing in Stripe’s dashboard.
Stripe has a guide on how to test their services here: https://stripe.com/docs/testing

