commercebuild Success Portal commercebuild Success Portal

  • Home
  • Submit a Ticket
  • Updates
  • Login
  • Contact Us
Home / Tutorials / How To Create A Site Administrator

How To Create A Site Administrator

567 views Less than a minute 0

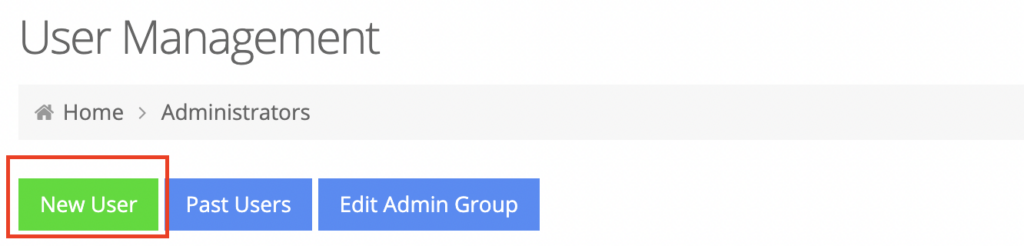
Creating a Site Administrator for your web store is a fairly easy step by step process. In your admin dashboard, navigate to System > Site Administrators. 

On the landing page, click New User button.

New User – Step 1 of 3

To begin setting up, select Site Manager (Administrator) from “Select Group” dropdown. Click Continue.

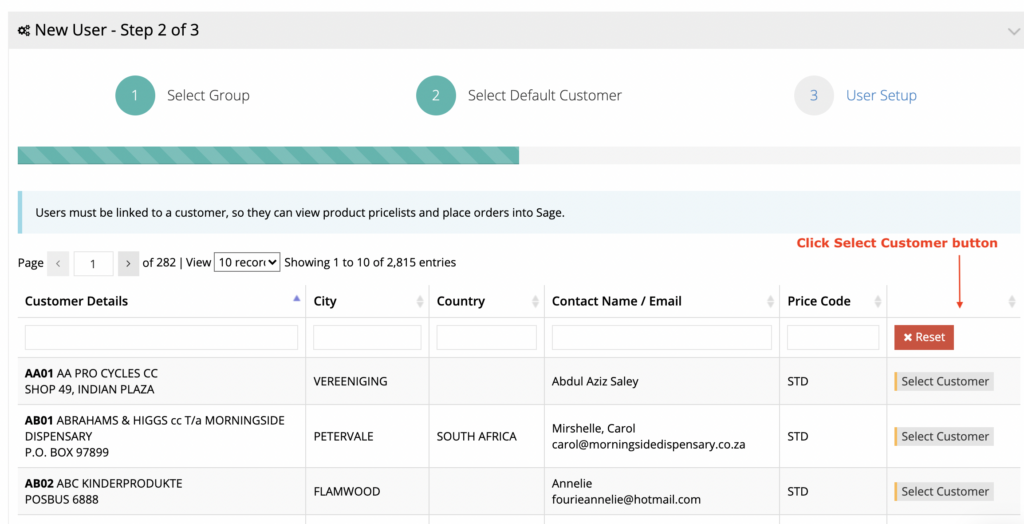
New User – Step 2 of 3

Assign a default customer to your user. This is imperative so they can view product price lists and place orders into your ERP.

Search for the customer you wish to assign them to and click Select Customer for that record.

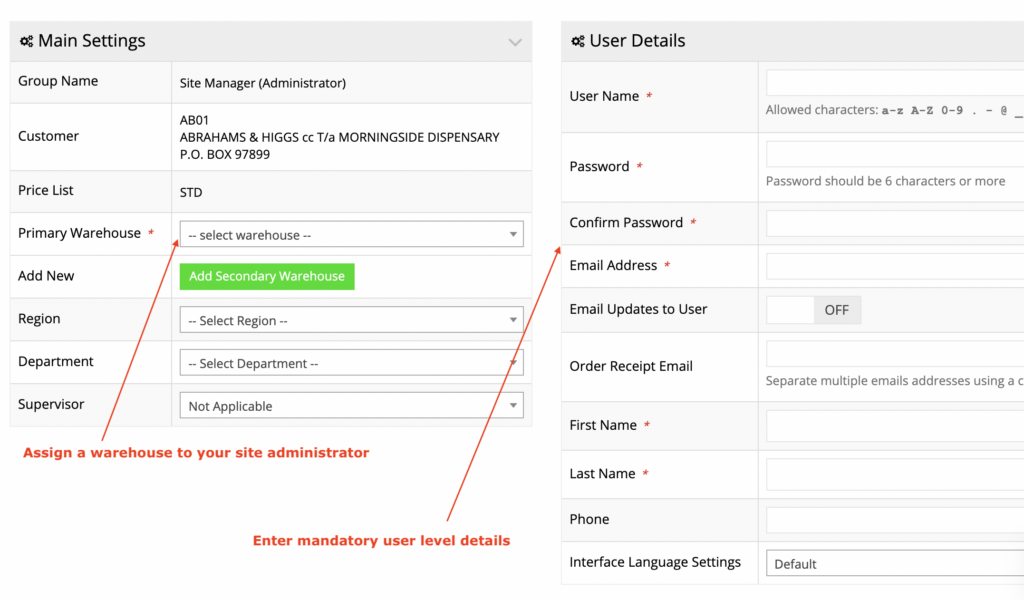
New User – Step 3 of 3

In User Setup screen, fill in all the mandatory fields such as Primary Warehouse, Username , Password, Email Address and First/Last Name.

Click Continue to finish creating a site administrator. The system will take you back to the list of site administrators and you may need to search for the newly created user.

webstore Tutorials

About Latika

View all posts by Latika →

Related Articles

  • How to Enable reCAPTCHA on Custom Forms
  • Adding a custom message to the shipping step at checkout
  • How to configure Stripe as a payment method
  • SQL Server Change Tracking Query for Sage 300 and X3

Popular Articles

  • Enable Firewall Rules and a JavaScript Browser Challenge 2247 16
  • Enable Cloudflare Rate Limiting 2134 0
  • How to Add a JavaScript Snippet 1994 8
  • IP Allowlist 1945 0
  • Signing up for Cloudflare and Configuring Your Domain 1812 4

New Articles

  • Error when adding a new user: Email is already in use 676 0
  • How to Check commercebuild Payments Version 913 0
  • How to Enable reCAPTCHA on Custom Forms 820 0
  • Manually posting an order 970 0
  • Adding a custom message to the shipping step at checkout 785 0
© commercebuild 2022. All rights reserved.