Once you have added a new template for Account Activation, you are now ready to begin creating and customizing it.
Please note that the Account Activation email is sent only if you have Is email verification required before login checked in your registration form.
For the sake of this guide, we will use the below template.
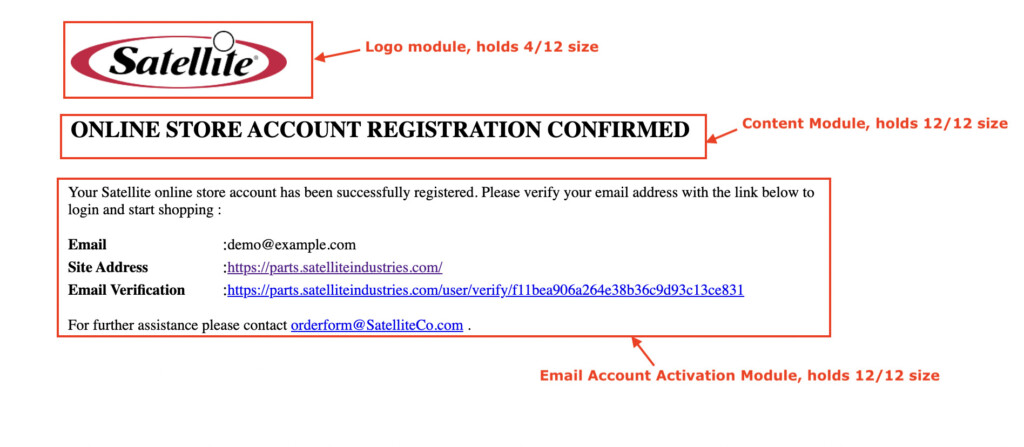
The design should suffice as it holds all the necessary modules with some cardinal styling.
If you want to modify the placement of certain modules, you can easily do so by adjusting the containers’ position.
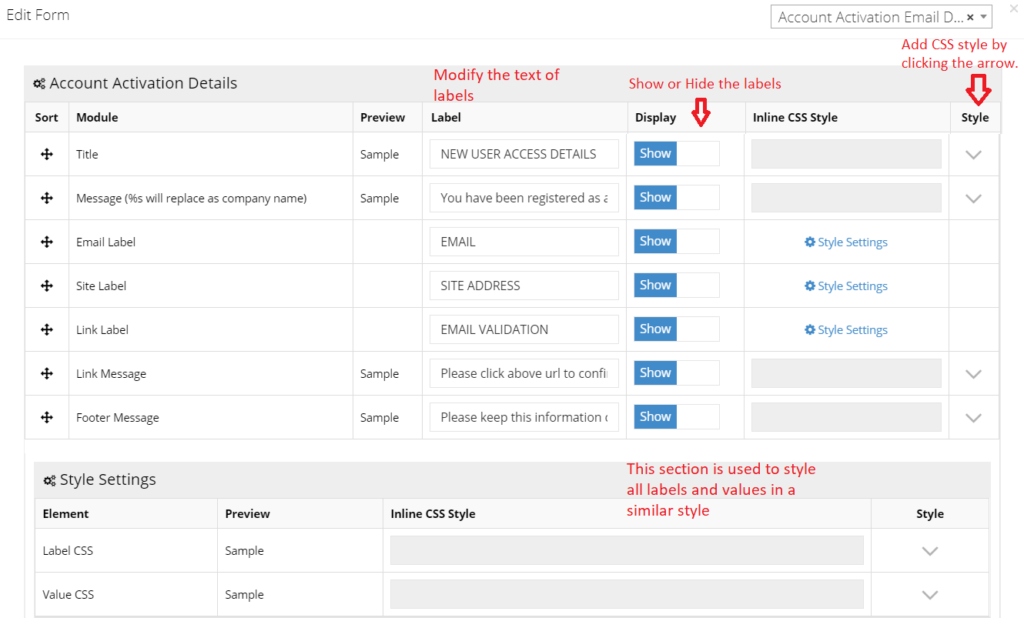
Please note “Account Activation Email Details” module is compulsory to publish the Account Activation template.
Getting Started
To start, navigate to the newly-added container and click Edit Content. On the next screen, click the Contents dropdown which shows available modules that can be added to the Account Activation email template.

Click on any module from the Contents dropdown, for example, “Account Activation Email Details” and click Apply.
Please note “Account Activation Email Details” module is compulsory to include to publish the Account Activation template.
Add Container
Click Add Container and Edit Content from within the container. Choose a relevant module from the Contents dropdown.
Within a particular module, you can control the display of various sub-modules by toggling on/off the Display buttons. Click Apply to save your selection.
Apply Style
To style the display of text and labels on the email, there is an option to add an inline CSS style when a module is selected. Click the “V” sign to add style.
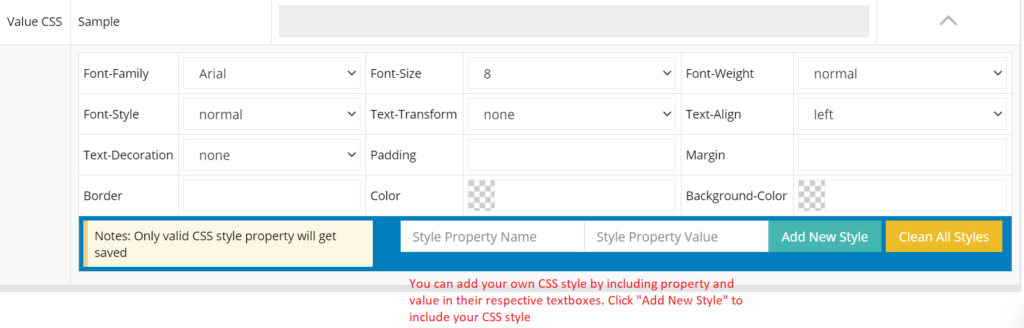
For example, to align the label vertically, add line-height in Style Property Name and a value of 1.25 in Style Property Value. Click Add New Style to apply your changes.
CSS style for modules
We are sharing the CSS style that can be added using the above approach to ensure the look of your email looks the same as the email format shared above.
For Label –
vertical-align:bottom
line-height:1.5
font-family:roboto
font-weight:bold
font-size:14px
width:20%
For Value –
vertical-align:bottom
line-height:1.5
font-family:roboto
font-size:14px
width:20%
Publish a template
You can preview the template by clicking on the Preview button.
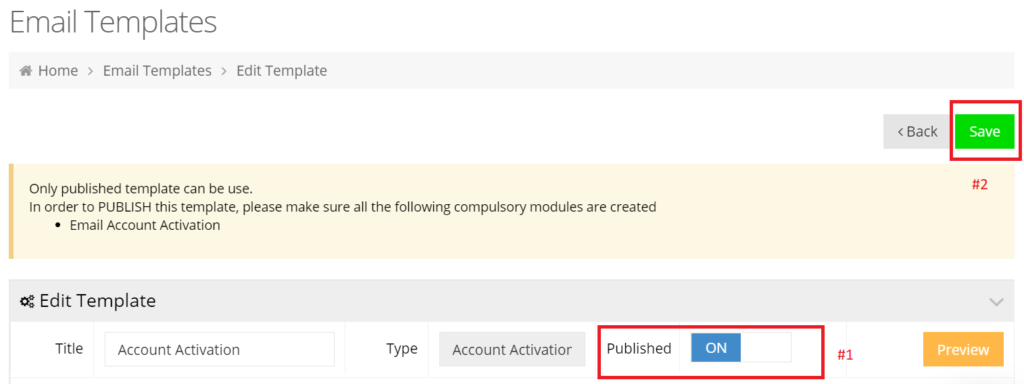
Once you are convinced with the layout and design of your template, toggle on the Published button and click Save as shown above.
Please note that the new template will overwrite the existing template once you publish it.