Once you have added a new template for Order Confirmation, you are now ready to begin creating and customizing it.
For the sake of this guide, we will use the below Order Confirmation email.
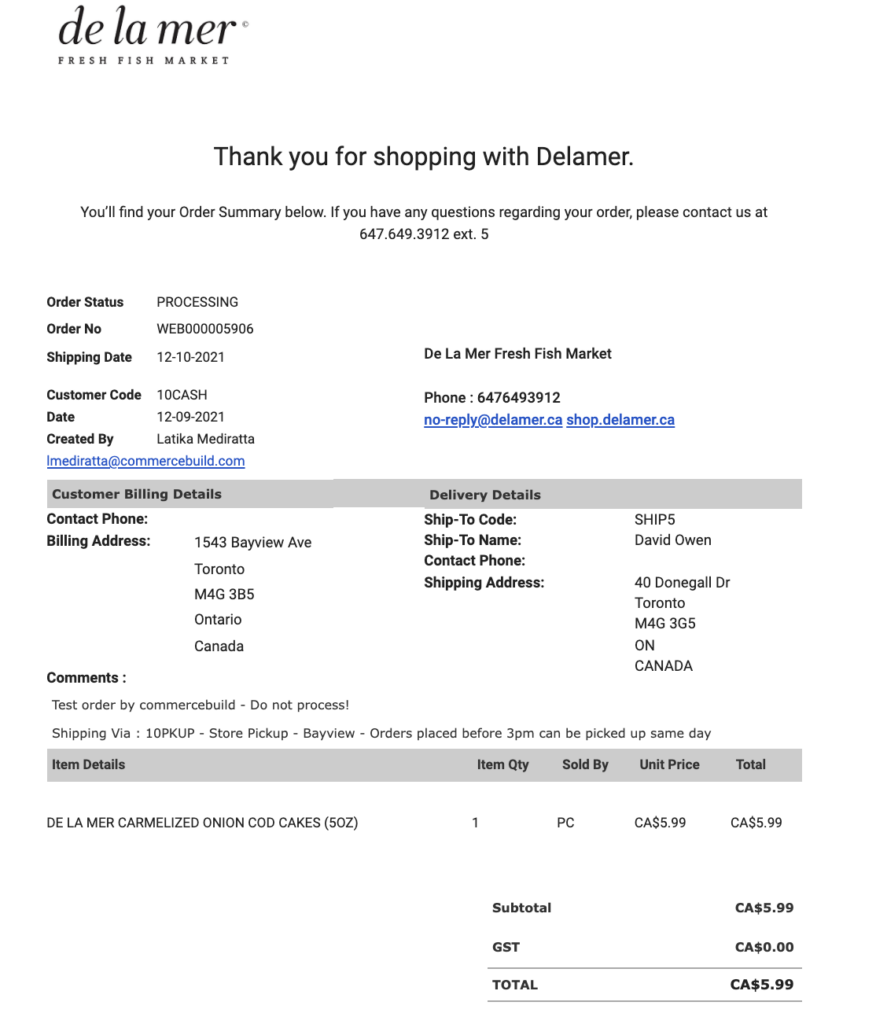
The design should suffice as it will hold all the necessary modules and some cardinal styling. However, if you want to modify the placement of certain modules, you can easily do so by adjusting the containers’ position.
Let’s begin by understanding the various modules that are included in the above email design
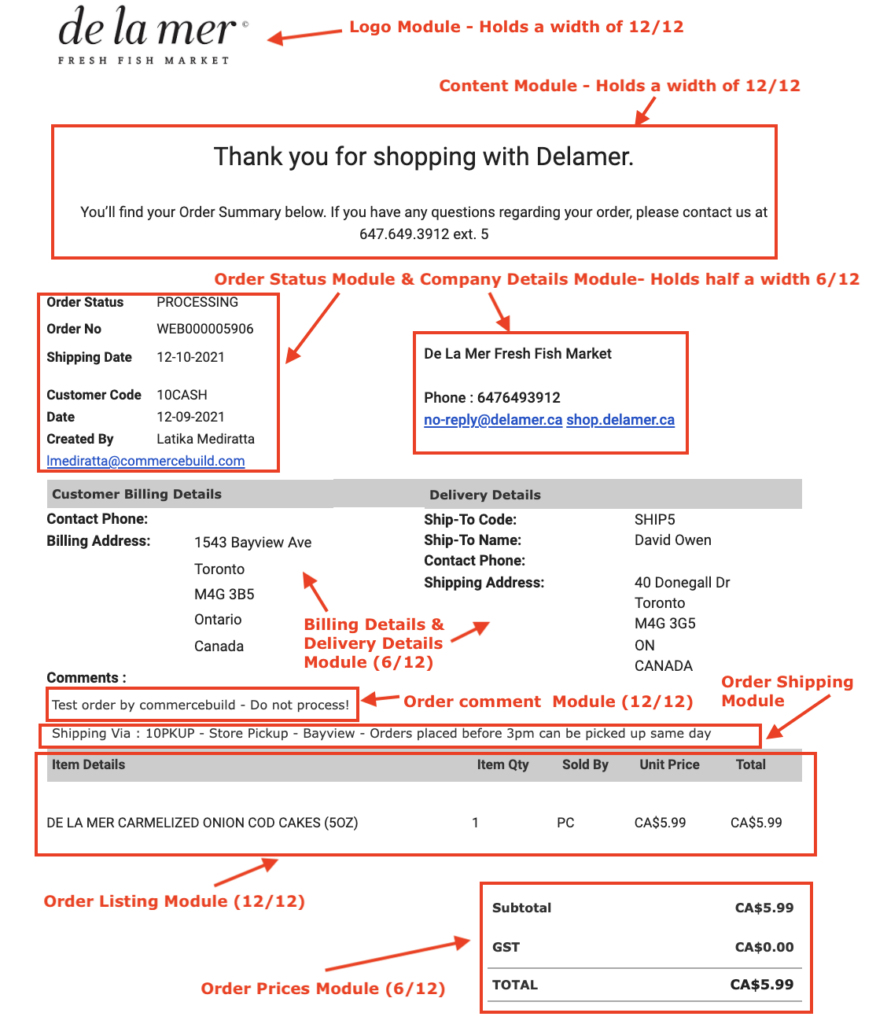
Please note the following modules are compulsory to publish the Successful Order template:
- Order Status
- Order Billing Details
- Order Delivery Details
- Order Listing
- Order Prices
Add Container
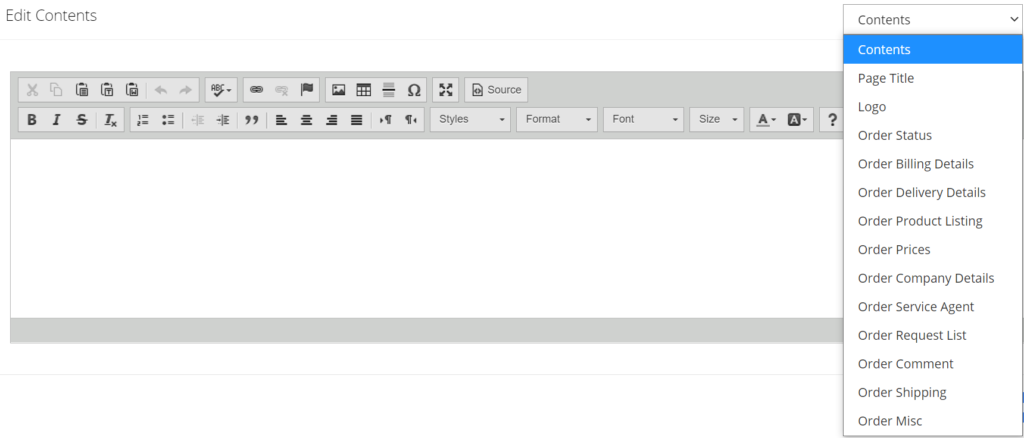
Click Add Container and Edit Content from within the container. Choose a relevant module from the Contents dropdown.
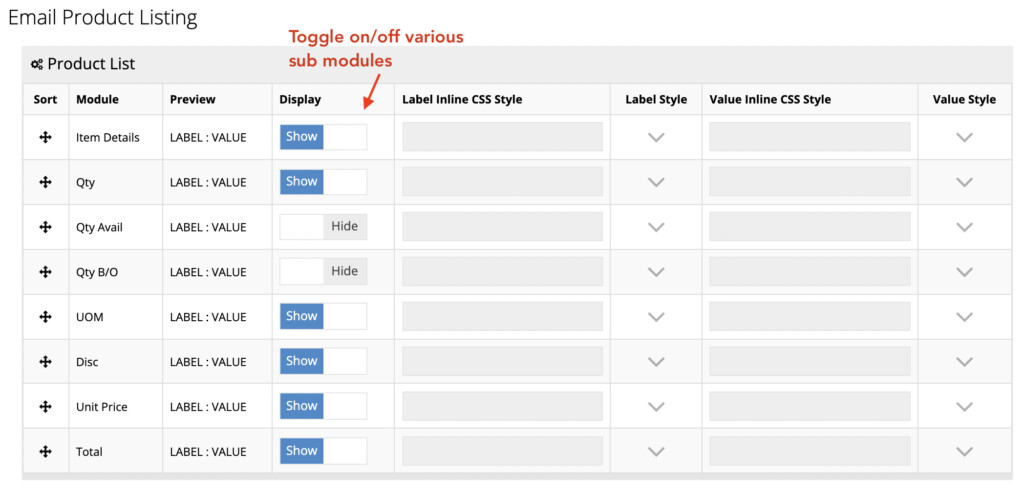
Within a particular module, you can control the display of various sub-modules by toggling on/off the Display buttons. Click Apply to save your selection.
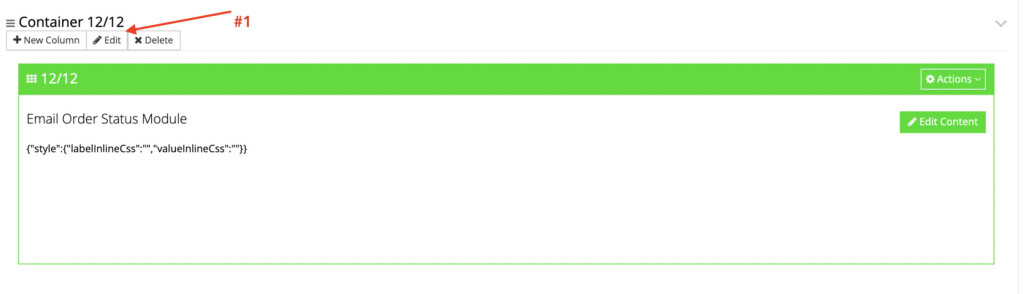
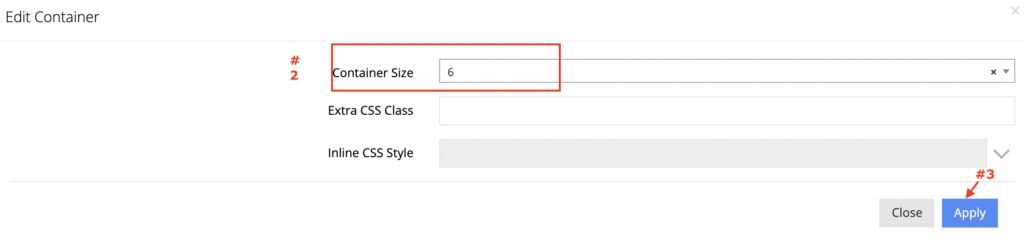
Once a module is added, you can adjust its width by clicking Edit and setting a value in the Container Size field.
Apply Style
To style the display of text and labels on the email, there is an option to add an inline CSS style when a module is selected. Click the “V” sign to add style.
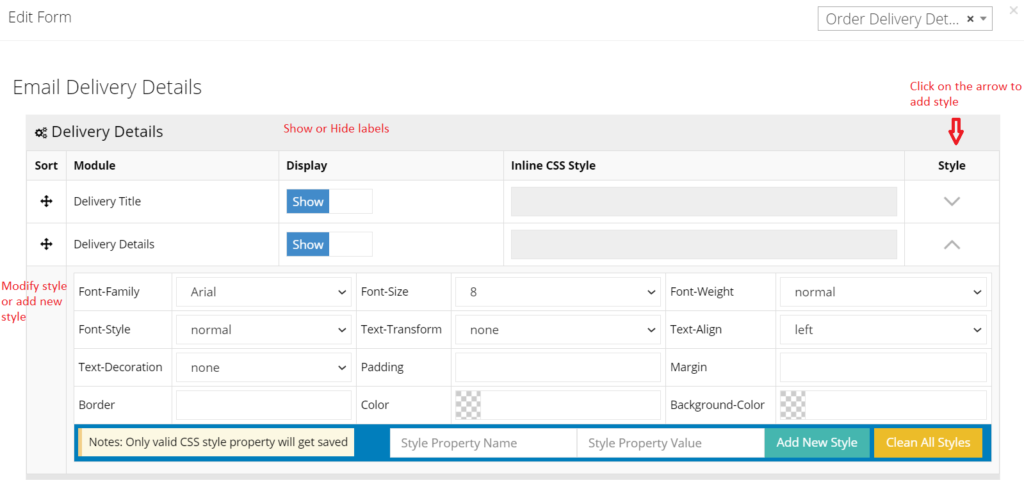
You can either enter a value for the available style options or add new styles.
For example, to align the label vertically, add line-height in Style Property Name and a value of 1.75 in Style Property Value. Click Add New Style to apply your changes.
CSS style for modules
We are sharing the CSS style that can be added using the above approach to ensure the look of your email looks exactly the same as the email format shared above.
Order Status Module
For Label –
font-weight:600
vertical-align:top
line-height:1.25
For Value –
vertical-align:top
line-height:1.25
Billing Details Module and Delivery Details Module
For Label –
display:inline-block
vertical-align:top
font-weight:600
font-size:14px
For Value –
vertical-align:top
line-height:1.25
font-size:14px
Comments Module
For Label –
font-weight:600
font-size:14px
Order Listing Module
For Label –
background-color:#cccccc
font-weight:bold
color:#333333
line-height:1.75
padding:5px
For Value –
line-height:1.75
Order Shipping Module, Logo Module, Order Prices Module, and Company Details Module
No CSS style
Publish a template
You can preview the template by clicking on the Preview button.
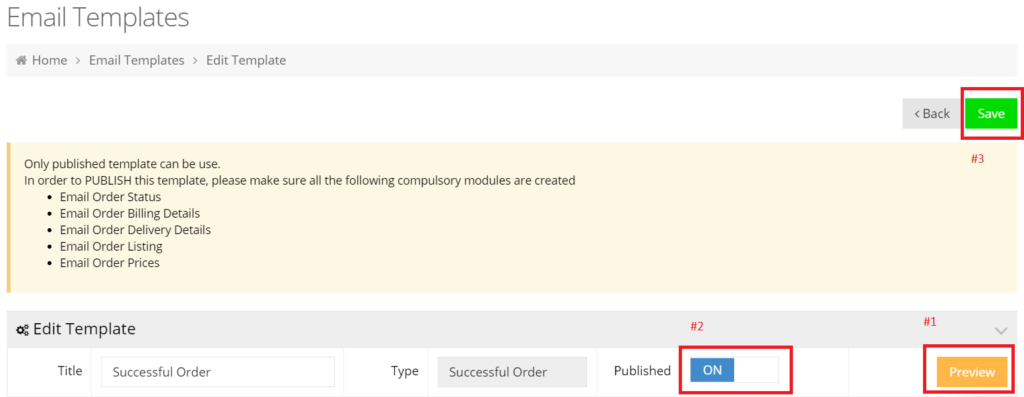
Once you are convinced with the layout and design of your template, toggle on the Published button and click Save as shown above.
The following video shows an example of how to add one such module and apply a style to it.
[videopress 1ZKmedpA]
Please note that the new template will overwrite the existing email once it is published.