Please note the article discusses a feature — Product Custom Fields — which is a billable add-on. Please contact us if your web store does not have this feature activated.
The Pre Order feature enables you to set your products on Pre-order. It is a custom field that is set at the product level. To get started, follow the steps below.
Create Pre-Order Custom Field
Go to your Admin dashboard and navigate to Catalog > Product Settings > Custom Fields.
If the field is disabled, please reach out to commercebuild Customer Success.
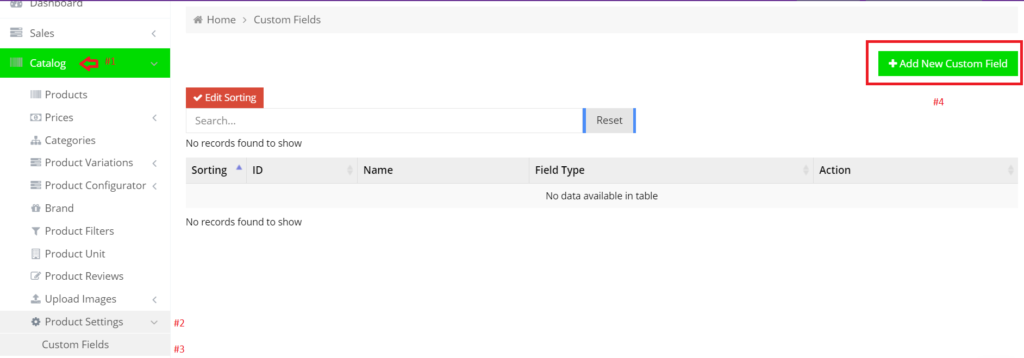
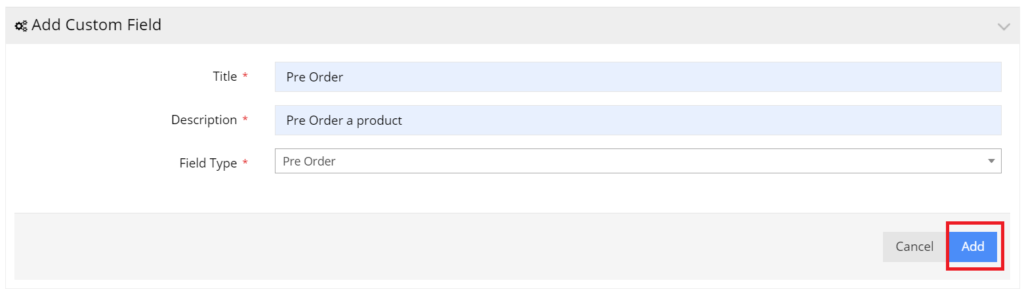
Click Add New Custom Field button. On the next screen, enter the following details and click Add.
Enable Pre-Order for a Product
Once created, it will appear under the Custom Fields section on your product page.
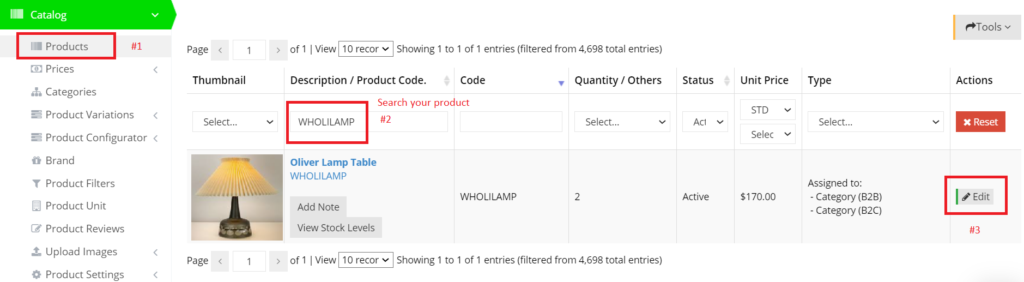
To enable, navigate to Catalog > Products. Search for a product for which you want to enable Pre-order and click Edit.
In the product edit page, go to the General tab and scroll down to locate the Custom Fields section.

You can also add another field to show the release date of your product. This is also a custom field created similar to the Pre-Order field.

Check the Display checkbox and click Save.
Please note: for variant products, the above-mentioned settings will need to be done for each child product.
How It Appears on Your Web Store
The following screens are updated on your web store to reflect Pre-order information:
Product Detail
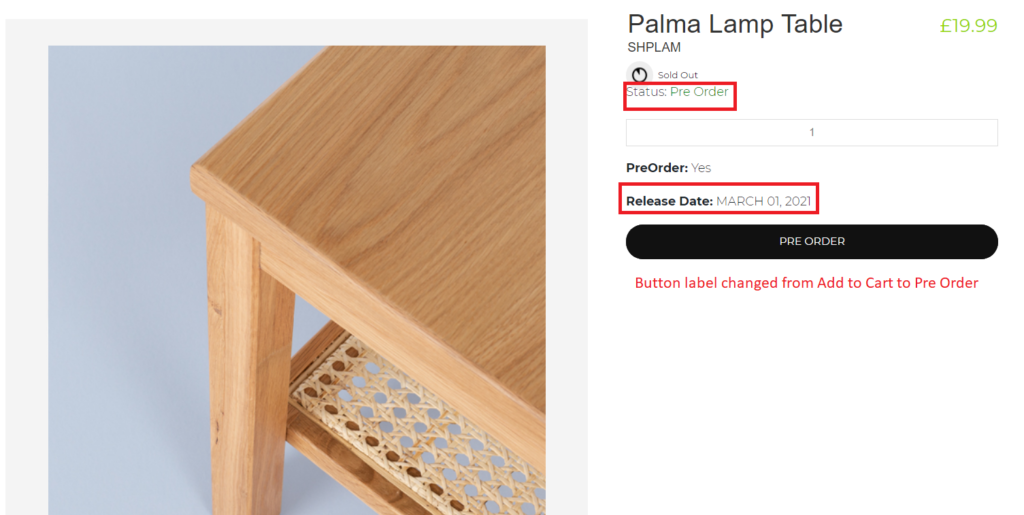
The label of the “Pre Order” button can be modified in the Admin dashboard. Navigate to System > Labels and search under the Category Listing Labels panel.

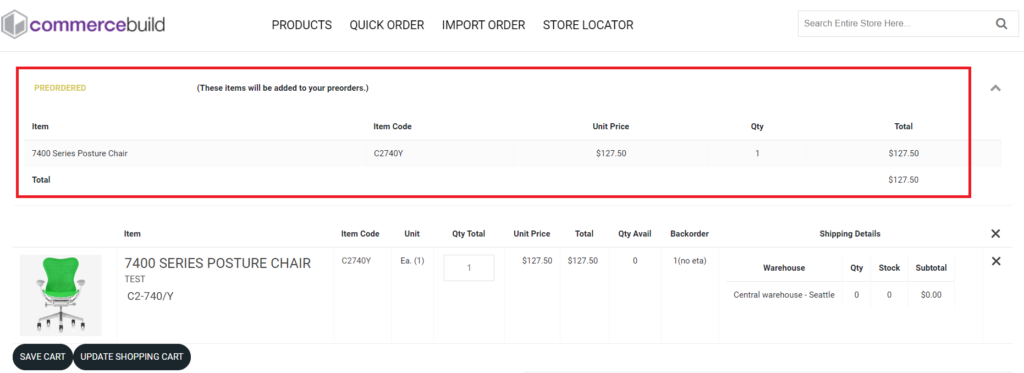
Shopping Cart
If your cart page is managed via Responsive Content Grid, then you can add a Cart Pre-order Module to show a section of items on Pre-order.
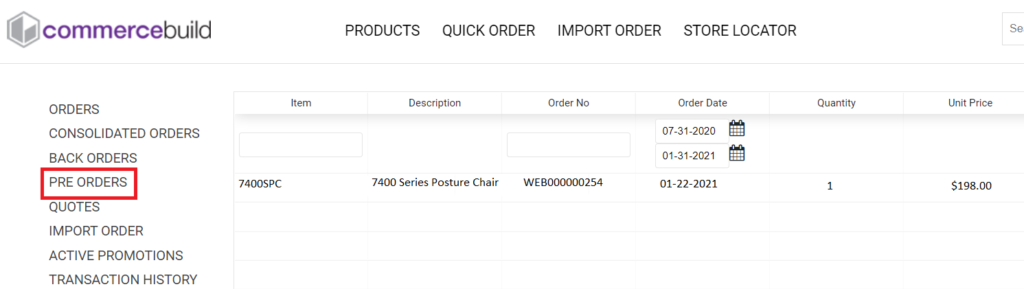
User Account
The user’s My Account screen will show an additional link “PRE ORDERS” on the side navigation menu. This page can also be managed through the Responsive Content grid on the Admin dashboard via Content Management > Default Pages > User Account > Pre Orders.