When you’re shopping online and select a product to buy, you’re adding to your cart. Typically, users build a cart once, checkout, and that’s it. Their next order may be completely different.
But for many customers, they might order the same items, or have a smaller subset of items that they like to order more frequently. We have multiple ways to help users out, and one of them is the Saved Cart feature.
In this article we’ll first look at how the save cart works from the user’s perspective, and then we’ll look at how to enable Saved Carts on your store. Note that while Saved Cart is available for both B2B and B2C users, a B2C user must be registered. Guests cannot save a cart.
How Save Cart works
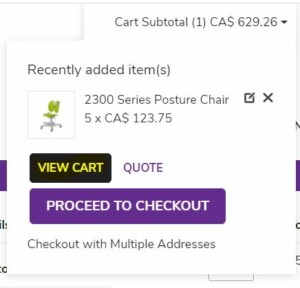
You can manually create a saved cart by shopping as you normally would online, and clicking on the Save Cart button in the View Cart page. You typically access the View Cart page from the cart drop down at the top of the page:
On this view cart page, you can have an option to “Save Cart”:

When you click on the Save Cart, you’ll get to name your cart. If you’ve already created carts before, you can choose to append the contents to an existing cart. When you click “save” you haven’t bought anything, but you’ve saved a cart that can be quickly added anytime and users can checkout quickly.

Once the cart is saved, you can access your list in the My Account section.

You can quickly add all the contents of a saved cart to your current order by clicking on Select, accept the default quantities, or update the quantities, and click on Add All To Cart.

Once you’ve added the items to cart, you can checkout as you normally would.
Import Cart
Importing your cart uses a spreadsheet to load the products into commercebuild. This is really handy if you have a lot of product and you don’t want to navigate or search to add each item to your list. This is most useful for your B2B customers, as they may have inventory/cycle counts and can use this method to replenish their stock.
If a saved cart is already created, you can easily download, update and save it as a new cart. To create a brand new cart, you’ll need to fill out the spread sheet with key data. On the Save Cart page, look for the Export and Import buttons.

When you export, you’ll see the cart name, the product code, description, unit, and quantity. Product description isn’t a required field, it’s just there for us humans. The tricky thing is usually the Unit: This does have to match the UOM that you’ve set up in your ERP. If you sell product by the Ea., EA. ea, ea., e.a. and so on, this will be more difficult for your users. It is really good to keep your UOM clean!

If you want to create a new cart, just add a unique cart name. This is a flat file: you will have to fill in all of the required cells, even if it’s repetitive.

This file appends data – you can’t delete items here. So if you want to create a new cart, you could just upload the new records: you don’t have to upload all of the data.
Once your new spreadsheet has been created, you can upload it on the same page you downloaded the saved carts. Upload the exact same file type – currently .xls
Note that manually adding items to a Saved Cart and uploading them in a sheet are not mutually exclusive. You can manually create a Saved Cart, then download that cart and add products or change quantity and upload the new and improved Saved Cart to the store.
How to Set up
If you think Save Cart is for you, let’s set it up.
Features
In System >> Features, on both the B2B and B2C side, turn this on:

This flag can be set independently for B2B and B2C. You don’t have to offer this to all clients if you choose not to. For B2B there is an additional option:

Content Management
To make the create a saved cart button visible in the /cart page, you need to add it in your Cart page. Navigate to Content Management >> Default pages. Edit the Cart page. It’s beyond the scope of this article to tackle content management, so if this is new for you, reach out for help!
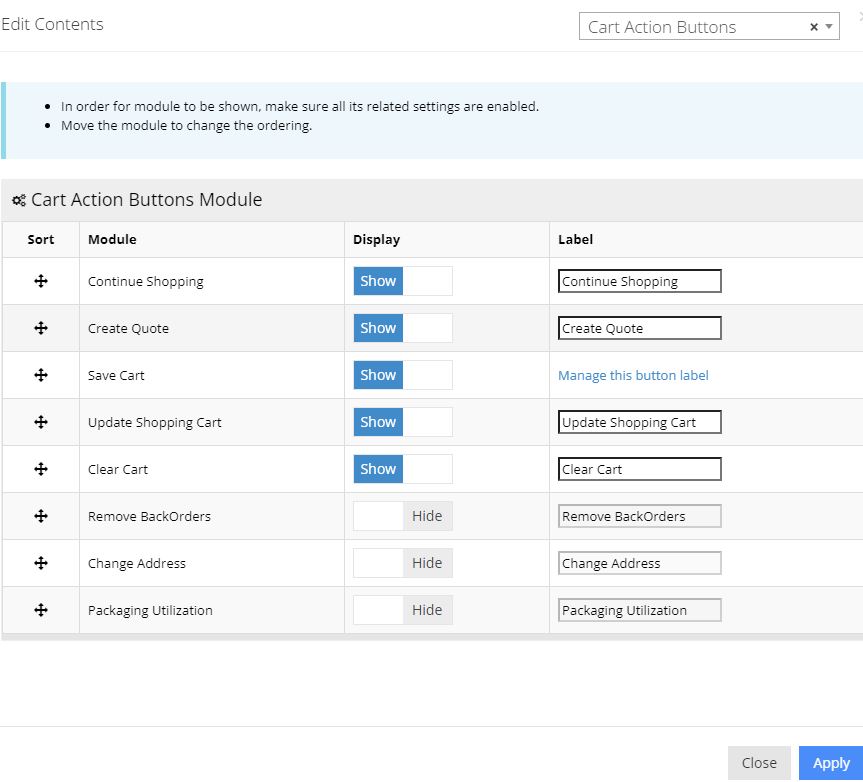
In the Cart page, you probably already have the Cart Action Buttons Module created. If not, add the module.

Click on the Edit Content, and make sure that the Save Cart is set to Show.

You’ll also want to create a page where you can look at all of the carts, and upload to them via excel. Still in Content Management >> Default Pages, navigate to these two pages

In the Saved Cart and Saved Cart Items page you’ll want to make sure that the Account Saved Cart Listing Module is set up. Again, content management is a big topic to cover, and we assume here you know how to use the content grid.
Last step
Now that you’ve successfully set up Saved carts, you’ll need to give your users a path to get to this page. The most common is to simply let users find it in the My Account section. If you’re using the grid, navigate to Content Management >> Default Pages, and edit User Account. If you have the grid set up with the Account Menu module, make sure that the Saved Cart is active.

