Filters are paramount to enhanced user experience, increased product views, and a high conversion rate in your web store. With filters, users are able to shortlist a product based on their parameters, which not only eliminates the need for numerous searches but also makes the purchase and checkout process faster.
Enable Filters
In your admin dashboard, navigate to Catalog > Product Filters. The landing page shows a few default filters and custom filters which can be defined according to a product’s attributes on the web store.
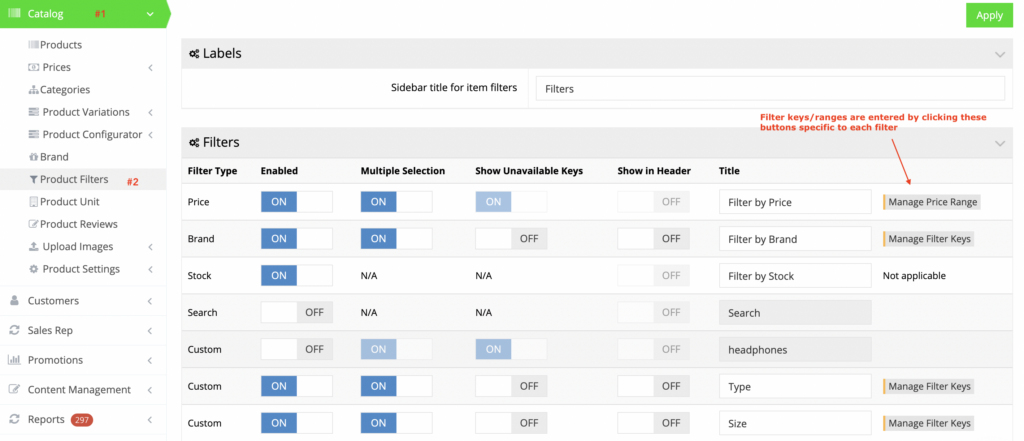
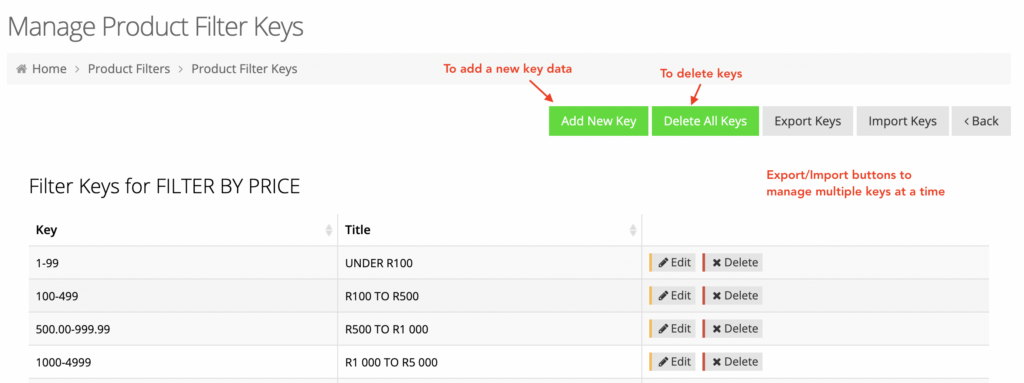
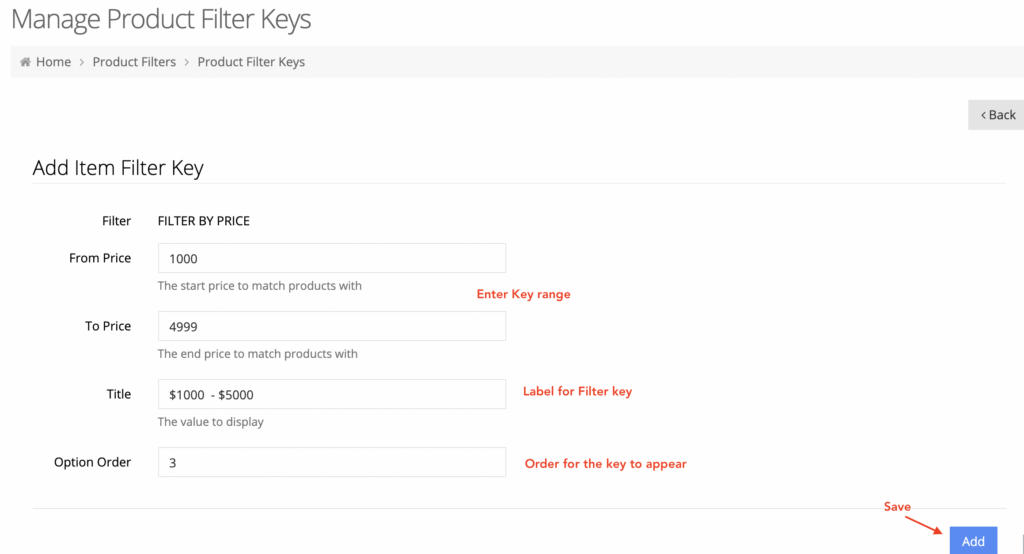
Manage Price Range / Manage Filter Keys
These button helps to define price ranges or filter keys for your custom filters. For example, if Color is a custom filter, then Canary Yellow, Azure, Burgundy, Cyan, Amber, Barn Red, Ash Gray and etc. can be defined as keys for Color. Similarly, we can set up a price range to filter products based on their price.
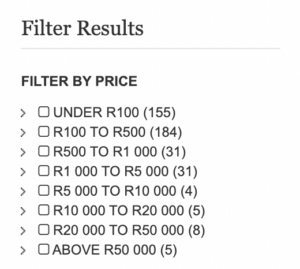
Filter by Price (available only for B2C)
Filter by Price is used to create varied price ranges for your customers to filter the products. It is available by default.
This is how Filter by Price looks on the side navigation after adding the relevant price range via Manage Price Range.
Filter by Stock
Filter by Stock is used to filter out Out of Stock data and shows only In Stock products.

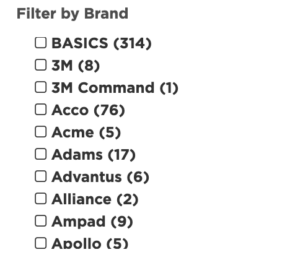
Filter by Brand
Filter by Brand helps to filter out data based on products brand.
Custom Filters
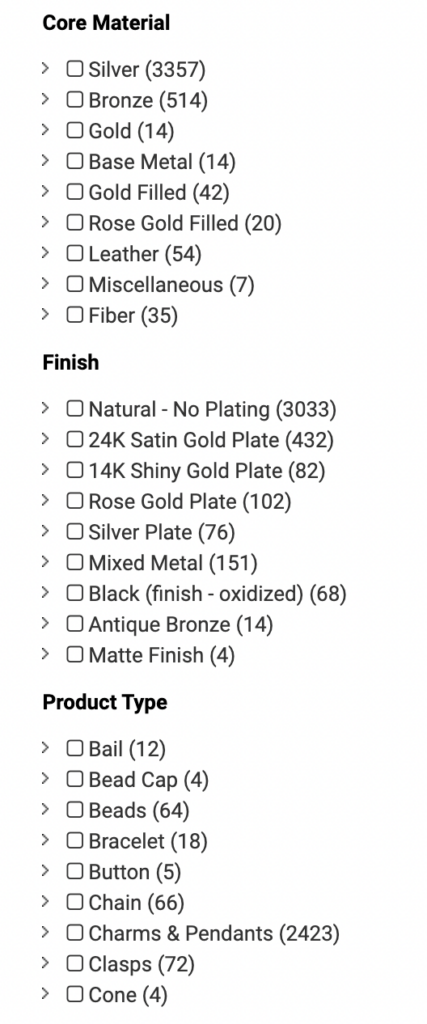
To create your own filters which are applicable to products on your webstore, enter an appropriate title and create keys so the products are refined based on them. For example, for a jewelry store, custom filters may look somewhat like this:
After setting up filters, assign them to products and categories so they are available in the side navigation and show a correct subset of products when applied.
- For assigning filters to products, see our tutorial on How To Assign Filters To Products.
- For assigning filters to category pages, see our tutorial on How To Add Filters To Category Pages.