What are products variants?
Product variants also known as “Variant/Virtual products” are products that have similarities but are based on one underlying product.
For example: A T-shirt with different options of XS, S, M, L and XL sizes are five different products that have their respective SKUs in ERP. Similarly, if we add colors such as Red and Blue, then the combination of different sizes with colors will have 10 different ERP products.
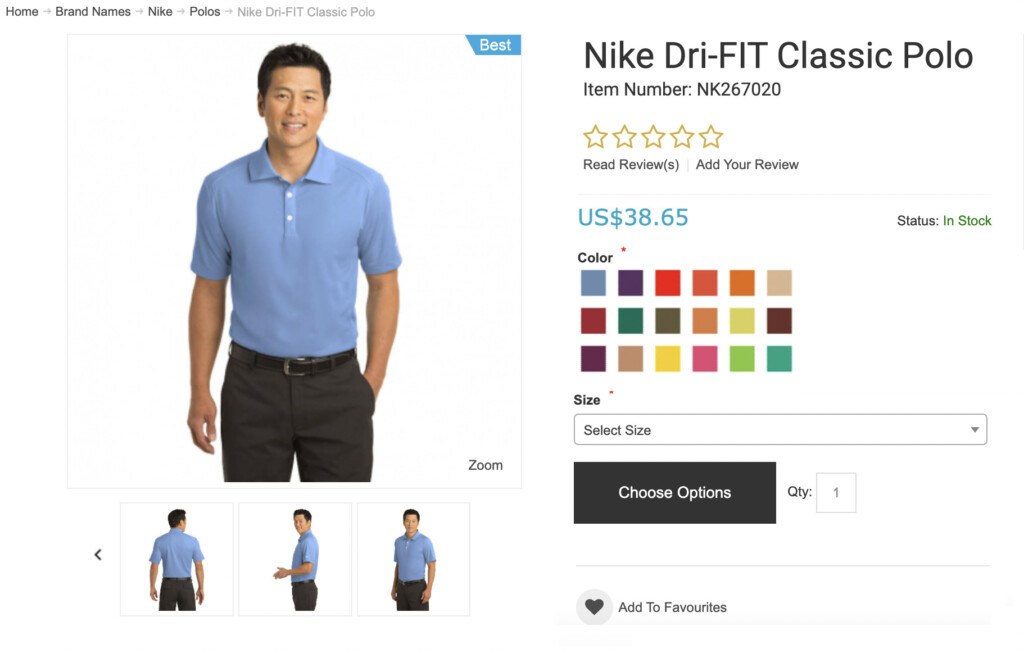
This a how a typical variant product looks:
How to setup products variants
To set up product variants, we would need to follow a bottom-up approach of creating variant options before creating a variant product. Following are the steps which we will dive into in that order:
- Create Variant Options & Values
- Create a Variant/Virtual Product
- Assign Child Products to a Variant Product
- Assign Variant Products to a category
Create Variant Options & Values
A variant product can have many options such as Color, Size, Length, Height and etc. Further, these options can have varied values, for example, S, M, L, Red, Yellow, Cyan, Magenta, 3 inches, 4 inches, 5 cm, 7 cm and so on.
We can display the options in various forms: Swatches, Dropdown and Matrix.
Please follow this step-by-step illustration on How to Create Variant Options
Create a Variant/Virtual Product and Assign Child Products
Once options have been created, it’s time to create a variant/virtual product and assign “child” products to it. These “child” products are products from your ERP with item codes, descriptions and other attributes already set in the ERP.
Follow this guide on how to achieve that setup – How to Create a Variant Product and Assign Child Products
Assign Variant Products to a category
Like regular products, variants products need to be assigned to one or more categories in order to make them available on the frontend. Navigate to Catalog > Categories and select a category. On the right-hand side, search for your variant product and click Assign Item to assign this variant product to the selected category.
The assignment of a variant product to a category is similar to the assignment of any regular ERP product to a category. You may like to read this specific tutorial – How to Assign Products to a Category