A badge is a small image that is shown on the top or bottom of your product’s image in the Product Listing as well as Product Details screens. Item badges are an effective way to highlight your products in a web store.
You can apply an item badge by using an image with some design flair to make the badge stand out. For example, to highlight Biodegradable products you can add an “Eco-friendly” badge.
Getting Started
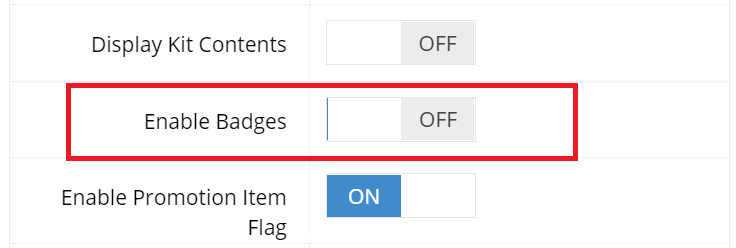
The first step to using item badges is to go to System > Features and activate “Enable Badges” under the Display Features panel. Please note this can only be found under the B2B profile but will apply to both.
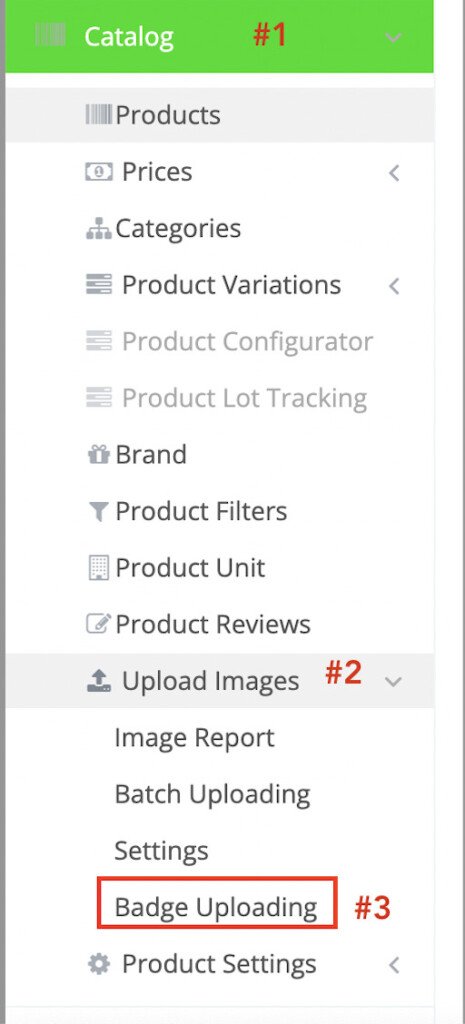
This will activate the Badge Uploading tab in the left-hand sidebar.
Badge Image Uploading
Once enabled, navigate to Catalog > Upload Images > Badge Uploading to upload images for the badges.
Click Select Image to choose the image and click Apply to save your changes. To show a second badge, upload an image in Item Badge Image 2 section and so on as the webstore support up to 8 item badges.
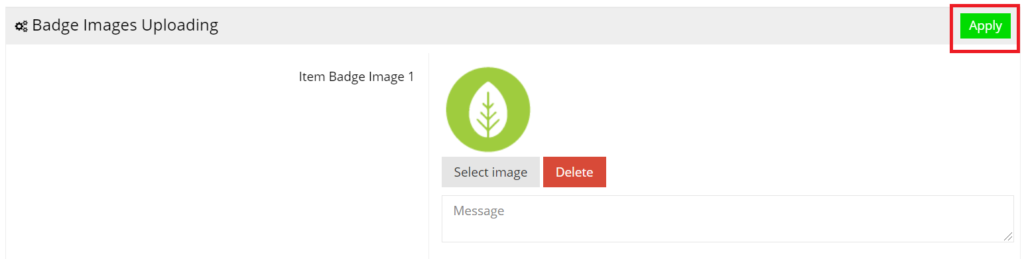
Please ensure to upload an image that is a 50×50 pixel .png file with a transparent background.
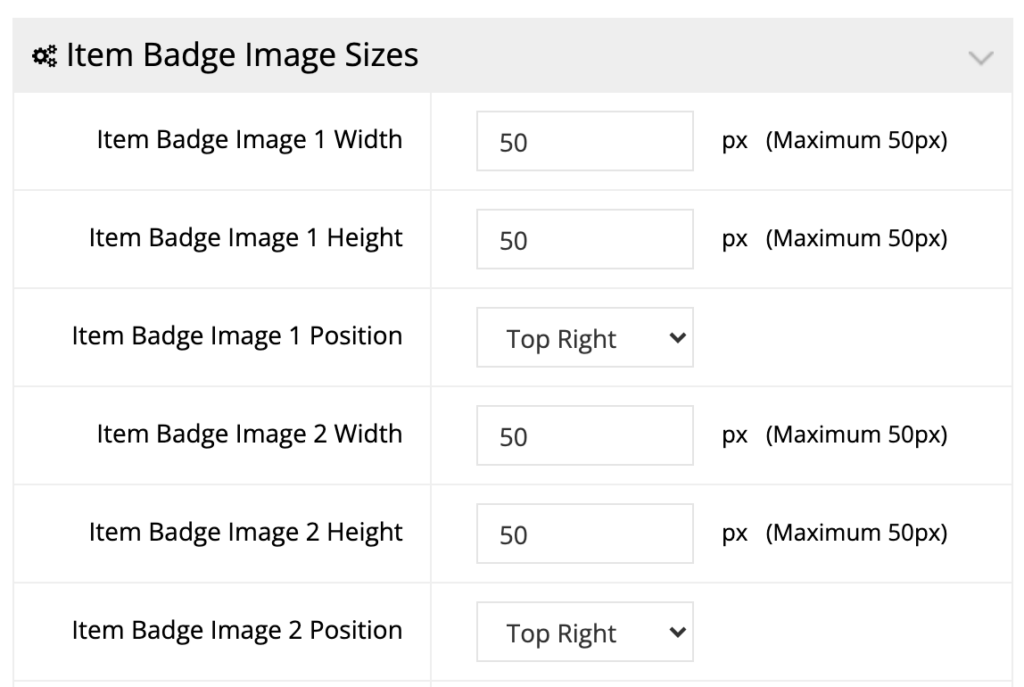
Badge Image Settings
Navigate to Catalog > Upload Images > Settings to fill the badge image size settings as shown below:
Enable Badge for a Product
Navigate to Catalog > Products and search for a product you want to apply the badge. Click Edit to reach the Product Details landing page.
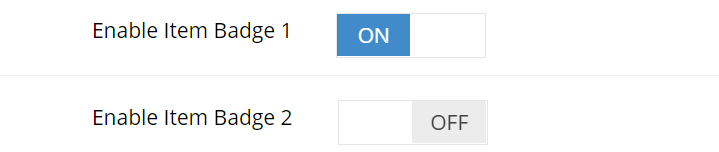
Under the General tab, locate a button for Enable Item Badge 1 and toggle it ON. If you are showing two badges, toggle ON Enable Item Badge 2 and so on for more badges.
Please note the following settings will be shown only after badges are uploaded to the system.
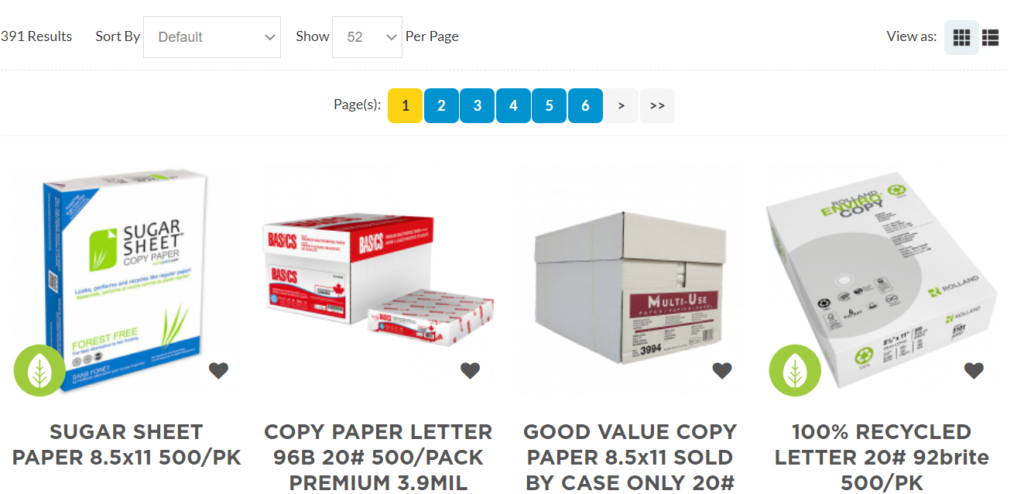
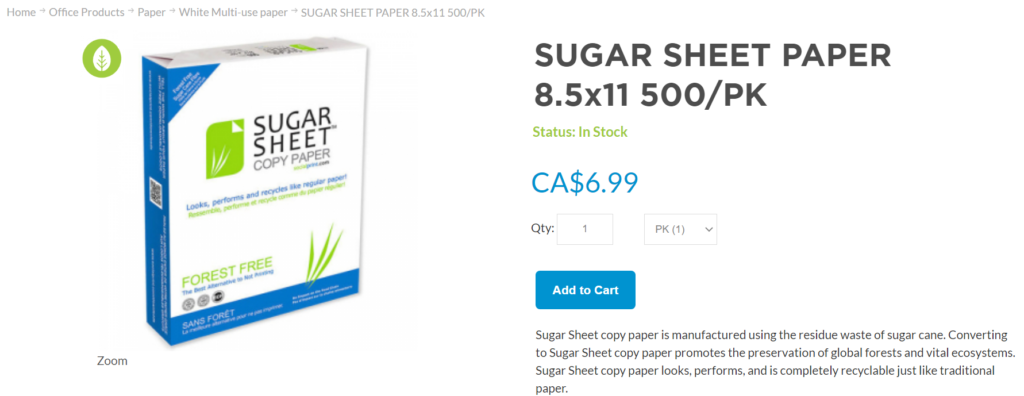
This is how it will appear on your web store.
Product Listing
Product Detail
For guidance on how to set up Category Badges, see our tutorial on How to Setup Category Badges.