Product Finder is a great tool to help your customers find a product by narrowing it down from broad level criteria to the most refined level. It is used to mine and filter products by refining the search result to a specific product.
Not only that, it also overcomes the limitation of having only a 3-level deep category tree on product categories.
Before we begin, please note that Product Finder is a billable add-on. Contact us if your web store does not have this feature activated.
Getting Started
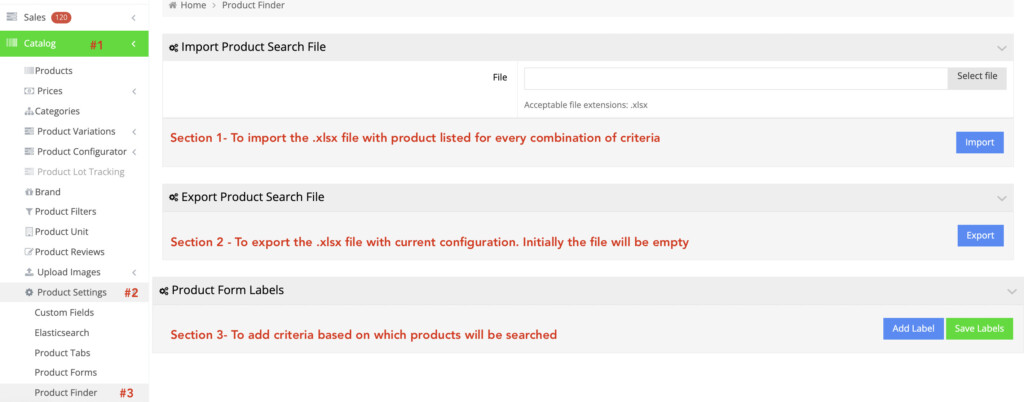
In your admin dashboard, navigate to Catalog > Product Settings > Product Finder.
There are three sections to this functionality which include:
Product Form Labels – To add labels for various criteria based on which products will be searched.
Export Product Search File – To export the .xlsx file while will hold item codes for every combination.
Import Product Search File – To upload the file back into the system so products can be searched.
Product Form Labels
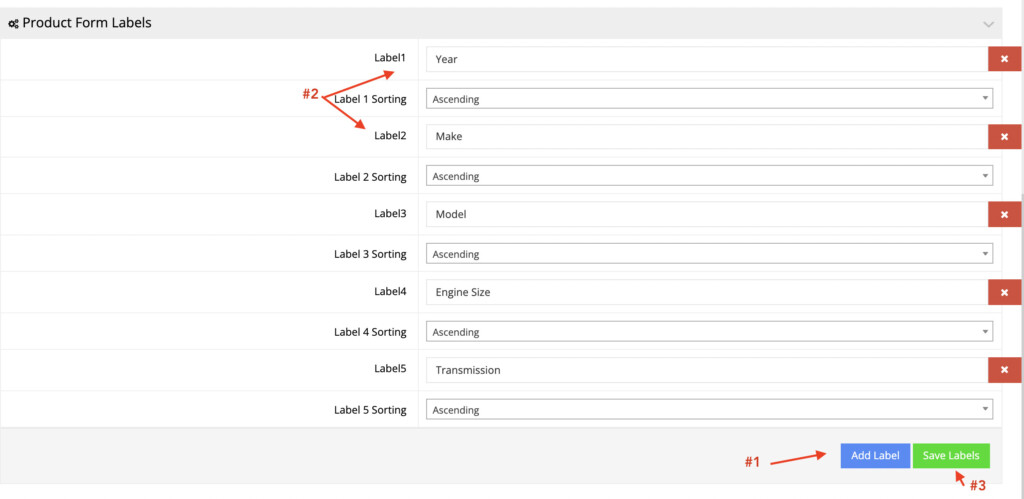
Click Add Label to begin adding labels to the search parameters.
Enter the label name that will appear on Product Finder. You can also choose how the values for that parameter will be sorted by selecting either “Ascending” or “Descending” from the Sorting dropdown.
Finally, click Save Labels to save your changes.
Export Product Search File
Click Export to download the file. The initial look of the file will appear as shown below: 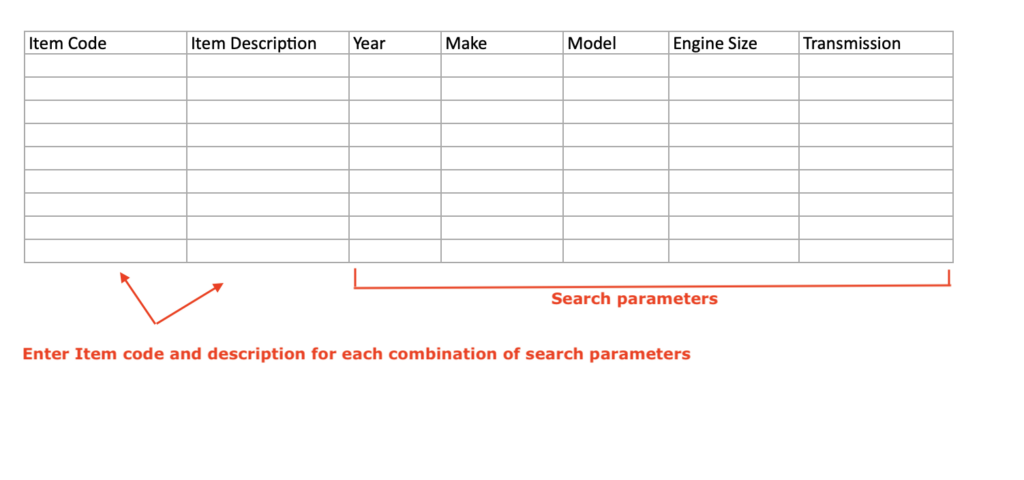
As we have search parameters in place, it will refine the search results to the correct combination of Year → Make → Model → Engine Size → Transmission.
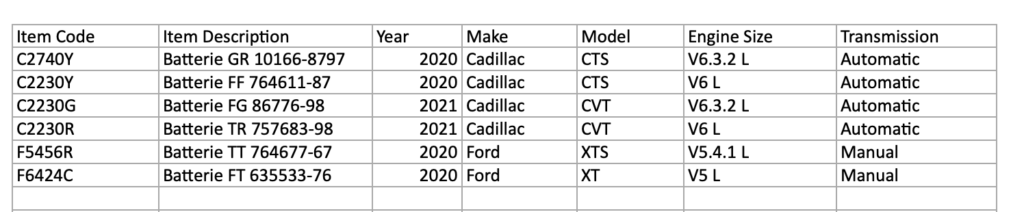
After the details are filed in, the file may look like this:
Import Product Search File
Click Select File to choose the file and click Import to upload the file back in the system.
Add Product Finder
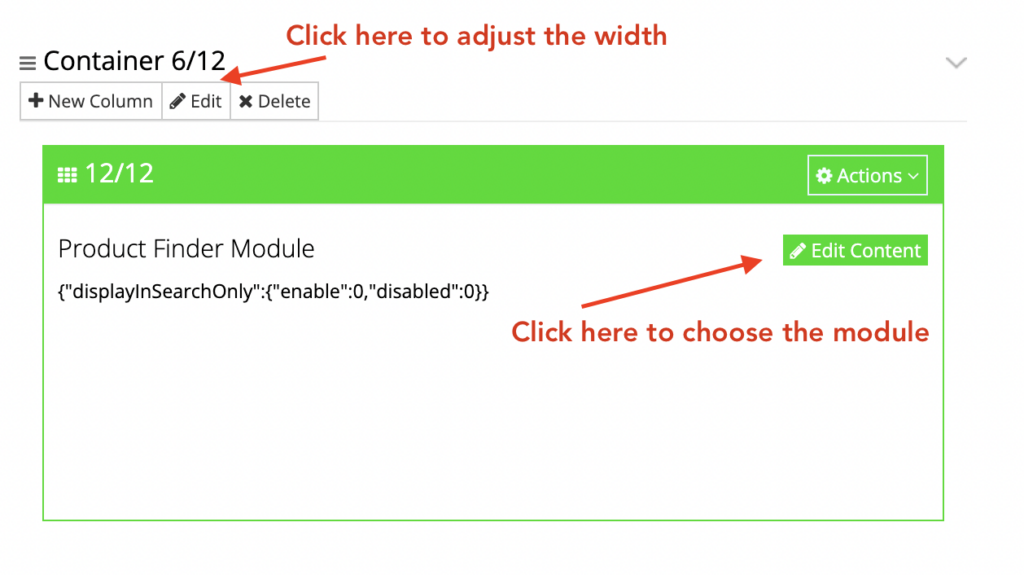
To add Product Finder to your site, navigate to Content Management > Default Pages. Click Edit for the page you want to add this feature. For the sake of this tutorial, let us add it to the Home page.
Next, click Add Container to add a new container. You can reposition it by dragging and dropping and also adjust its width by clicking Edit to specify how much space it would take on the home page.
Next, click Edit Content and choose Product Finder from the dropdown and click Apply.
This is how it will appear on the frontend:
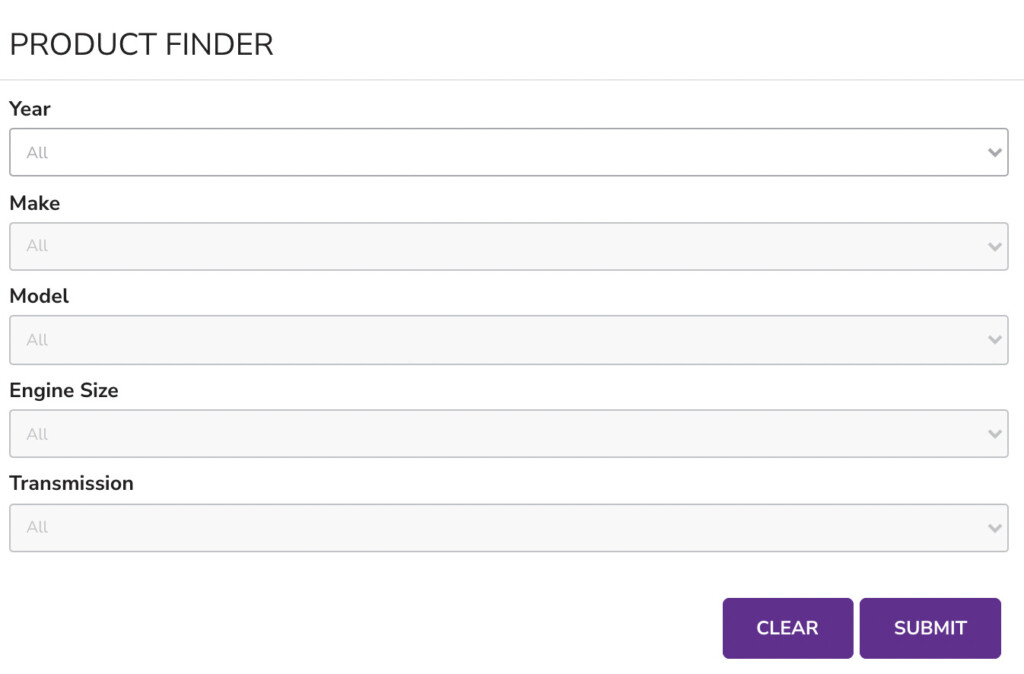
Based on the above selection, the result set will appear right underneath the module.
You can also control where the result set should appear. For that choose the Product Finder Results Module in a new container and position its placement accordingly.