It’s a good idea to start with one item and keep the front-end product page of it open in another window so you can view your changes as you go along. You can then see if you like the configuration of your tabs and nail down how you’d like your information to display before implementing it on multiple products.
There are two ways to populate your product tabs; one product at a time in the eCommerce Console or many items at once using an Excel export/import.
First, navigate to Catalog > Products in the eCommerce Console.
Populate tabs in the eCommerce Console
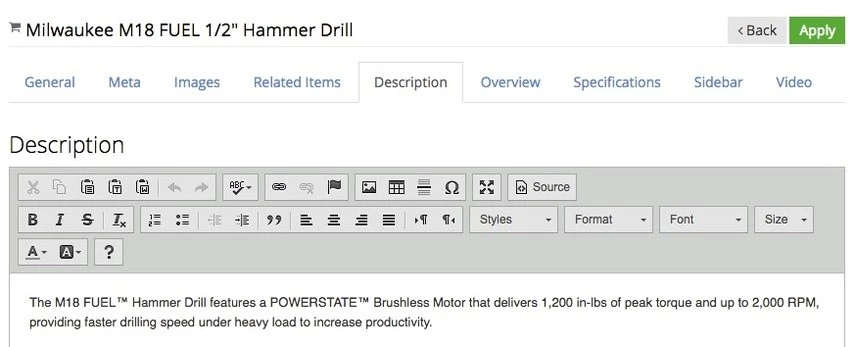
1) Select a product and click on one of your product tabs

2) Add content to the Content Editor and click Apply
This can be any sort of content including regular text, links, images, videos, etc.
3) Repeat this process for each product tab
Remember to click apply after each tab has been populated as well. Adding content to multiple tabs before clicking Apply may result in some tabs not saving correctly.
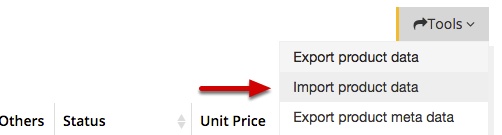
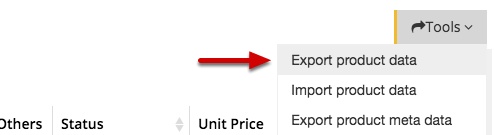
Populate tabs using Excel
1) Click the Tools (Catalog → Products page, top right-hand corner) dropdown and select Export Product Data
2) Open the Excel file and note the structure
This file contains the structure needed to import the file again, specifically row 1. Any products that you have existing product tab content for will display with the HTML of that content according to the item code in column A.

If you’d like to have your content displayed in any other way than a block of text, you will need to use HTML to do so. If you do not have full knowledge of HTML, a handy trick would be to open a Content Editor module and use it to convert your text to HTML by clicking the source button after entering it into the content area.
3) Type your item codes into column A and fill in the corresponding tabs (columns D – H)

For item codes that are written into column A, any information under columns D – H will be overwritten when imported. For example, if we were to change the description in cell D3 (item code ST4000 in A3) and import, that description would overwrite any existing content. If we were to clear the cell completely, that would also overwrite existing content by deleting it.
4) Save the file and go back to the eCommerce Console (Catalog > Products)
5) Click the Tools dropdown, select Import Product data, and import your file