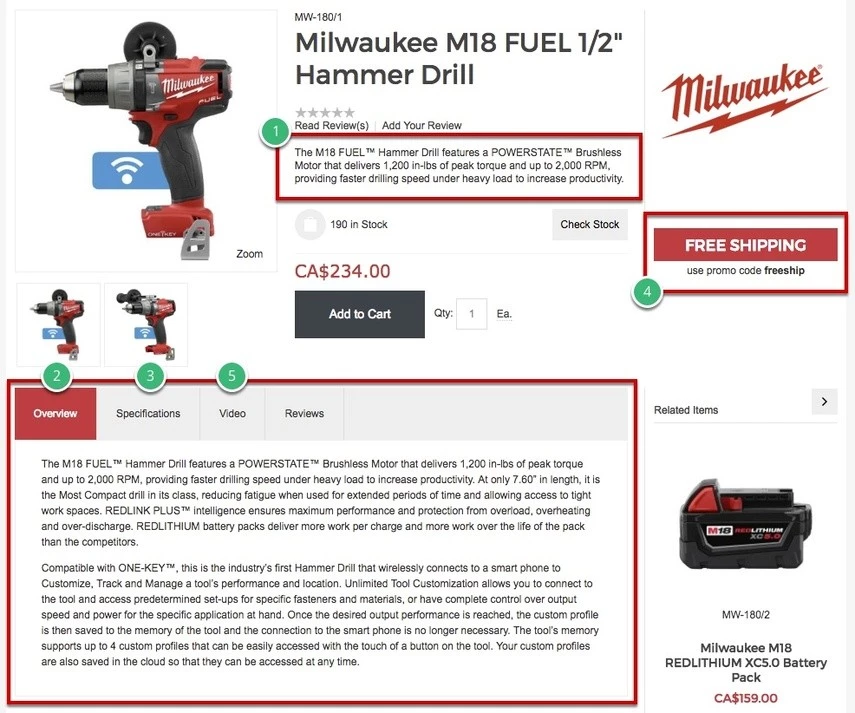
Product tabs are used to include most of the content that you can place on any product page. They are called “tabs” because, in the eCommerce Console, they appear as tabbed Content Editors. In the front end, however, you can display these tabs in different ways; on their own as a “standalone” and/or as tabs as well.
There are a total of 5 tabs you can utilize to display content on your product pages. Each tab will contain its content and you will be able to name and determine where they’re displayed. You do not have to use all 5 tabs for every item (or at all). If you do not input any information inside a tab, the tab will not appear in the front end for that specific product whereas a product with information in that tab, would. You can also turn off a tab completely which will therefore hide it in the front end even if there is already content inside of it for some products.
Consideration
To begin using product tabs, you should consider what type of content you’d like to display on your product pages. The 5 available tabs do not all have to be used but the ones that are used will be global in their naming and their placement so this should be thought out with care.
You will also have the option to display tabs not only on product pages but also on category pages. Again, this is a global setting so information in this tab should be consistent site-wide.

Naming and positioning product tabs
Once you have an idea of how you’d like to utilize your product tabs, you can start by naming them appropriately. Their titles can be shown in the front end of your webstore or just be used for identifying purposes in the eCommerce Console.
At this time, you can also decide where each product tab will be placed on a product page and whether or not their content will be displayed on category pages as well.
First, navigate to System > Product Tabs in the eCommerce Console.
1) Type your tab names for the First, Second, Third, Fourth, and Fifth Tabs
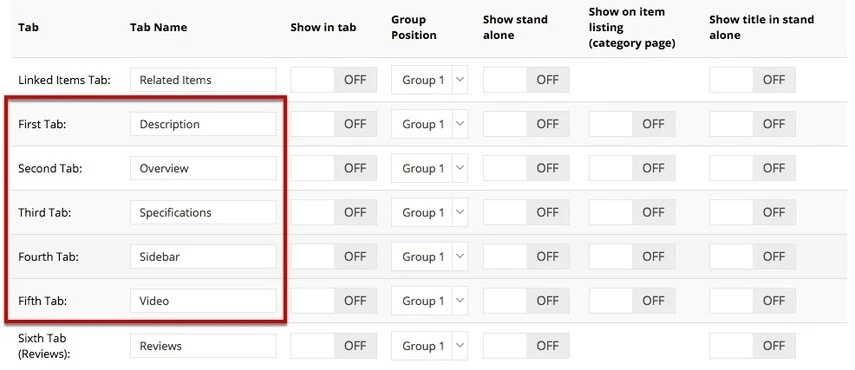
2) Click the Apply button
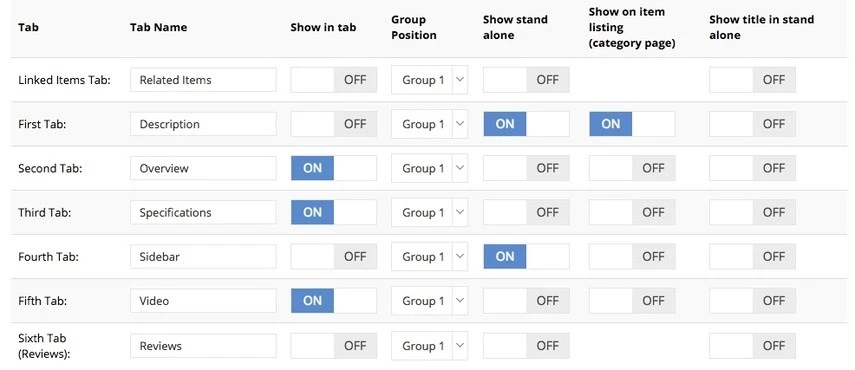
3) Turn on/off the type of display for each tab (non-product grid setup)
If your product page is not set up via content grid then choose whether you’d like your tabs to be grouped and displayed as tabs (Show in tab), by themselves as standalone (Show standalone), and/or on category pages (Show on item listing) by switching the corresponding toggle to ON.
Also, decide whether you’d like the title of the tab to be visible in the front end of your webstore (Show title in stand-alone). Tabs that are chosen to display as tabs in the front end will display their titles regardless. This setting is particular to tabs you’d like to display as standalones.
4) Set the Group Position for each tab
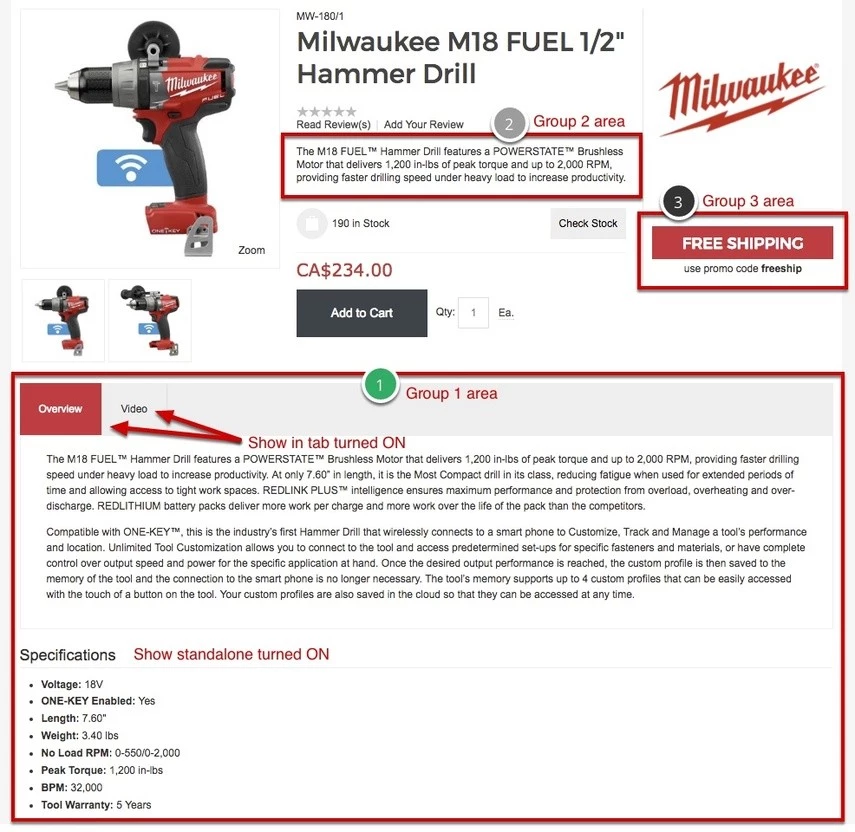
By setting a group position, you are determining where the tab will be placed on the product page. Tabs that are in the same group number and have Shown in the tab set to ON, will display as tabbed content in one group. If your tabs are in the same group number but have Show standalone set to ON, they will appear in the same vicinity but as separate blocks.
5) Click Apply
Enable product tabs on the product grid
If the product page is driven by the content grid, navigate to Content Management > Default Pages. Click Edit for “Product” and add a new container.
Click Edit Content on the newly added container and choose Product Tabs Module.
You can enable or disable the visibility of a tab by using the toggle switches.
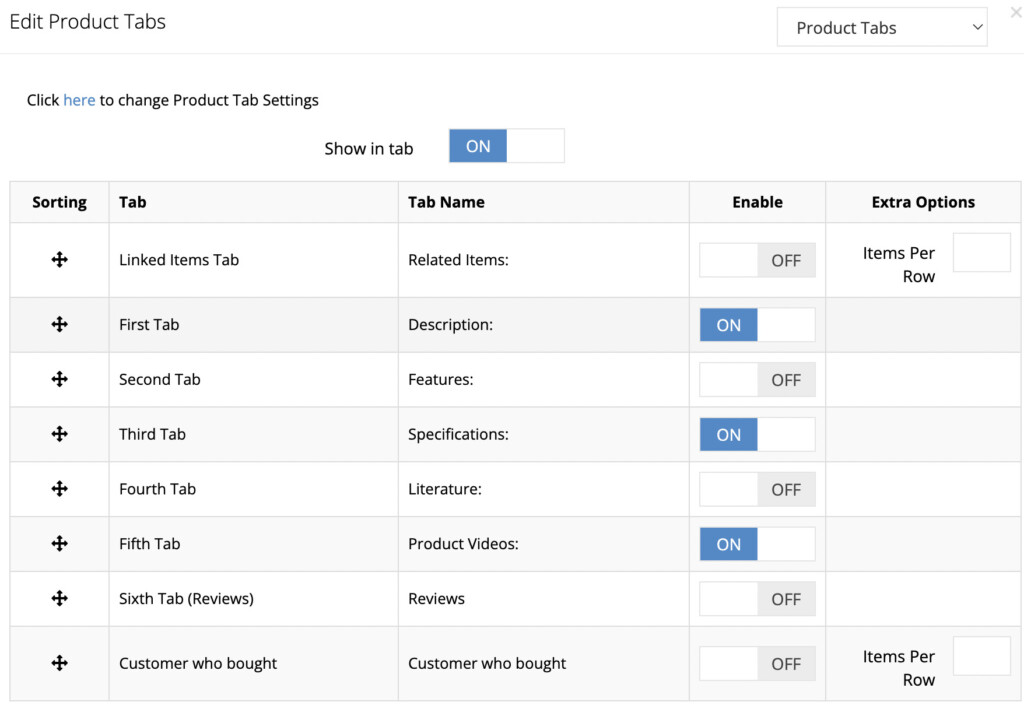
You can create many Product Tabs modules with appropriate tabs enabled to place them in different locations on the product page.

