You can enforce a Minimum Order Quantity (MOQ) for ERP products, as well as ERP products that are part of variants. With an MOQ in place, web store customers are not able to purchase less than the number specified in the product custom field.
In this guide, we’ll help you get the custom field set up, as well as activate the custom field for a single product.
Setting Up The Custom Field
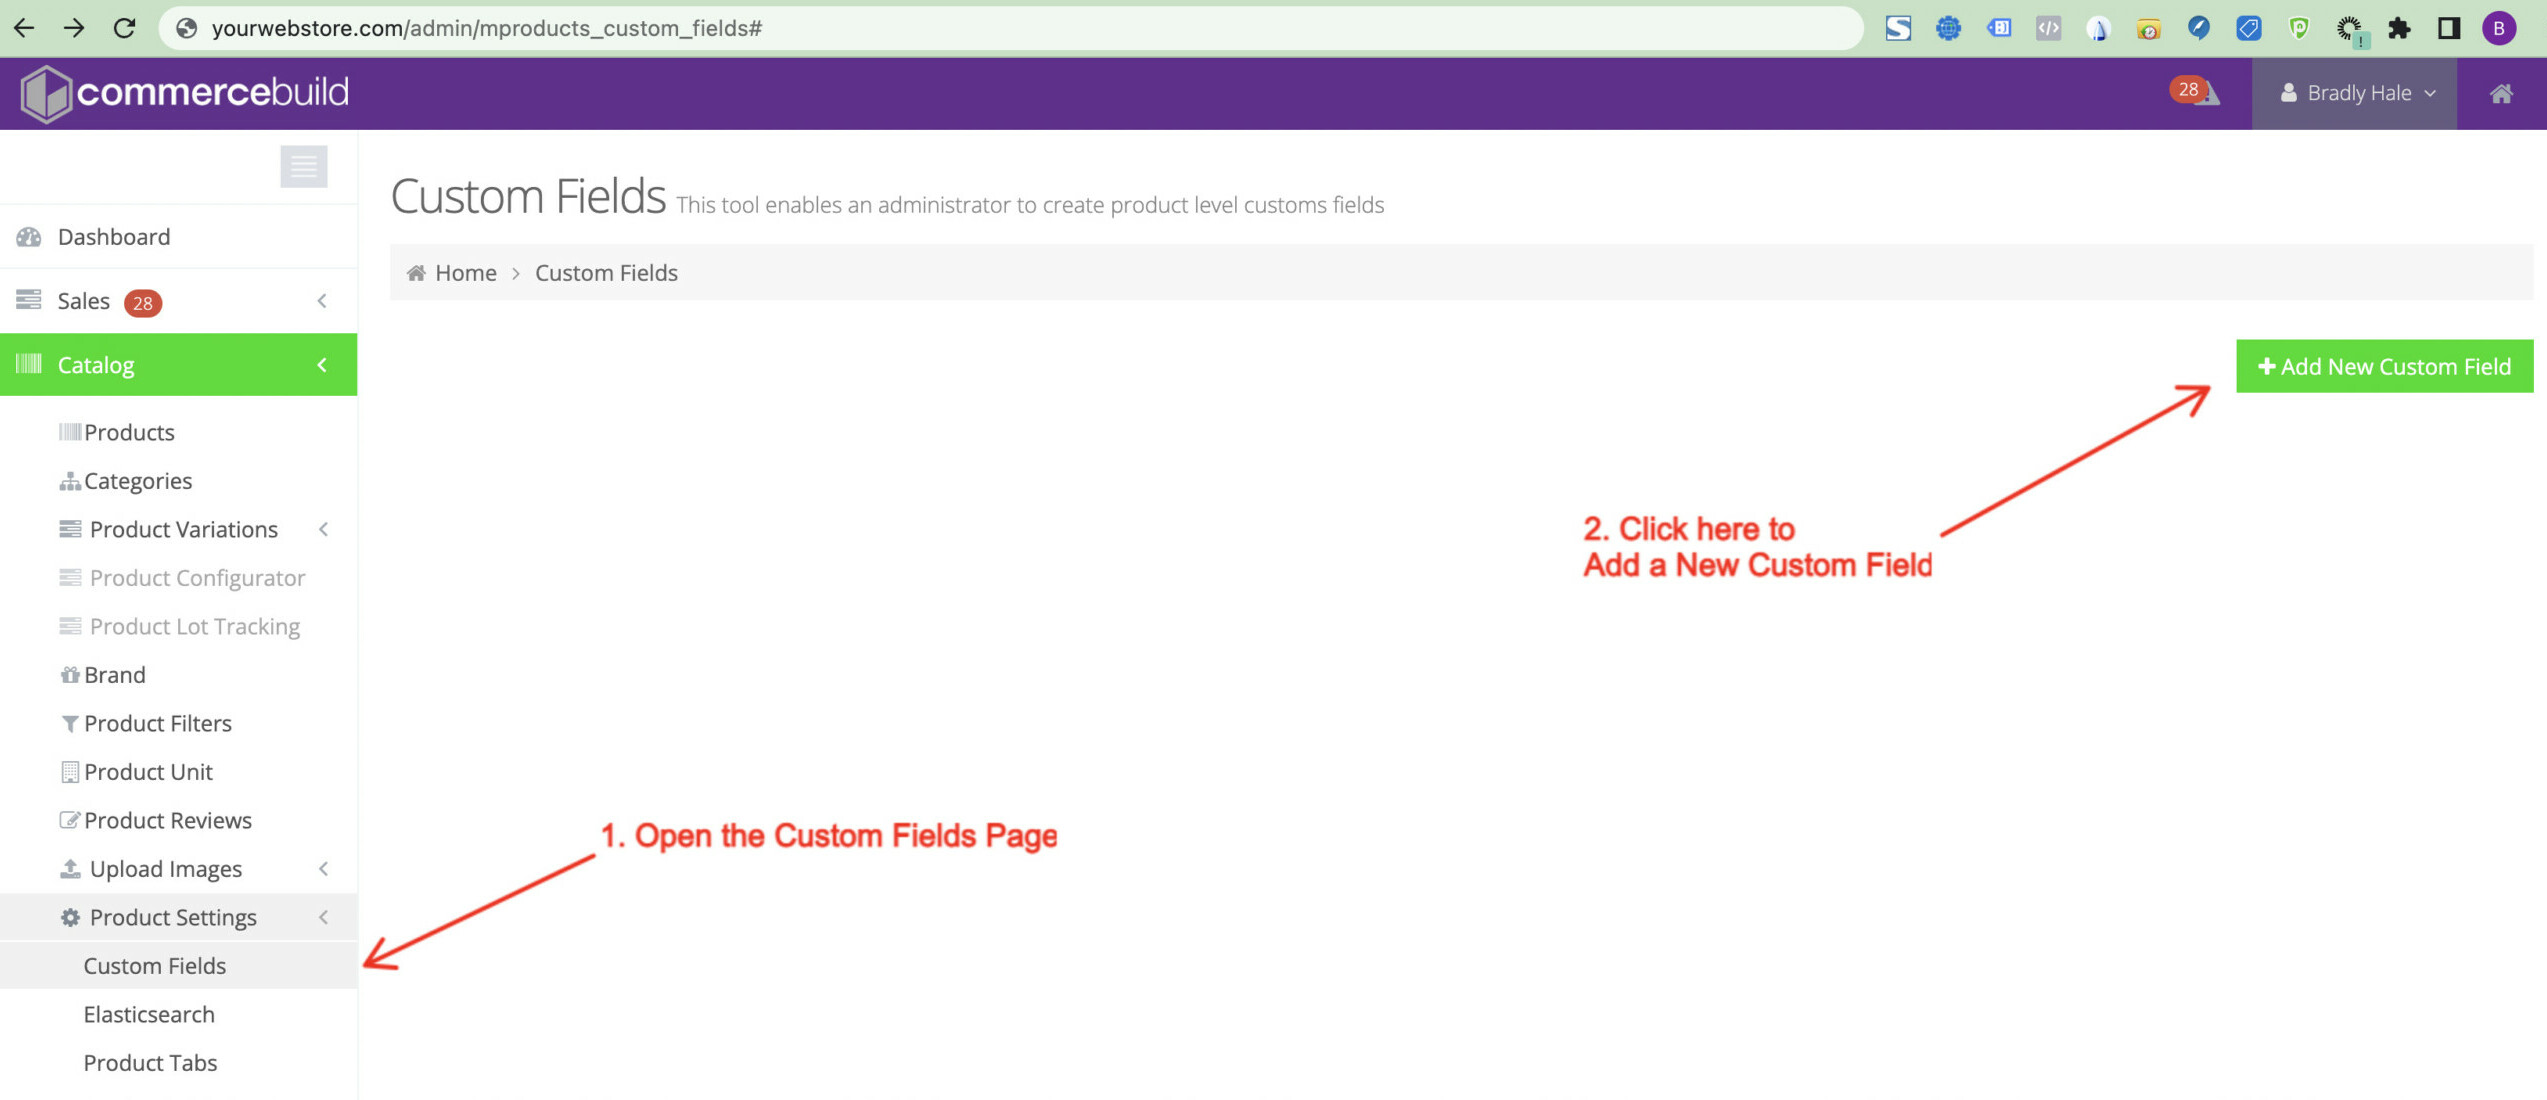
Navigate to Catalog > Product Settings > Custom Fields, and then click + Add New Custom Field to create your MOQ custom field.
Create the Custom Field
Upon clicking + Add New Custom Field, the following information will be requested:
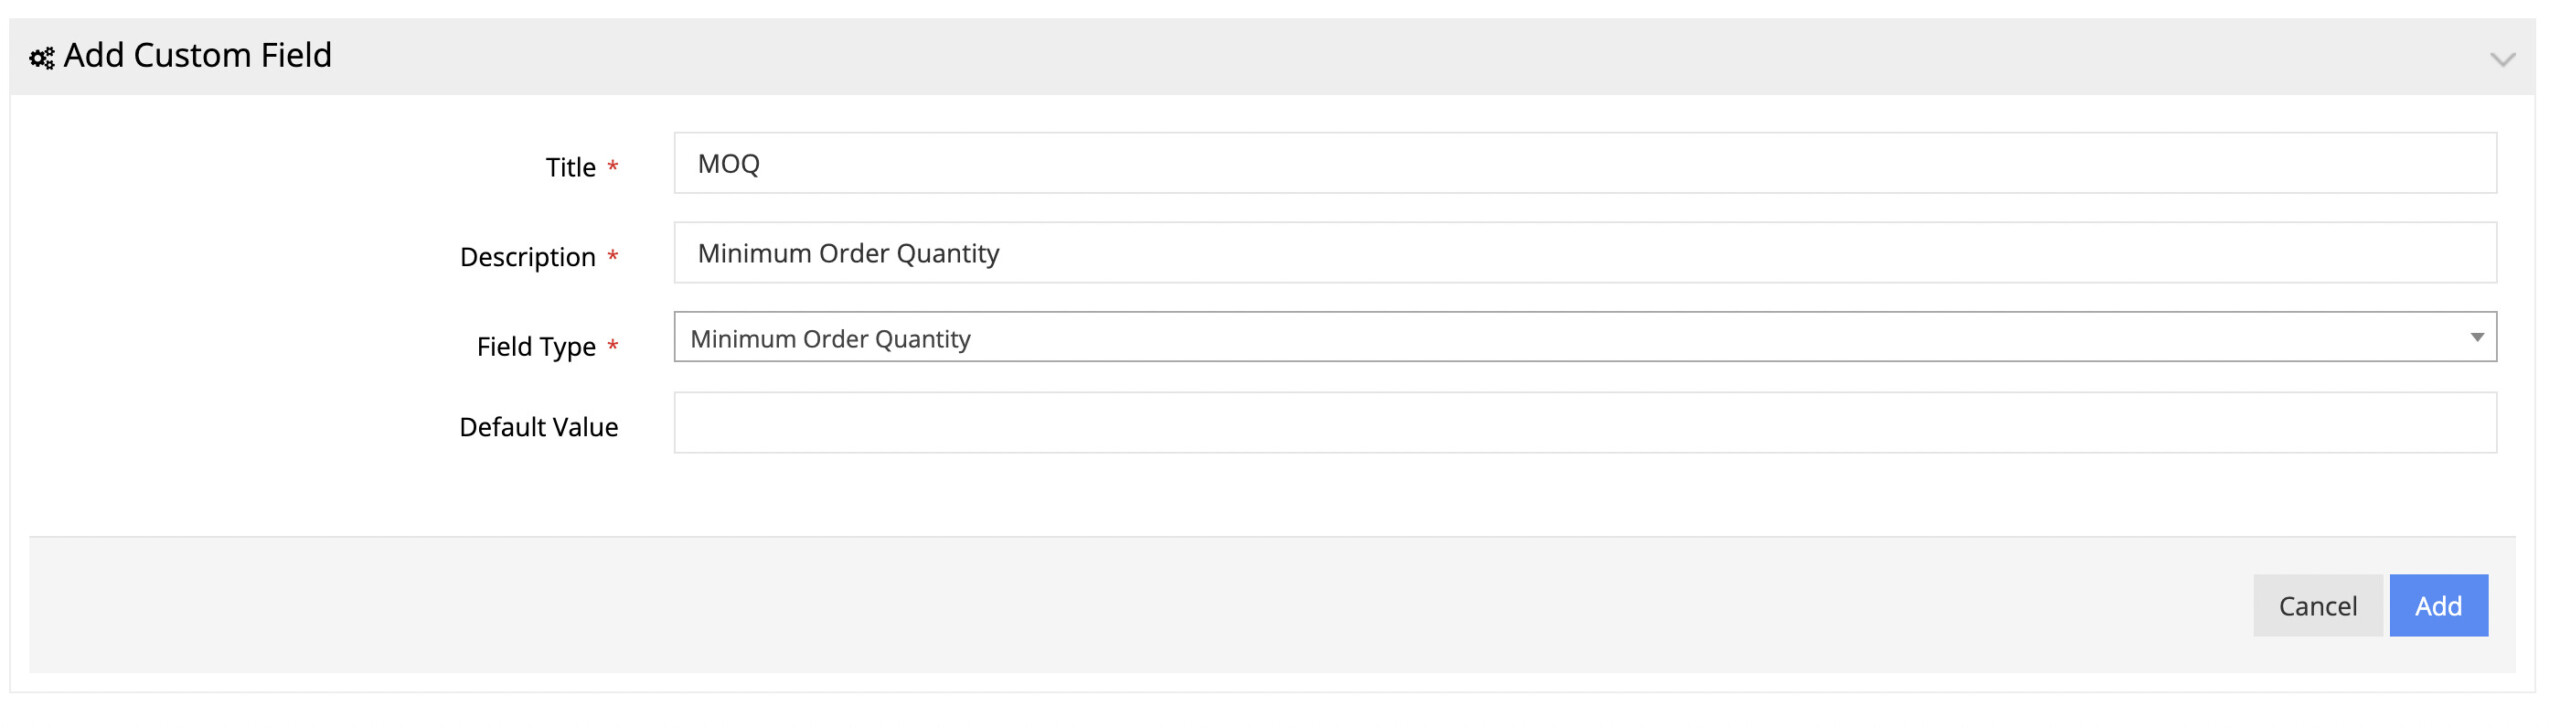
- Title – This value will appear on the frontend, in the product details.
- Description – This value appears in the product details for the admin user (via the admin view of the product details page)
- Field Type – This is the type of field we want to use; in this case, it’s Minimum Order Quantity.
- Default Value – This will set the MOQ by default. Note that having a value here does not mean that the MOQ will be enabled for all products. As we’ll show below, this custom field would need to be enabled for a product before it takes effect. Setting a default just ensures that a MOQ value is already set before the MOQ is enabled.
Enable the Custom Field
Once the custom field is created, navigate to the product details page for the product(s) in question and enable the field.
- Go to Catalog > Products and search for the product in question.
- Once it is found, click the Edit button to see the product details.
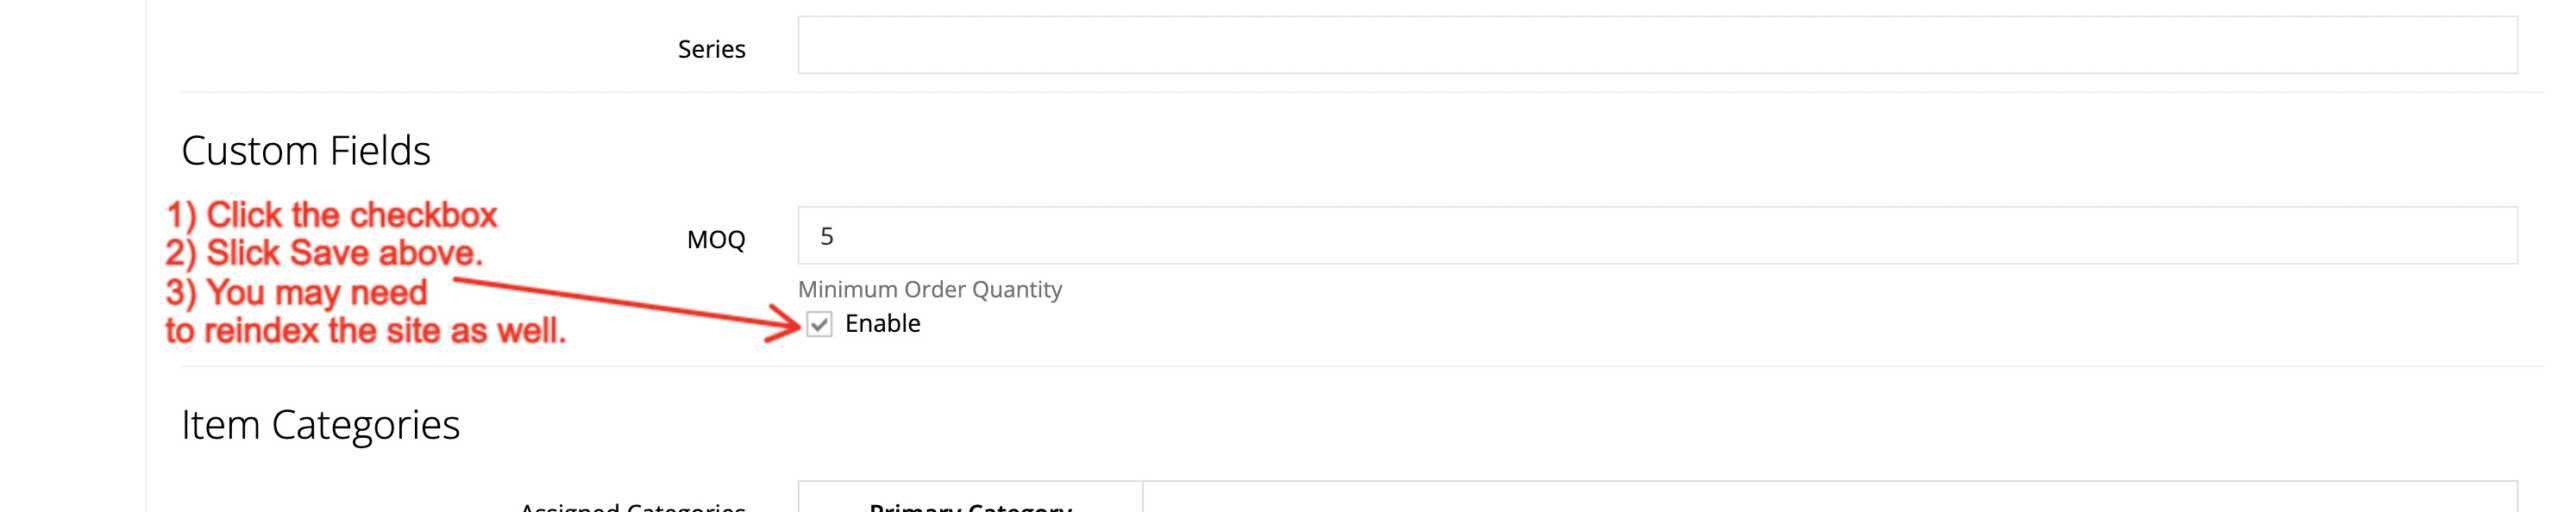
- Scroll down to the Custom Fields section in the product details.
- Enable the custom field in question.
- Save your product details and consider reindexing the site manually as well.
Review the Changes
Finally, navigate to the product page for the user and observe that the MOQ has been set on the product. When a customer tries to purchase this product, they will be required to purchase at least 5 units of the item.
